Gear Shift Lever Case
GEAR SHIFT LEVER CASE1. Wash and inspect each part and replace if necessary. Also check item as described and correct whatever necessary carefully by using reamer, oilstone and the like, wash it thoroughly and reassemble it.
Item to be checked is;
^ Shift shaft should go into case smoothly.
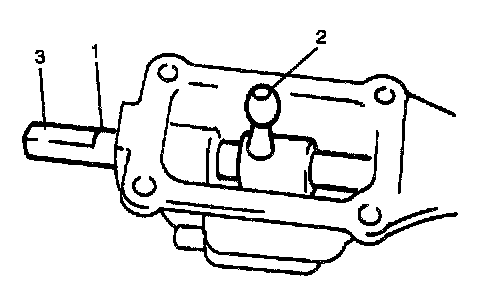
2. Insert shift shaft (1) as shown in the figure while making sure that inner parts are in proper direction.
NOTE:
^ Cut off portion (3) in shift shaft (1) should face downward when shift shaft (1) is installed.
^ Shift lever (2) should be installed at the same time.
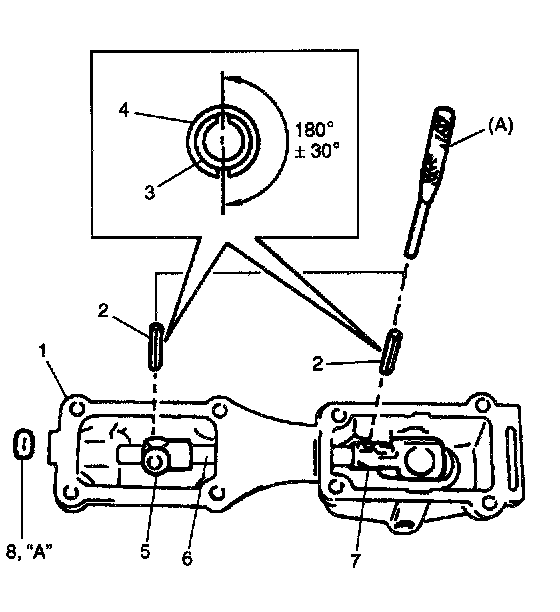
3. Drive in spring pins (2) for gear shift lever (5) and shift arm (7).
NOTE: When driving in spring pins, position their slits 180° ± 30° apart.
Special tool (A): 09925-78210
4. Apply sealant to new case plug (8) and drive it into lever case (1).
"A": Sealant 99000-31110
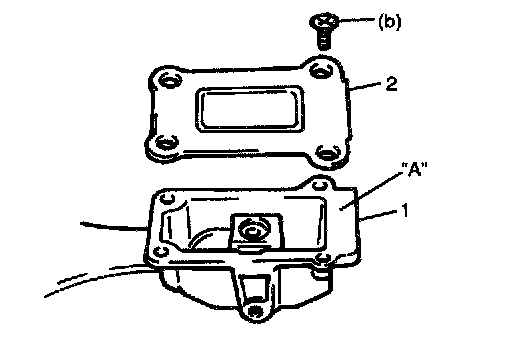
5. Clean mating surface of gear shift lever case (1) and case plate (2), and then apply sealant evenly to surface of gear shift lever case (1).
"A": Sealant 99000-31110
6. Tighten screws to specified torque.
Tightening torque
Gear shift lever case plate screw (b) 6 Nm (0.6 kg-m, 4.5 ft. lbs.)
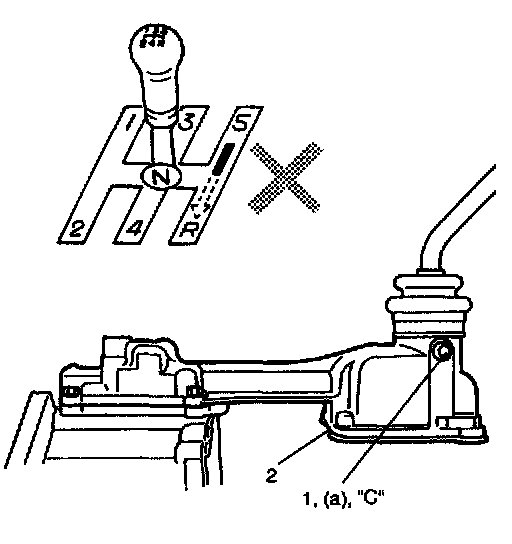
7. Install gear shift lever case (2) to transmission without using sealant for functional check.
8. Install shift control lever and check to make sure that it shifts smoothly according to shift pattern as shown in the figure.
NOTE:
^ Apply thread lock cement "C" to control lever locating bolts (1) when retightening.
^ Be sure to apply sealant to mating surface of gear shift lever case (2) for its final installation.
"C": Cement 99000-32020
Tightening torque
Control lever locating bolt (a) 17 Nm (1.7 kg-m, 12.5 ft. lbs.)