Removal & Installation (Esteem)
- Relieve fuel system pressure. See FUEL SYSTEM PRESSURE RELEASE
. Disconnect negative battery cable. Go to next step.
- Remove rear seat cushion, rear seat back, right side door sill, pillar trim and right rear opening trim. Disconnect connectors to fuel tank wire harness. Remove parking brake cover and console box (1.6L engine only). Disconnect connectors for rear oxygen sensor. Go to next step.
- Hoist vehicle and remove HO2S2, Do not allow weight of exhaust pipe to be supported by HO2S wiring harness. Remove muffler. go to next step.
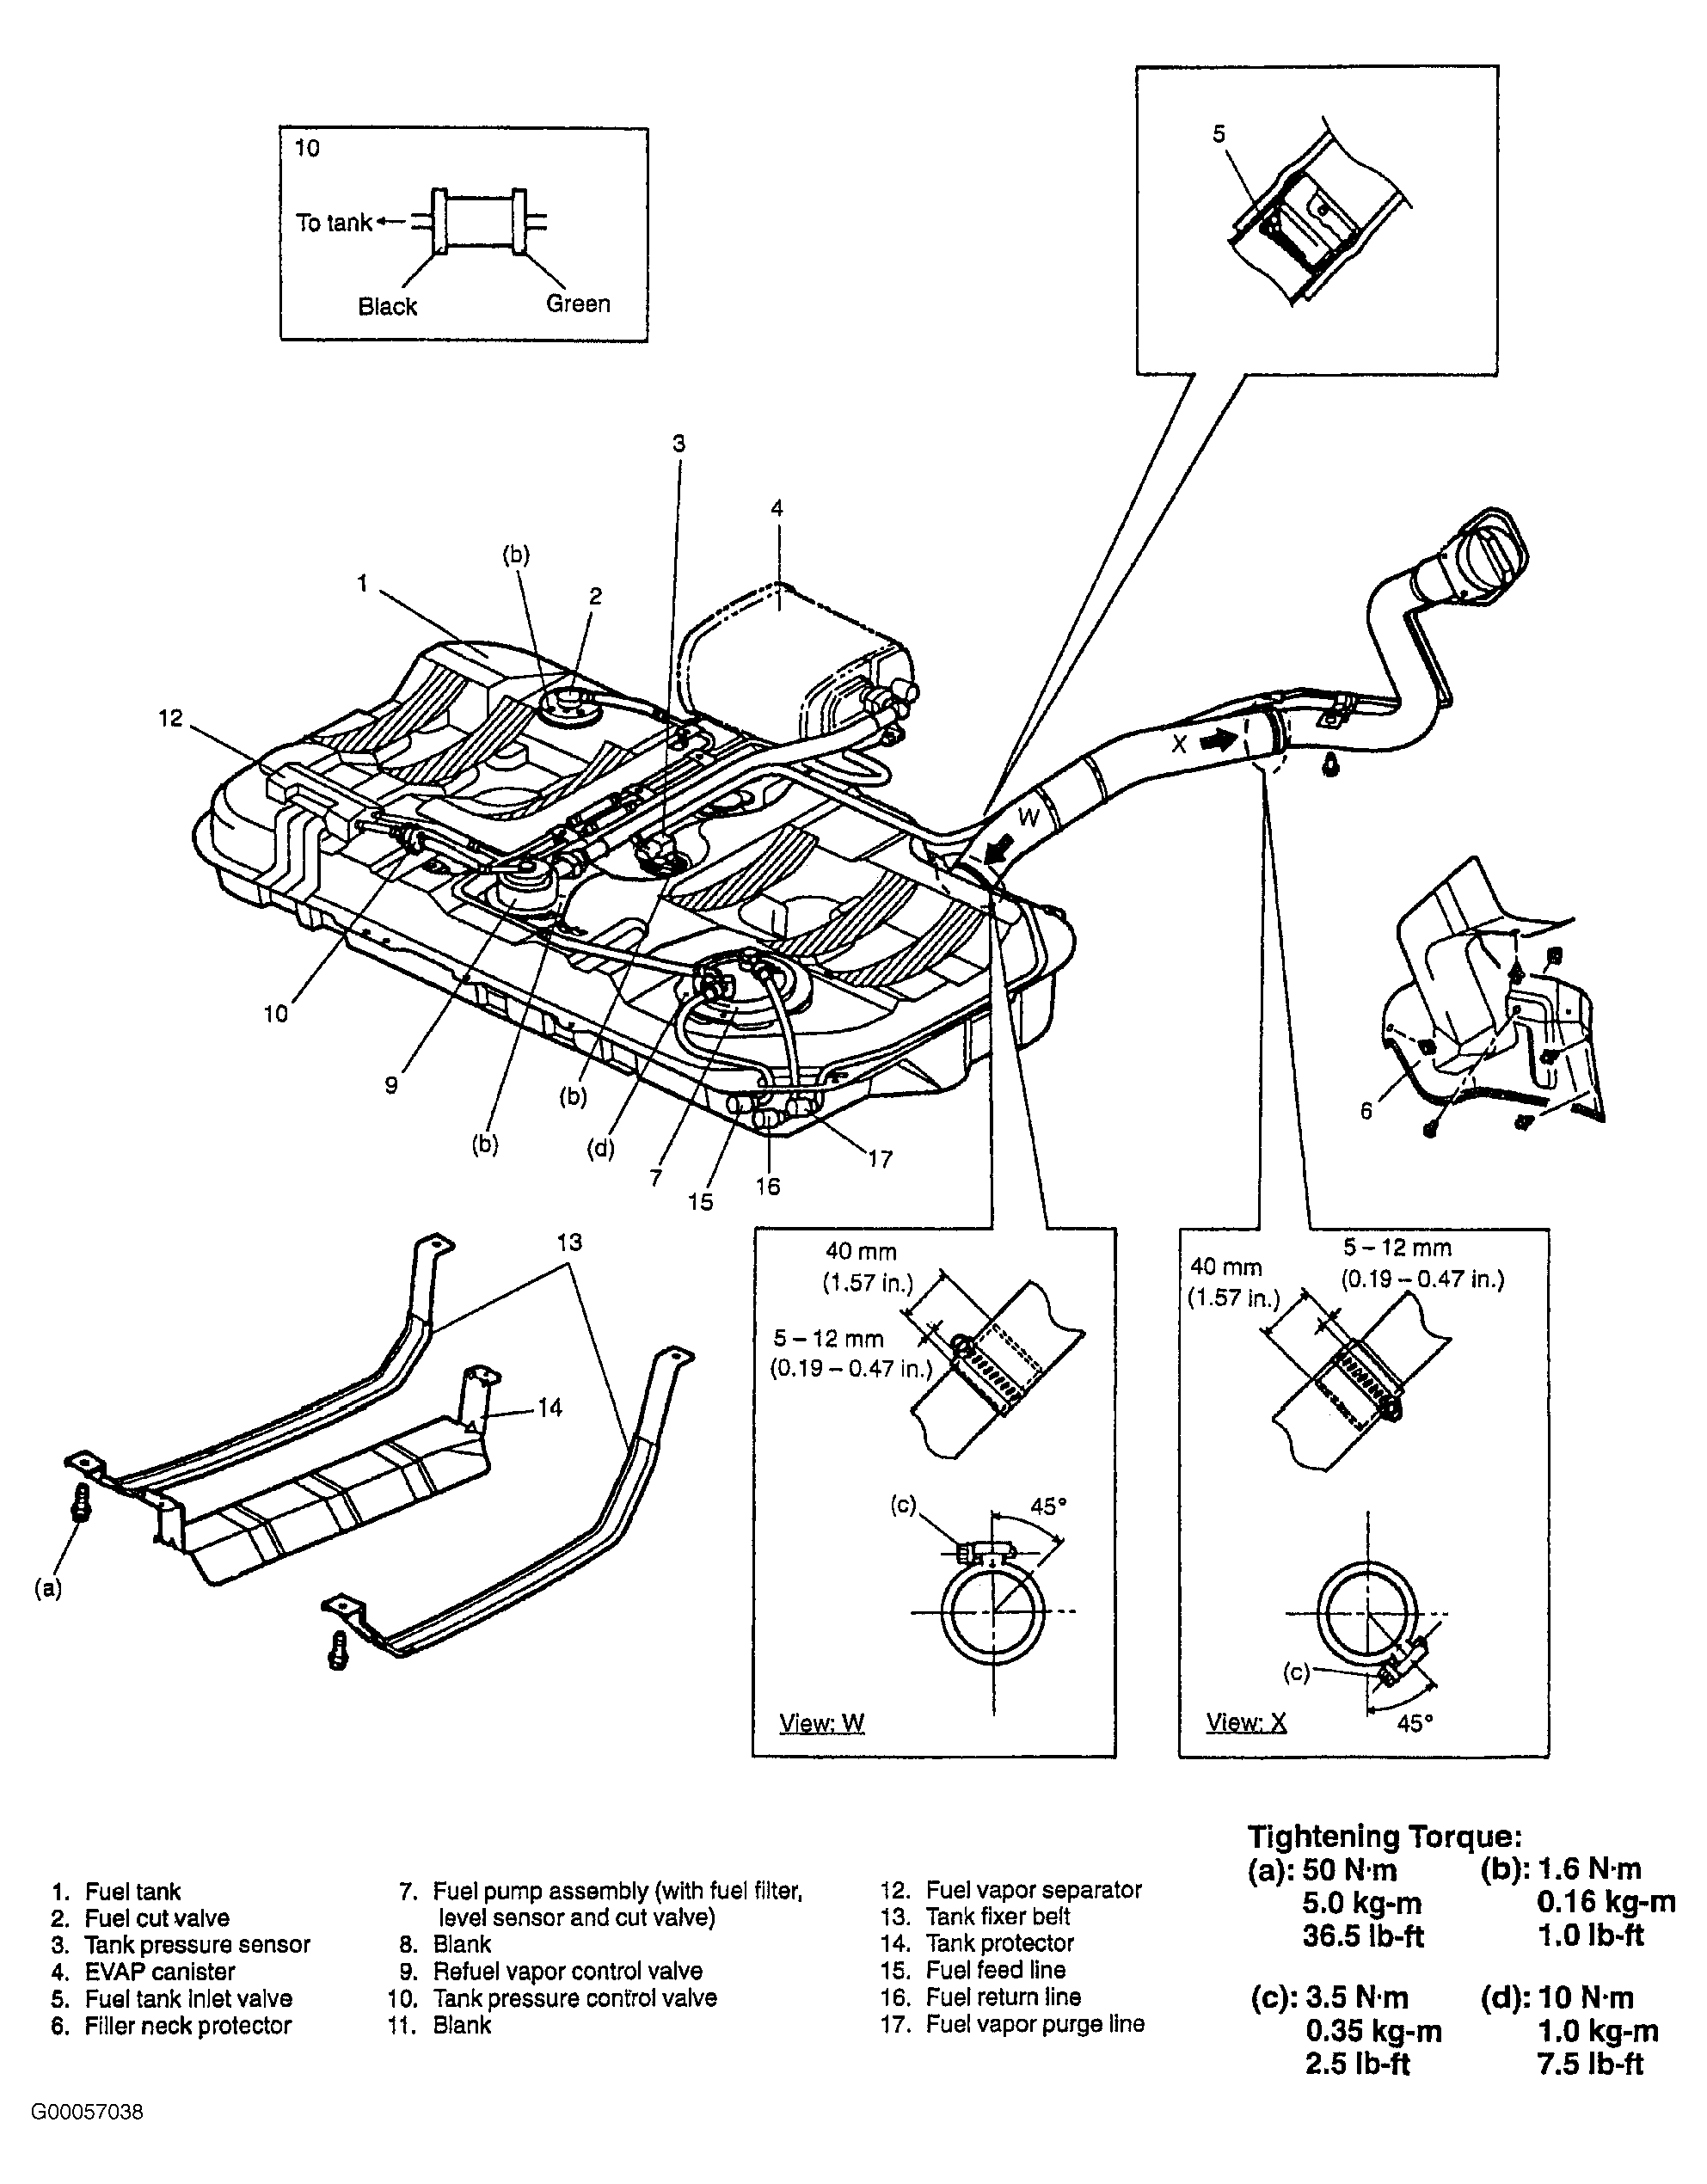
- Removing fuel from fuel tank, DO NOT put siphon hose through filler neck at fuel filler cap. Disconnect fuel filler hose and breather hose(s) from fuel filler neck (car body side). See Fig 1
. Insert hose of a hand operated fuel siphon pump into rubber hose, but not into tank. Do not force hose into fuel tank. Siphon fuel into a fuel certified container from section "A", see Figure
. Remove siphon hose.
- Remove rubber hose from gas tank neck. Remove fuel tank inlet valve from gas tank neck. See Figure
. Insert hose of a hand operated fuel siphon pump into fuel tank neck and siphon fuel into a fuel certified container. Some fuel will remain in tank, proceed with caution. Go to next step.
- Disconnect EVAP canister air valve, follow fuel lines and disconnect fuel hoses and vapor hoses, where quick disconnect fittings are supplied, use Quick Disconnect Tool (09919-47020). Disconnect components as necessary. Support fuel tank on jack, slowly lower tank away from vehicle. Be careful that fuel lines and/or wires do not get hung up on vehicle while lowering tank. Clean off tank with compressed air before removing fuel pump assembly. Disconnect harness connector from fuel pump assembly. Remove fuel pump assembly from fuel tank. See REMOVAL & INSTALLATION (ESTEEM)
under FUEL FILTER. To install, reverse removal procedure. See TORQUE SPECIFICATIONS
table. Go to next step.
- After repairs, check for fuel leaks. With engine off, turn ignition to ON position for 2-3 seconds to activate fuel pump. Repeat until pressure can be felt in fuel hose. Check for fuel leaks around connections. Repair fuel leaks if necessary.
 Courtesy of SUZUKI OF AMERICA CORP.