Differential Mount: Service and Repair
DIFFERENTIAL MOUNTINGSREMOVAL AND INSTALLATION
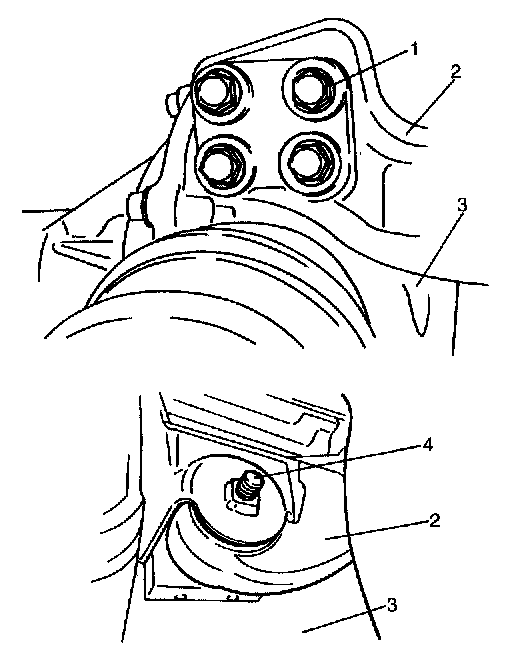
1. Lift up vehicle and turn steering wheel all way to the right.
2. Separate mounting bracket R (2) from differential housing (3) by removing bolts (1) from its lower part.
3. Remove mounting bracket R (2) by removing mounting front bolt (4) from its upper part.
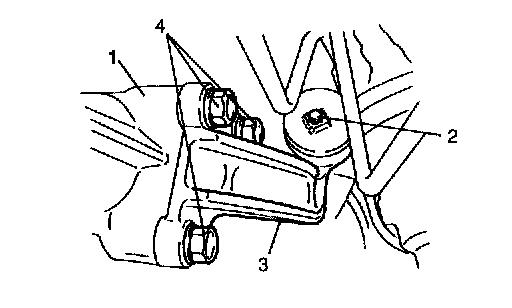
4. Remove mounting bracket L (3) from differential housing (1) by removing upper and lower fastening bolts (2, 4).
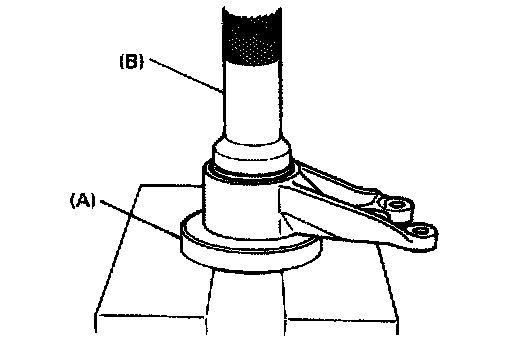
5. Check conditions of each bush. If it is damaged or deteriorated, drive it out with special tools and press for replacement.
Special tool
(A): 09951-26010
(B): 09951-16080
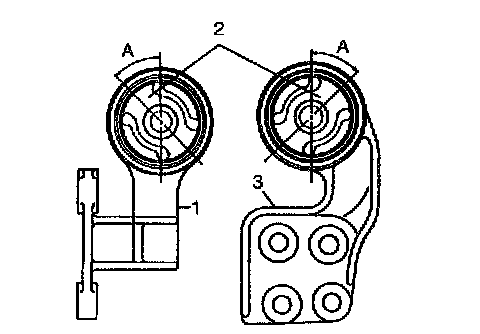
6. Position slit in each bush (2) as shown when press-fitting it.
Bush instillation position (angle "A") 45° (slit alignment)

7. Position each bush to bracket as shown in the figure
Bush installation position (length "a" 3.0 mm (0.12 inch)
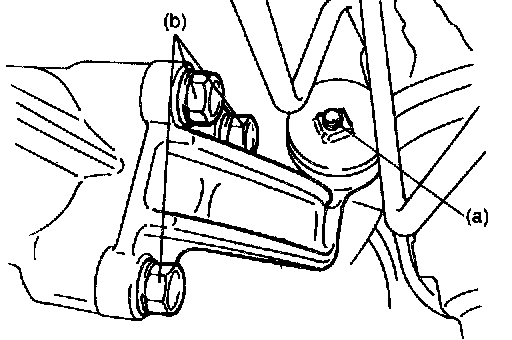
8. Tighten differential mounting front and bracket bolt to specified torque for reinstallation.
Tightening torque
Differential mounting front bolt (a) 85 Nm (8.5 kg-m, 61.5 ft. lbs.)
Differential mounting bracket bolt (b): 50 Nm (5.0 kg-m, 36.5 ft. lbs.)
REAR MOUNTING FOR FRONT DIFFERENTIAL CARRIER
REMOVAL AND INSTALLATION
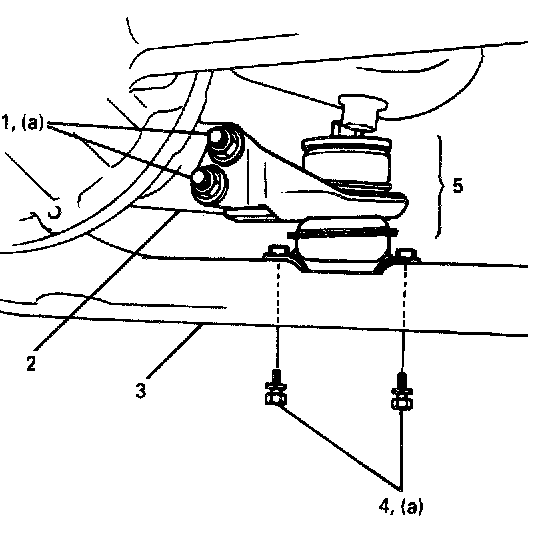
1. Lift up vehicle and remove mounting assembly (5) by removing 2 bolts and nuts (1) from differential carrier (2) side and 2 bolts (4) from cross member (3) side.
2. Check mounting rubber for damage or deterioration and replace as necessary.
3. Tighten differential mounting bracket bolt to specified torque for reinstallation.
Tightening torque
Differential mounting bracket bolt (a) 50 Nm (5.0 kg-m, 36.5 ft. lbs.)