Canister Purge Control Valve: Testing and Inspection
EVAP Canister Purge Valve and Its Circuit Check
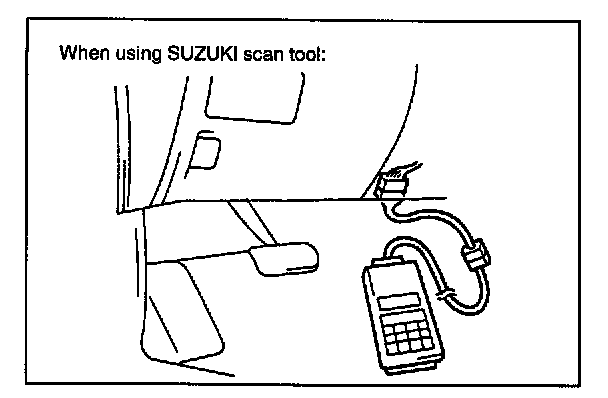
When using SUZUKI scan tool:
1. Connect SUZUKI scan tool to DLC with ignition switch OFF and disconnect vacuum hoses from each pipe.
2. Turn ignition switch ON, clear DTC and select "MISC TEST" mode on SUZUKI scan tool.
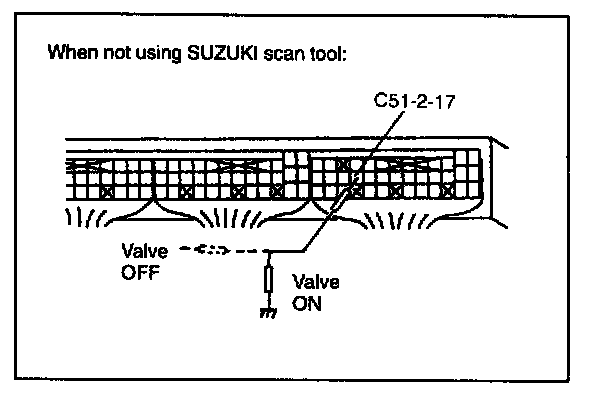
When not using SUZUKI scan tool:
1. Disconnect vacuum hoses from each pipe.
2. Turn ignition switch ON.
Using service wire, ground C51-2-17 terminal of ECM (PCM) connector (valve ON) and unground it (valve OFF).

3. Check purge valve for operation and vacuum passage for clog when valve is switched ON and OFF by using SUZUKI scan tool or service wire.
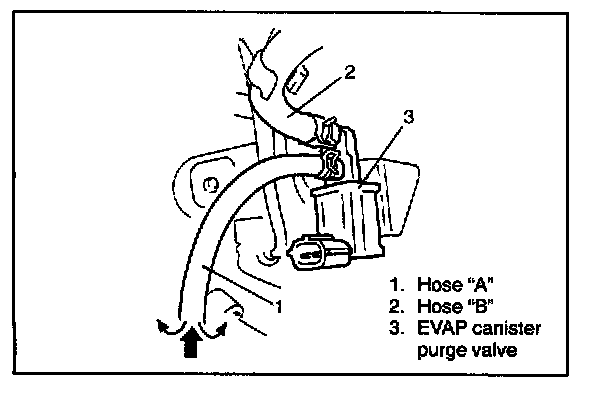
Valve OFF: When blowing into hose "A", air should not come out of hose "B".
Valve ON: When blowing into hose "A", air should come out of hose "B".
If check result is not described, check vacuum hoses, purge valve, wire harness and connections.
EVAP Canister Purge Valve Inspection
1. With ignition switch OFF, disconnect coupler from canister purge valve.
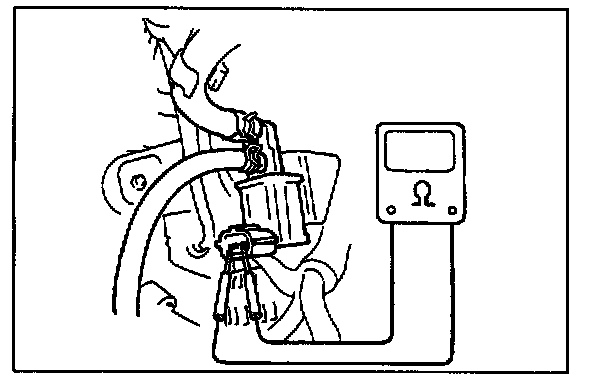
2. Check resistance between two terminals of EVAP canister purge valve.
Resistance of EVAP canister purge valve:
28 - 35 Ohms. at 20 °C (68 °F)
If resistance is as specified, proceed to next operation check. If not, replace.
3. Disconnect vacuum hoses from intake manifold and its EVAP canister.
4. With coupler disconnected, blow into hose "A". Air should not come out of hose "B".
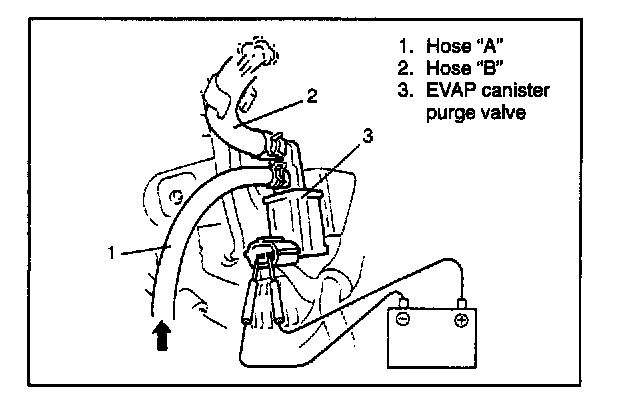
5. Connect 12 V - battery to EVAP canister purge valve terminals.
In this state, blow hose "A".
Air should come out of hose "B".
WARNING: Do not suck the air through valve. Fuel vapor inside valve is harmful.
If check result is not as described, replace EVAP canister purge valve.
6. Connect vacuum hoses.
7. Connect EVAP canister purge valve coupler securely.