Engine: Service and Repair
ENGINE ASSEMBLYREMOVAL
1. Release fuel pressure in fuel feed line.
2. Disconnect negative cable from battery.
3. Remove engine hood.
4. Drain cooling system.
5. Remove radiator fan and fan shroud. Refer to Cooling System.
6. Remove air intake hose.
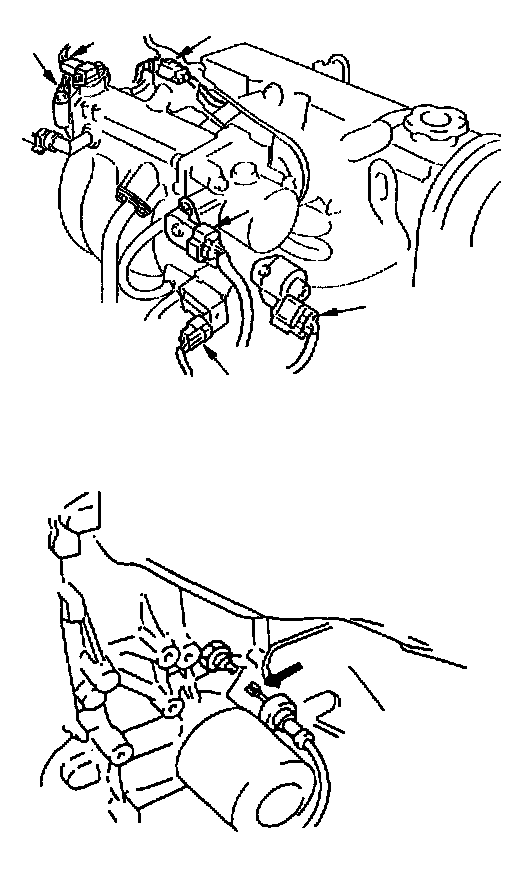
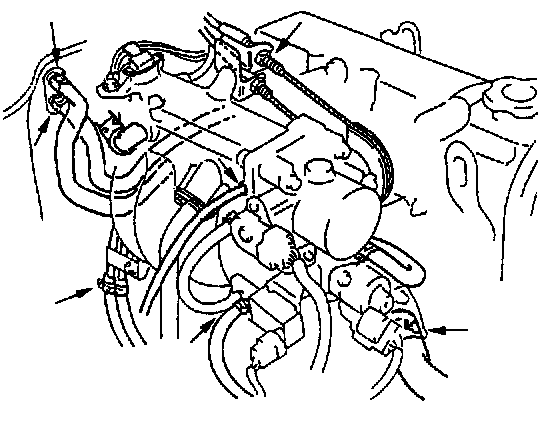
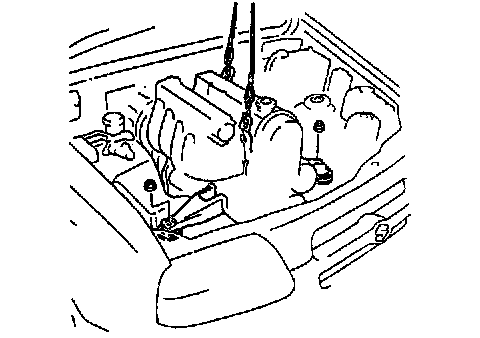
7. Disconnect following electric wires:
^ Ground wires from intake manifold
^ Manifold differential pressure sensor
^ Camshaft position sensor
^ EGR valve
^ EVAP canister purge valve
^ Engine coolant temp. sensor
^ Throttle position sensor
^ Idle air control valve
^ Fuel injector wire at the connector
^ Intake air temp. sensor
^ Mass air flow sensor
^ Tank pressure control solenoid valve
^ EVAP canister air valve
^ Crankshaft position sensor
^ Generator
^ Ground cable from cylinder block (if equipped)
^ Heated oxygen sensor-1 and -2
^ Engine oil pressure switch
^ Power steering pressure switch (if equipped) and then release wire harnesses from clamps.
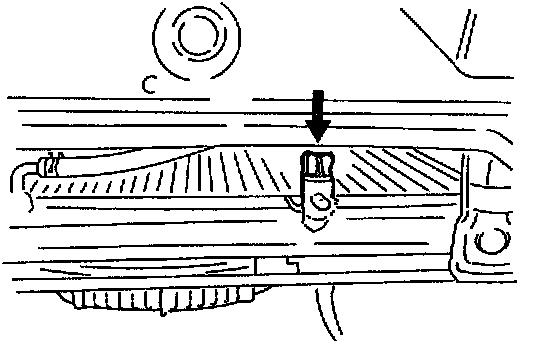
8. Remove starter motor.
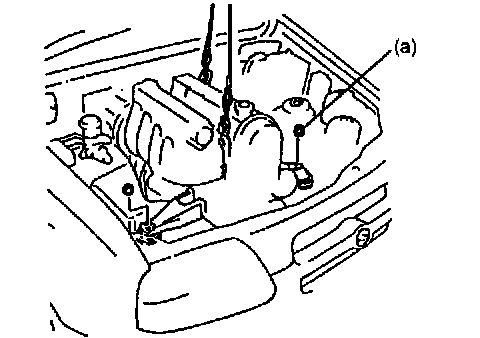
9. Disconnect following hoses:
^ Canister purge hose from EVAP canister purge valve
^ Radiator outlet hose from inlet pipe
^ Brake booster hose from intake manifold
^ Vacuum hose from intake manifold
^ Heater inlet and outlet hose from pipe
^ Fuel feed hose and return hose from each pipe
^ A/T fluid hose clamp from bracket
10. Disconnect accelerator cable and A/T throttle cable (if equipped) from throttle body and each clamp.

11. With hose connected, detach A/C compressor and/or power steering pump with bracket from cylinder block if equipped.
12. Loosen bolts fastening cylinder block and transmission.
13. Hoist vehicle.
14. Drain engine oil if necessary.
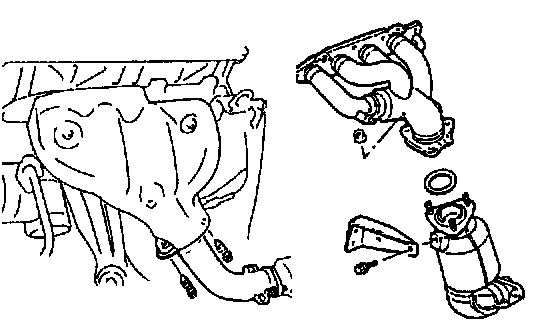
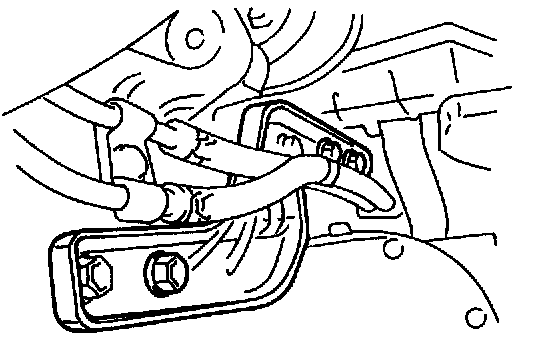
15. Remove exhaust pipe bolts or exhaust pipe.
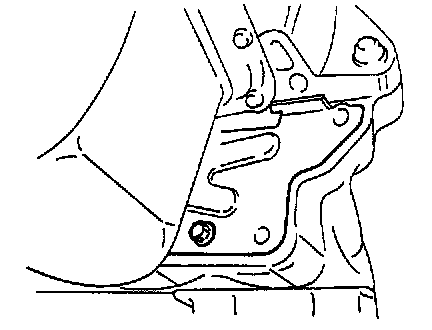
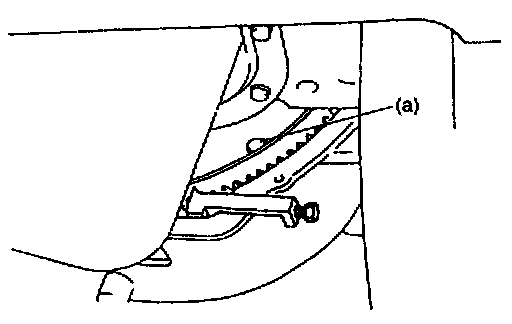
16. Remove right side transmission stiffener from transmission and cylinder block (A/T).
17. Remove clutch housing (torque converter housing) lower plate.

18. Remove torque converter bolts (A/T).
Special Tool
(A): 09927-56010
19. Remove nuts fastening cylinder block and transmission.
20. Lower vehicle.
21. Support transmission with jack.
With A/T vehicle, don't jack under A/T oil pan to support transmission.
22. Install lifting device.
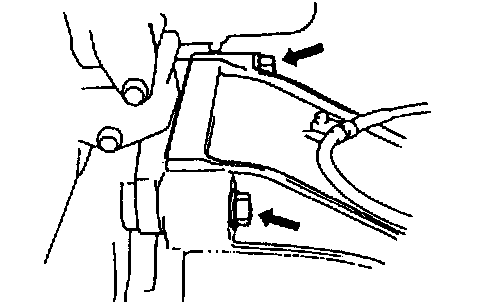
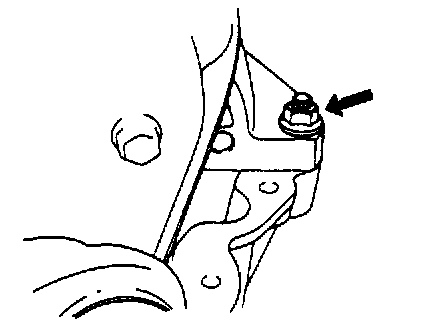
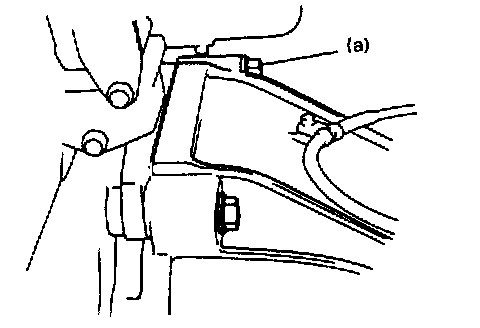
23. Remove engine mounting bracket nuts (R & L).
24. Before lifting engine, check to ensure all hoses, electric wires and cables are disconnected from engine.
25. Remove engine assembly from chassis and transmission by lifting a little, sliding towards the front side, and then carefully hoist engine assembly.
INSTALLATION

1. Lower engine assembly into engine compartment and connect engine to transmission.
Hand-tighten bolts and nuts fastening cylinder block and trans mission.
2. Tighten engine mounting bracket nuts (R & L).
Tightening Torque (a): 50 Nm (5.0 kg-m, 36.5 ft. lbs.)
3. Tighten bolts fastening cylinder block and transmission to specified torque.
Tightening Torque (a): 85 Nm (8.5 kg-m, 61.5 ft. lbs.)
4. Remove lifting device.
5. Reverse removal procedure for installation, noting the following.
^ Tighten torque converter bolts to specified torque (A/T).
Tightening Torque (a): 65 Nm (6.5 kg-m, 47.0 ft. lbs.)
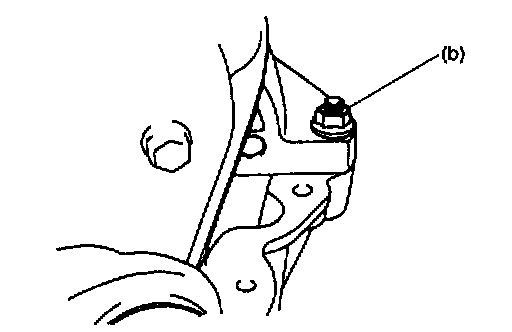
^ Tighten nuts fastening cylinder block and transmission to specified torque.
Tightening Torque (b): 85 Nm (8.5 kg-m, 61.5 ft. lbs.)
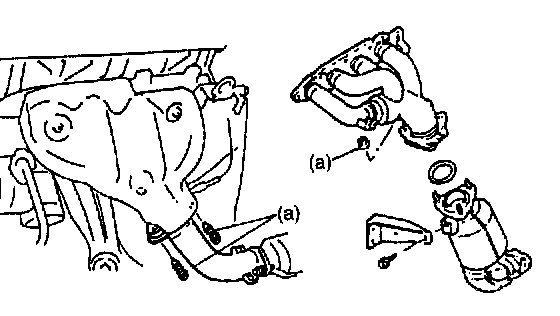
^ Tighten bolts of exhaust pipes to specified torque.
Tightening Torque (a): 50 Nm (5.0 kg-m, 36.5 ft. lbs.)
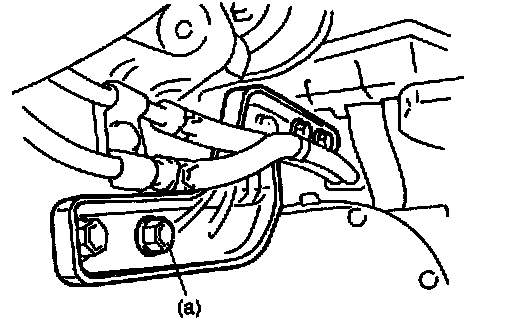
^ Tighten transmission stiffener bolts (right side) to specified torque (A/T).
Tightening Torque (a): 50 Nm (5.0 kg-m, 36.5 ft. lbs.)
6. Adjust water pump drive belt tension. Refer to Drive Belts.
7. Adjust power steering pump belt tension or A/C compressor belt tension, if equipped. Refer to Drive Belts.
8. Adjust accelerator cable play and A/T throttle cable (for A/T) play.
9. Check to ensure that all removed parts are back in place. Reinstall any necessary parts which have not been reinstalled.
10. Refill engine with engine oil.
11. Refill cooling system.
12. Verify that there is no fuel leakage, coolant leakage and exhaust gas leakage at each connection.