Seals and Gaskets: Service and Repair
REMOVAL1. Raise vehicle and drain transmission fluid.
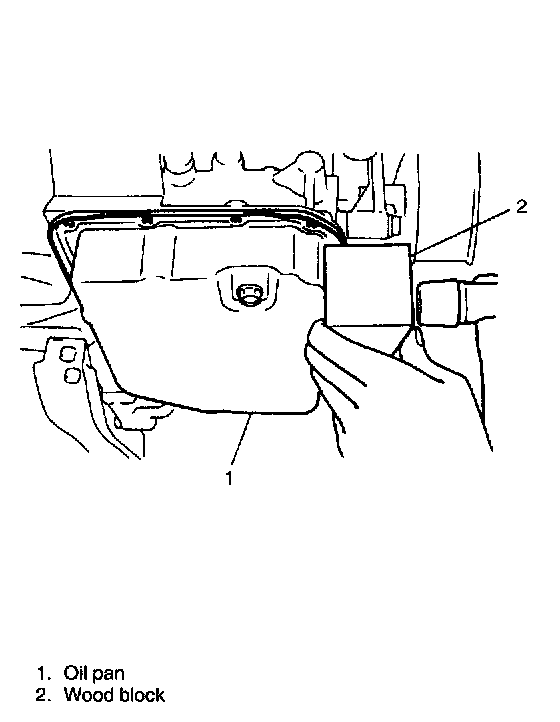
2. Remove oil pan from transmission. After removing oil pan bolts, tap around oil pan lightly with a plastic hammer for removal.
CAUTION:
- Never hammer oil pan hard, or it may get deformed. It is recommended to hit oil pan indirectly through wood block.
- Do not force oil pan off by using a flat tip screwdriver or the like as it may cause damage to gasket surface.

3. Remove gasket on mating surface thoroughly.
INSTALLATION
For oil pan installation, reverse its removal procedure using care for the following.
1. Make sure to use new gasket.
2. Clean inside of oil pan before installation.
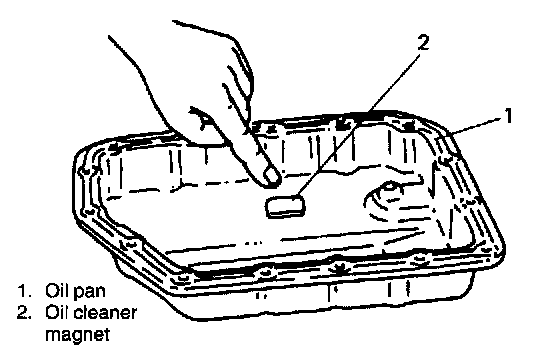
3. Clean oil cleaner magnet and install it in the position right below oil strainer.
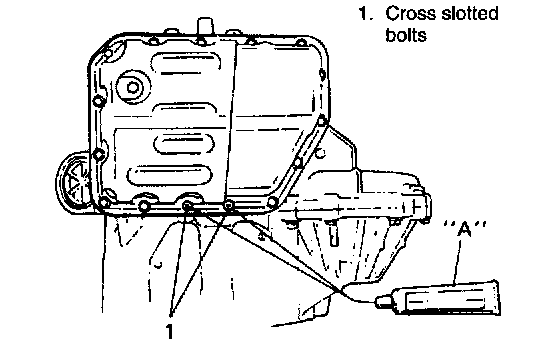
4. There are 15 oil pan securing bolts in all and two of them have cross slot in their heads. Mount these cross slotted bolts in such positions as shown in figure after applying sealant to their threads. However, do not apply sealant to other 13 bolts.
CAUTION: Do not use sealant to gasket surface.
"A": SUZUKI BOND No. 1215, 99000 - 31110
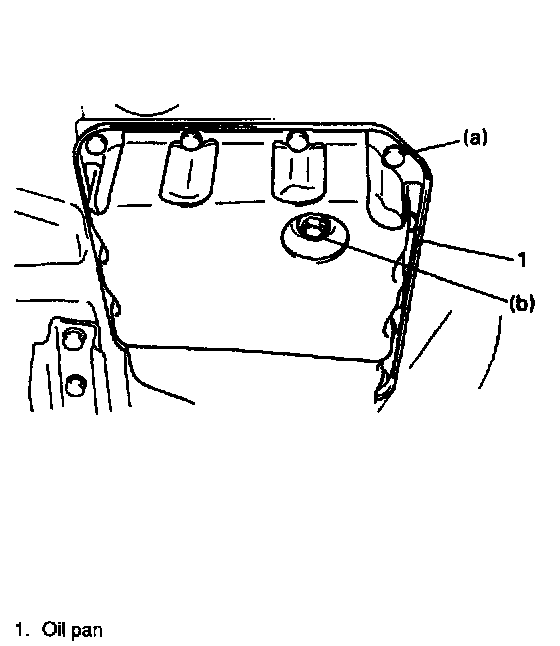
5. Tighten oil pan bolts to the following torque one after another diagonally.
CAUTION: Over tightening of bolts may cause fluid leakage.
Tightening Torque
(a): 5 Nm (0.5 kg.m, 4.0 ft. lbs.) for cork type gasket (gasket color: light brown)
7.5 Nm (0.75 kg.m, 5.5 ft. lbs.) for joint sheet type gasket (gasket color: black)
(b): 21 Nm (2.1 kg.m, 15.5 ft. lbs.)
6. Upon completion of installation, warm up transmission and check for fluid level and leakage.