Magnet Clutch (Denso Compressor)
Magnet Clutch (Denso Compressor):
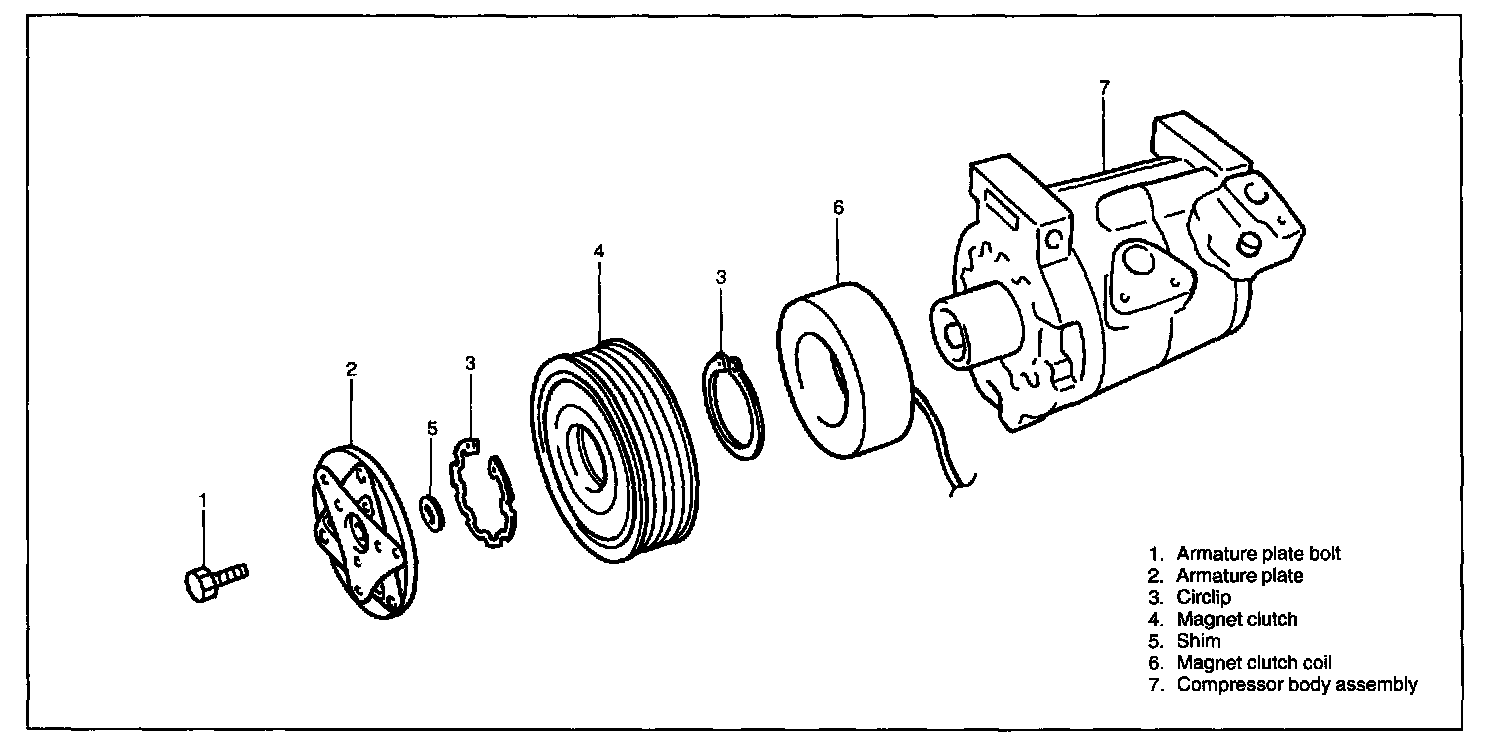
COMPONENTS
REMOVAL
1. Remove compressor from vehicle.
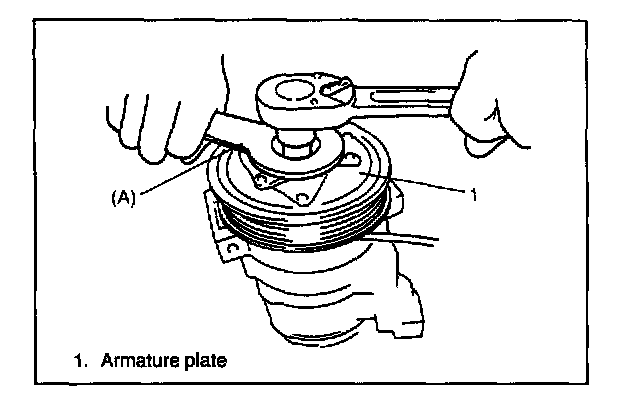
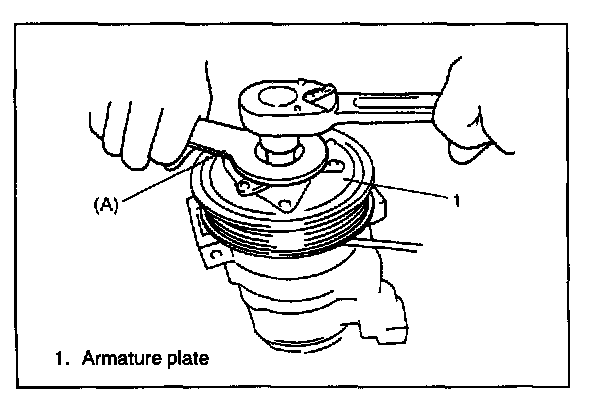
2. Fix armature plate with special tool (A) and remove armature plate bolt and washer.
Special Tool
(A): 09991 - 06020
NOTE: Do not reuse armature plate bolt.
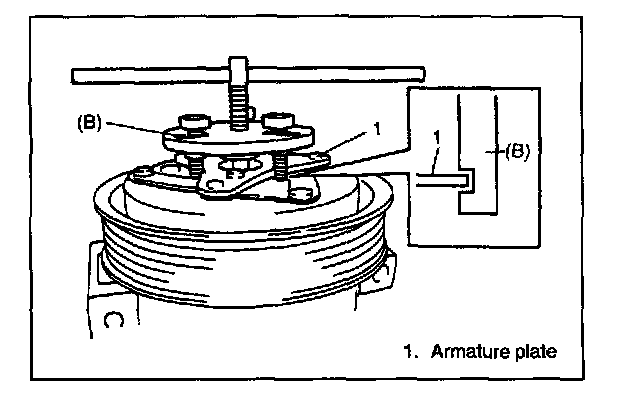
3. Using special tool (B), remove armature plate.
Special Tool
(B): 09991 - 06030
4. Remove shims from shaft.
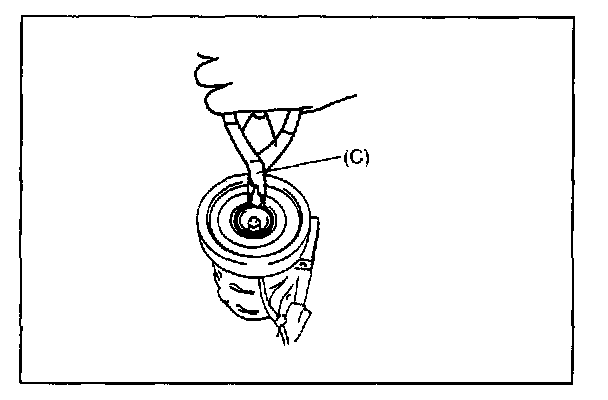
5. Using special tool (C), remove circlip.
Special Tool
(C): 09900 - 06107
6. Remove magnet clutch lead wire clamp screw, and remove magnet clutch read wire ground terminal.
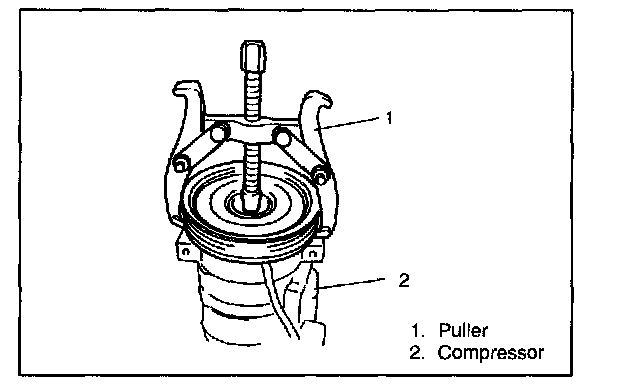
7. Remove magnet clutch with puller.
NOTE: Be careful not to damage pulley when tapping magnet clutch.

8. Remove magnet clutch coil.
Special tool
(C): 09900 - 06107
INSTALLATION
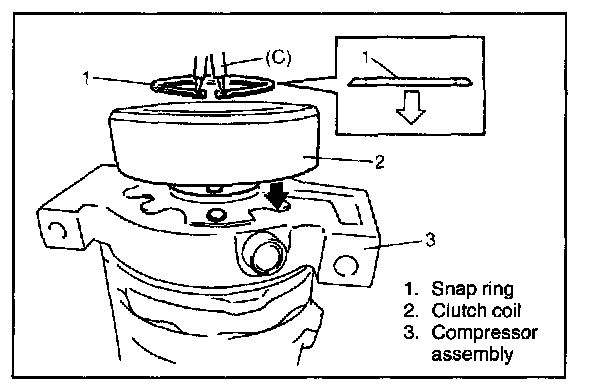
1. Install magnet clutch coil.
Protrusion on under side of coil ring must match hole in compressor assembly to prevent movement ant correctly locate lead wire.
2. Using special tool (C), install snap ring as shown.
Special Tool
(C): 09990 - 06107
3. Install clamp portion and ground terminal of lead wire.
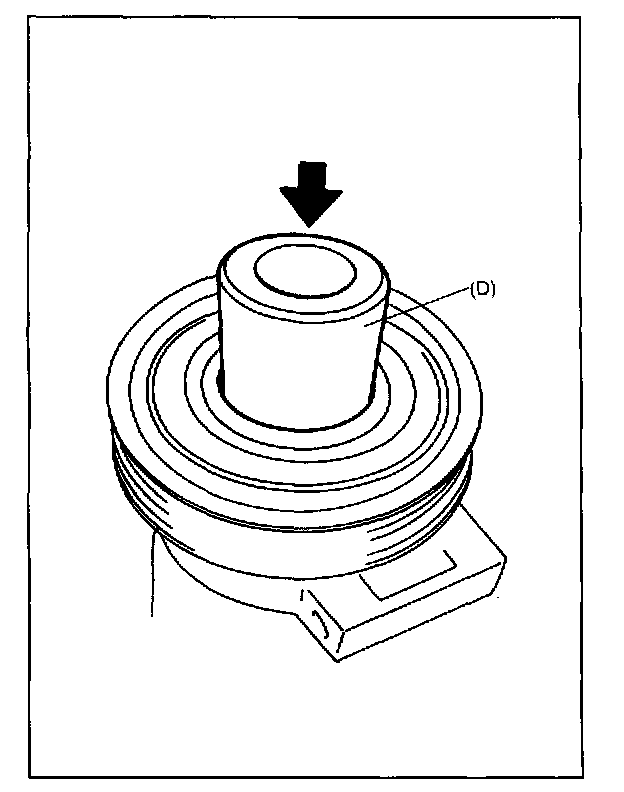
4. Install magnet clutch.
1. Set magnet clutch squarely over clutch installation boss.
2. Place special tool (D) onto clutch bearing.
Ensure that edge rests only on inner race of bearing.
3. Install snap ring.
Special Tool
(D): 09991 - 06010
CAUTION: Be careful not to scratch bearing seal.
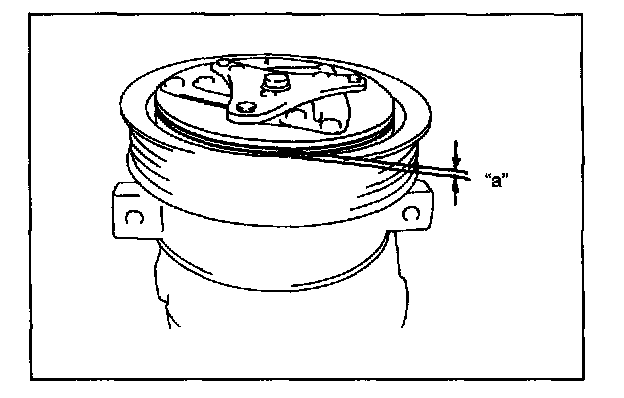
5. Adjust clearance, between armature plate and magnet clutch by putting shim on compressor shaft.
Standard clearance "a": 0.3 - 0.5 mm (0.012 - 0.02 in.)
6. Tighten new armature plate nut as specified.
Tightening Torque
(a): 14 N.m (1.4 kg.m, 10.5 lb.ft)
Special Tool
(A): 09991 - 06020