Fuel Pump Assembly
FUEL PUMP ASSEMBLY (WITH FUEL FILTER, LEVEL SENSOR (GAUGE) AND FUEL CUT VALVE) (For Type A)REMOVAL

1. Remove fuel tank from vehicle referring to FUEL TANK REMOVAL.
2. Disconnect electric connector from fuel pump assembly.
3. Disconnect fuel vapor hose and pipes from fuel pump assembly.
For quick joint, disconnect it as follows:
1. Remove mud, dust and/or foreign material between pipe and joint by blowing compressed air.
2. Unlock joint lock by inserting special tool between pipe and joint.
Special Tool
(A): 09919-47020
3. Disconnect joint from pipe.
4. Remove fuel pump assembly from fuel tank.
INSTALLATION

1. Clean mating surfaces of fuel pump assembly and fuel tank.
2. Install new gasket, fuel pump assembly and plate to fuel tank. As both fuel pump installation face of fuel tank and plate have cutout section, match them when installing these parts.
3. Tighten fuel pump assembly bolt to specified torque.
Tightening Torque (a): 10 Nm (1.0 kg-m, 7.5 lb-ft)
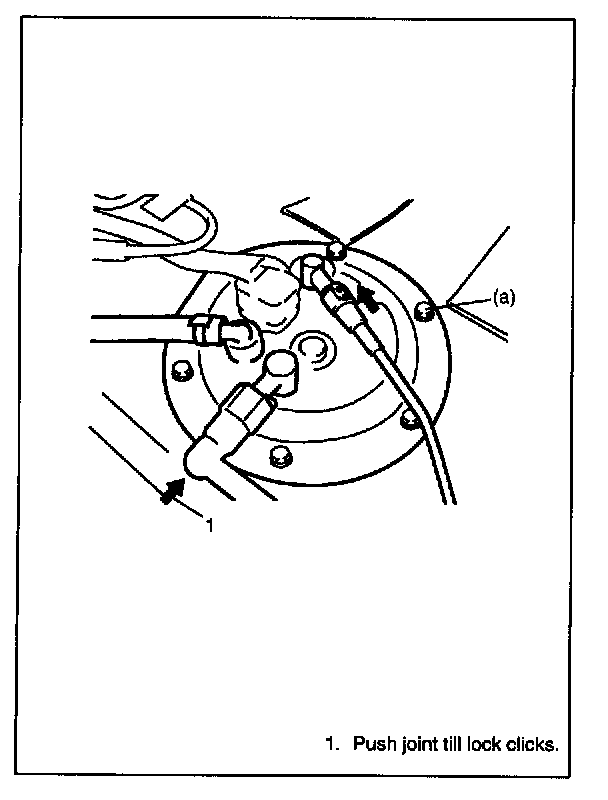
4. Connect fuel vapor hose and pipe joints to fuel pump assembly after cleaning pipe inserted to joint.
CAUTION: When connecting joint, push joint into pipe till joint lock clicks and check to ensure that pipes are connected securely, or fuel leak may occur.
5. Connect electric connector to fuel pump assembly.
6. Install fuel tank to vehicle referring to FUEL TANK INSTALLATION.