Master Cylinder
REMOVAL
NOTE: Do not allow brake fluid to get on painted surfaces.
1. Disconnect reservoir lead wire at coupler
2. Clean around reservoir cap and take out fluid with syringe or such.
3. Disconnect brake pipes from master cylinder.
CAUTION:
Brake fluid is extremely damaging to paint.
Do not allow brake fluid to get on painted surface.
4. Remove attaching nuts.
5. Remove master cylinder.
DISASSEMBLY
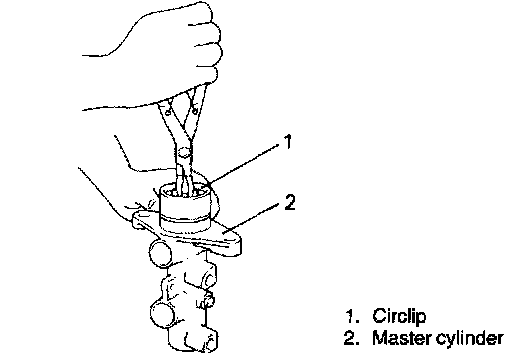
1. Remove circlip.
2. Remove primary piston.

3. Remove piston stopper bolt. Then remove secondary piston by blowing compressed air into hole from which piston stopper bolt was removed.
Be cautious during removal as secondary piston jumps out.
INSPECTION
Inspect all disassembled parts for wear or damage, and replace parts if necessary.
NOTE:
^ Wash disassembled parts with brake fluid.
^ Do not reuse piston cups.
Inspect master cylinder bore for scoring or corrosion. It is best to replace corroded cylinder. Corrosion can be identified as pits or excessive roughness.
NOTE: Polishing bore of master cylinder with cast aluminum body with anything abrasive is prohibited, as damage to cylinder bore may occur.
Rinse cylinder in clean brake fluid. Shake excess rinsing fluid from cylinder. Do not use a cloth to dry cylinder, as lint from cloth cannot be kept from cylinder bore surfaces.
REASSEMBLY
NOTE: All brake fasteners are important attaching parts in that they could affect the performance of vital parts and systems, and/or could result in major repair expense. They must be replaced with one of same part number or with an equivalent part if replacement becomes necessary. Do not use a replacement part of lesser quality or substitute design. Torque values must be used as specified during reassembly to assure proper retention of all parts. There is to be no welding as it may result in extensive damage and weakening of the metal.
^ Be fore assembling, wash each part in fluid recommended to use for that vehicle.
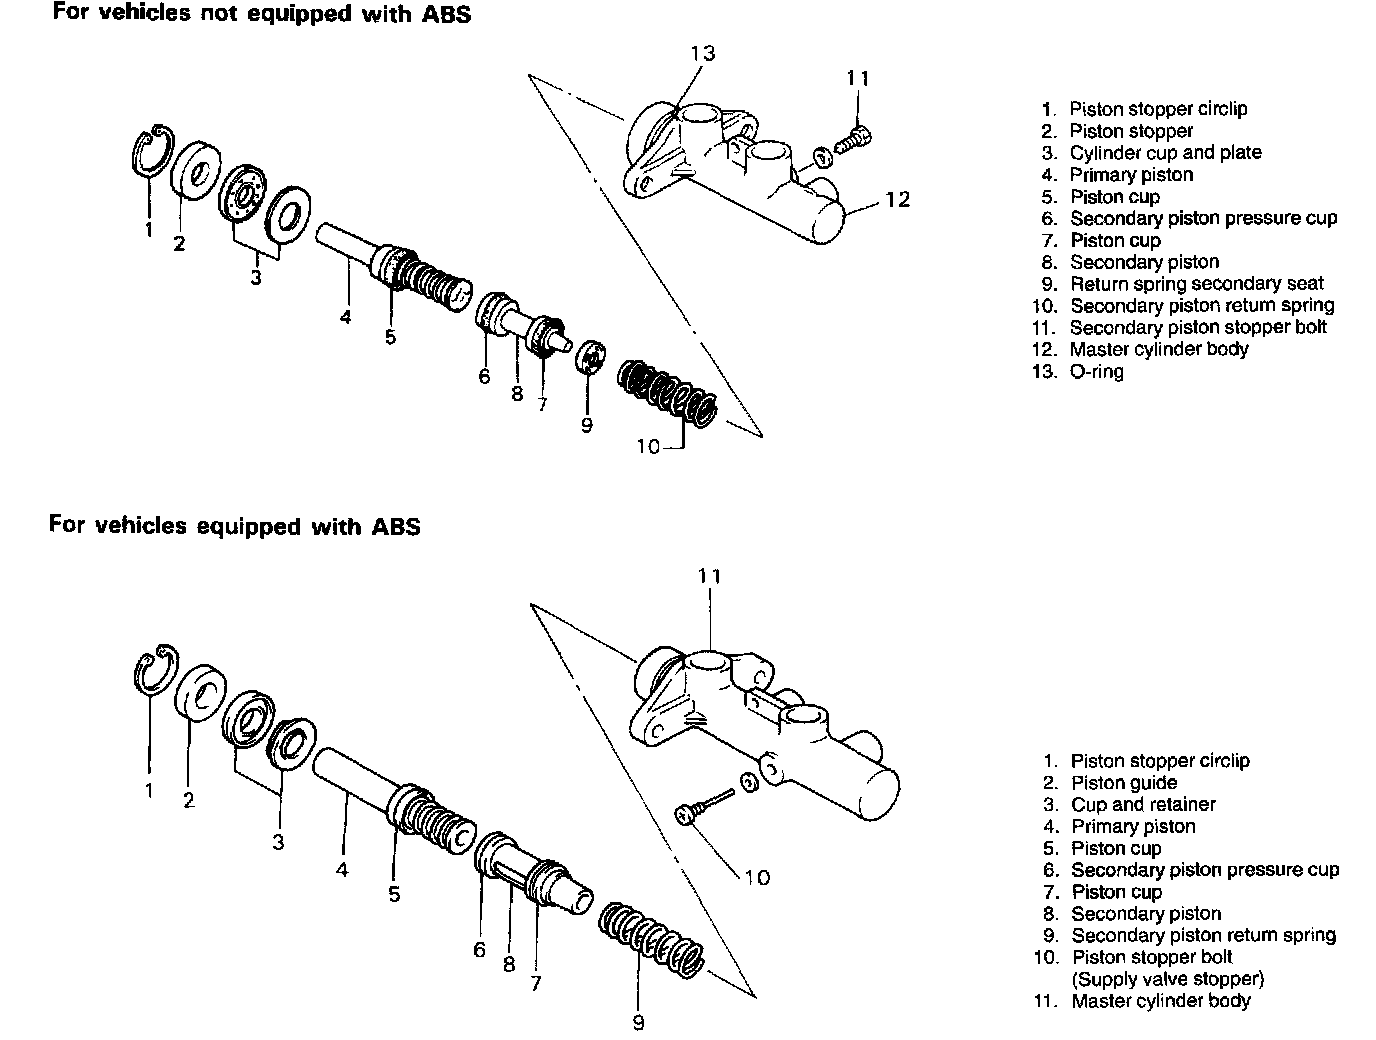
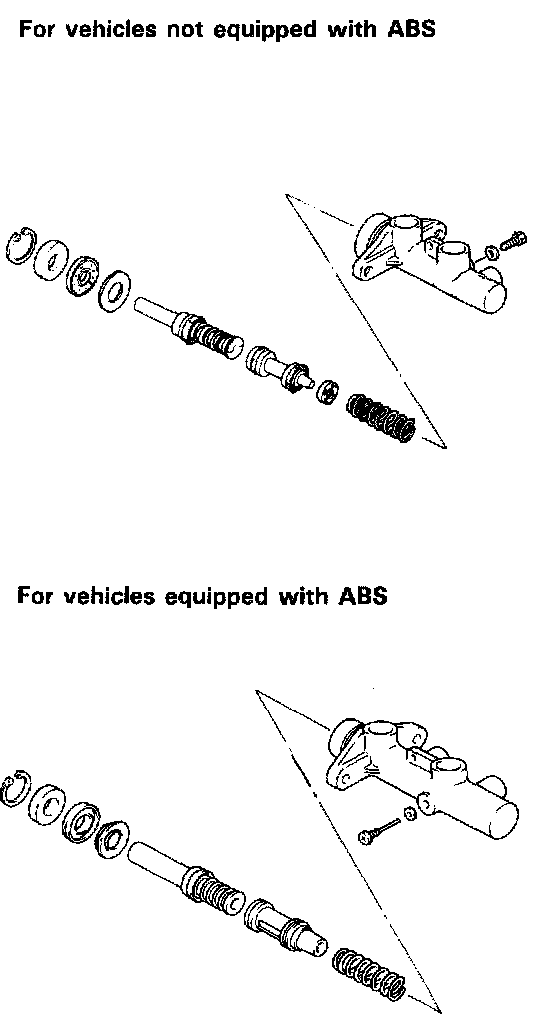
1. Assemble secondary piston as shown on previous page.
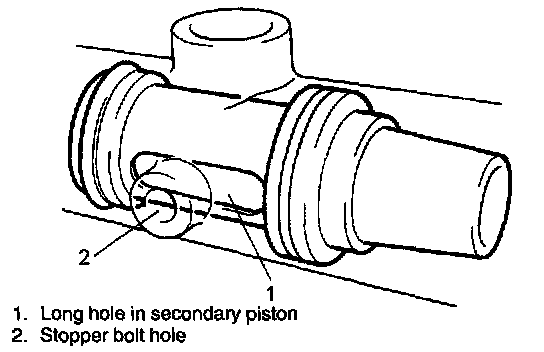
2. Install secondary piston assembly into cylinder.
NOTE: For vehicles equipped with ABS, align long hole in secondary piston with stopper bolt hole in master cylinder body when installing it.
3. Install primary piston assembly into cylinder.
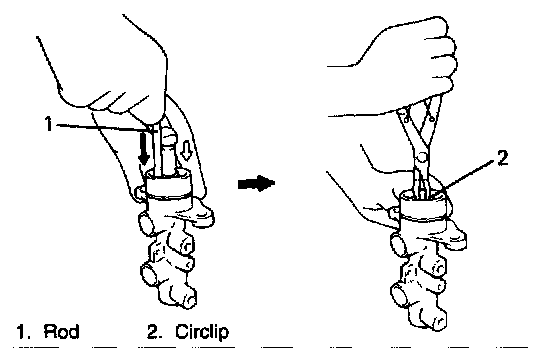
4. Depress, and install circlip.
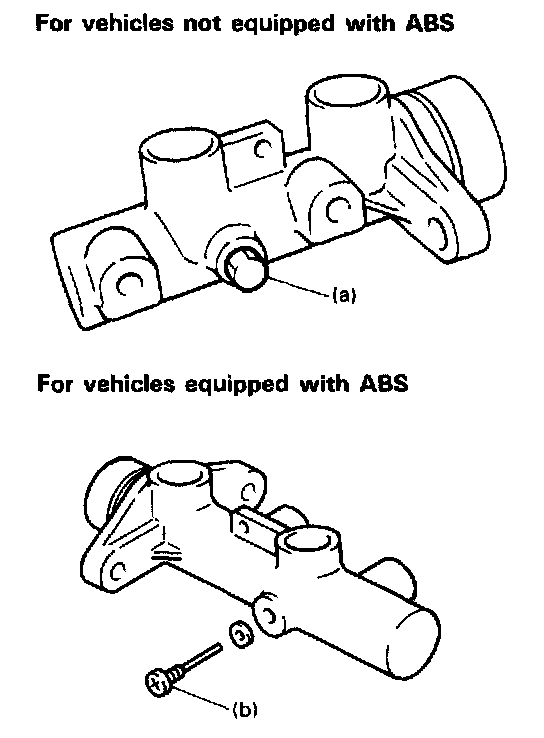
5. Install piston stopper bolt with pistons pushed in all the way and tighten it to specified torque.
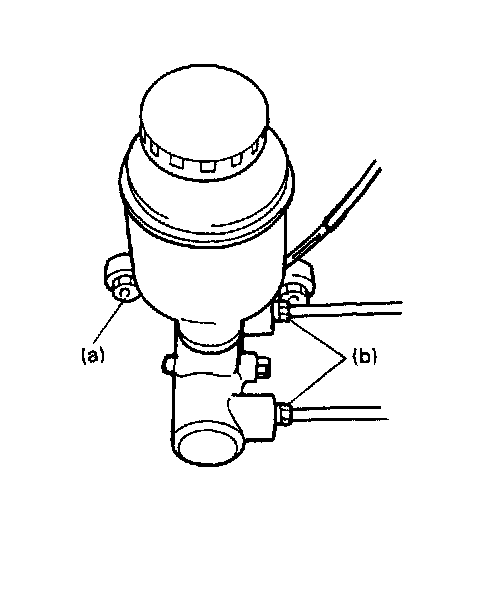
Tightening Torque
(a): 10 Nm (1.0 kg-m, 7.5 ft. lbs.)
(b): 2.5 Nm (0.25 kg-m, 2.0 ft. lbs.)
6. For installation on vehicle, refer to item INSTALLATION of MASTER CYLINDER ASSEMBLY.
INSTALLATION
NOTE:
^ Adjust clearance between booster piston rod and primary piston with special tool.
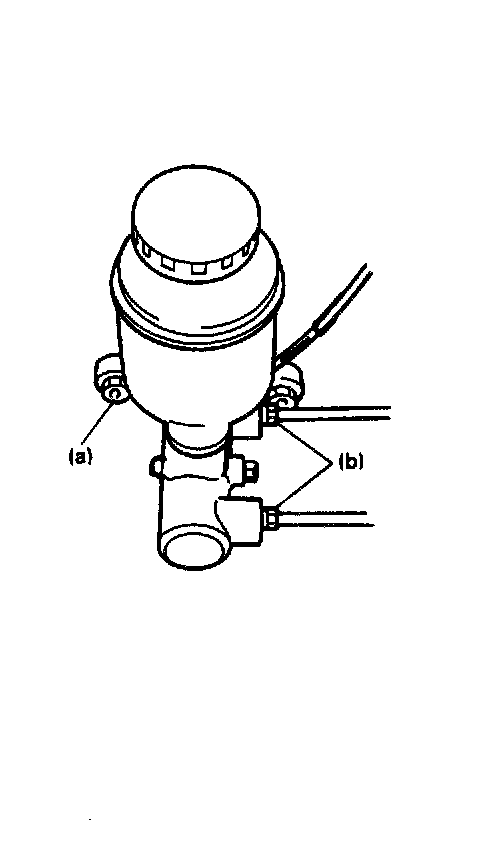
1. Install master cylinder to brake booster.
Confirm that push rod seal is set to master cylinder correctly (if equipped).
Torque master cylinder attaching nuts to specification.
Tightening Torque (a): 13 Nm (1.3 kg-m, 9.5 ft. lbs.)
2. Attach hydraulic lines and torque flare nuts to specification.
Tightening Torque (b): 16 Nm (1.6 kg-m, 12.0 ft. lbs.)
3. Connect reservoir lead wire.
4. Fill reservoir with specified brake fluid.
5. After installing, check brake pedal play and bleed air from system.
6. Perform brake test and check each installed part for fluid leakage.