Fuel Injector: Service and Repair
Removal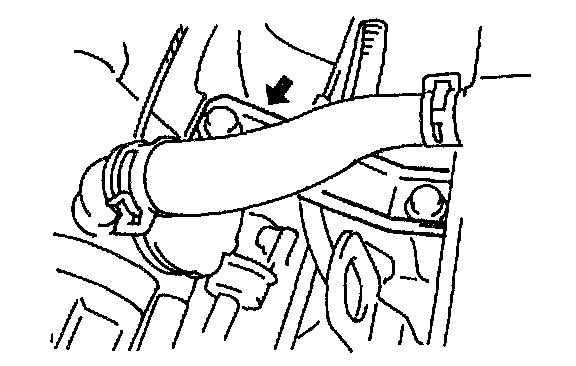
1. Relieve fuel pressure.
2. Disconnect battery negative cable at battery.
3. Remove PCV hose and breather hose.
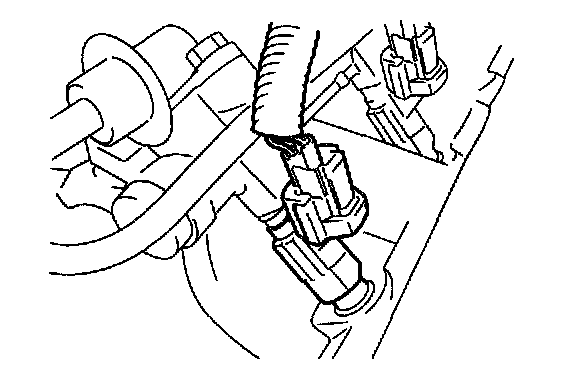
4. Disconnect coupler from each injector.
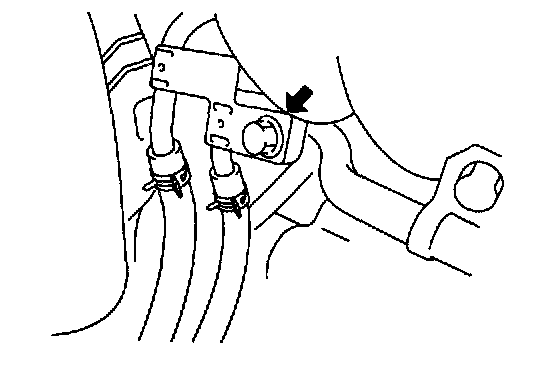
5. Remove clamp bolt for fuel feed pipe and return pipe.
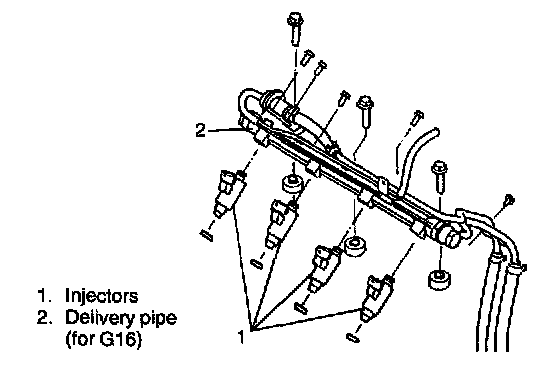
6. Remove fuel delivery pipe bolts.
7. Remove fuel injector(s) from delivery pipe and intake manifold or cylinder head.
WARNING: A small amount of fuel may be released when fuel injector is removed. In order to reduce the chance of personal injury, cover than with a shop cloth.
Installation
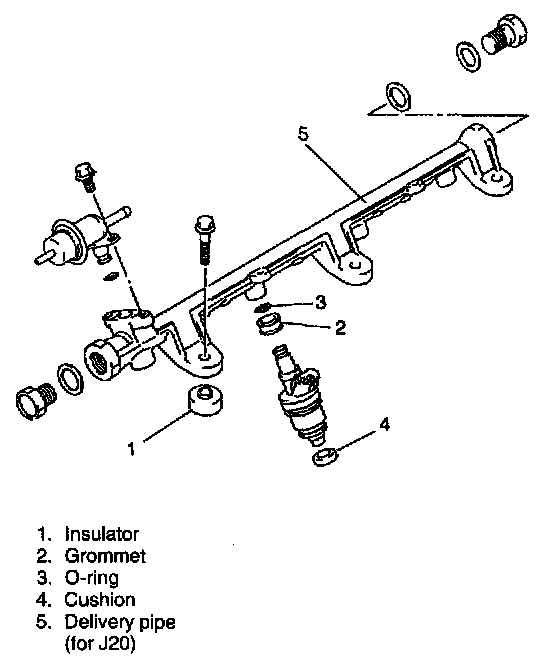
1. Replace injector O-ring with new one using care not to damage it. Install grommet to injector.
2. Check if insulator is scored or damaged. If it is, replace with new one.
Install insulators and cushions to intake manifold or cylinder head.

3. Apply thin coat of fuel to O-rings and then install injectors into delivery pipe and intake manifold or cylinder head.
Make sure that injectors rotate smoothly. If not, probable cause is incorrect installation of O-ring. Replace O-ring with new one.
4. Tighten delivery pipe bolts and make sure that injectors rotate smoothly.
Tightening Torque
(a): 23 Nm (2.3 kg-m, 17.0 ft. lbs.)
5. Connect couplers to injectors securely.
6. Install PCV hose and breather hose and clamp then securely.
7. Install clamp bolts for fuel feed pipe and return pipe.
8. Connect battery negative cable.
9. With engine "OFF" and ignition switch "ON", check for fuel leaks around fuel line connection.