Leak Detection Valve: Testing and Inspection
Tank Pressure Control Solenoid Valve Inspection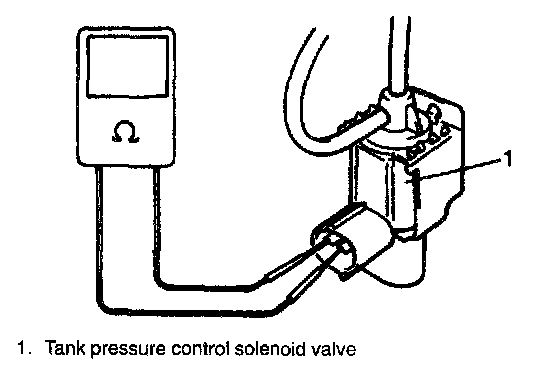
1. With ignition switch OFF, disconnect coupler from valve.
2. Check resistance between two terminals of tank pressure control solenoid valve.
Resistance of tank pressure
control solenoid valve: 28 - 36 Ohm at 20 °C (68 °F)
If resistance is as specified, proceed to next step. If not, replace.
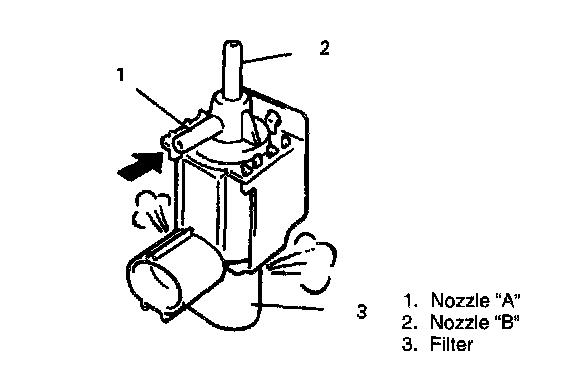
3. With coupler disconnected, blow into nozzle "A". Air should come out of filter and not out of nozzle "B".
If not, replace tank pressure control solenoid valve.
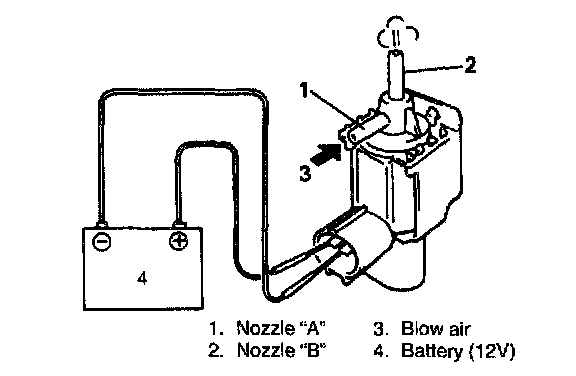
4. Connect 12 V-battery to tank pressure control solenoid valve terminals.
In this state, blow into nozzle "A".
Air should come out of nozzle "B" and not out of filter. If check result is not described above, replace tank pressure control solenoid valve.
5. Connect vacuum hoses.
6. Connect tank pressure control solenoid valve coupler securely.
Tank Pressure Control Valve Inspection

1. Disconnect hoses from tank pressure control valve and then remove tank pressure control valve.
2. Air should pass through valve smoothly from fuel tank side (TANK mark side of tank pressure control valve) to EVAP canister side when blown hard.
3. From CAN mark side, even when blown softly, air should come out of TANK mark side.
4. If air doesn't pass through valve in step 2) or hard blow is required in step 3), replace tank pressure control valve.
WARNING: DO NOT SUCK air through tank pressure control valve. Fuel vapor inside the valve is harmful.
5. Apply vacuum to vacuum port.
In this state, blow TANK mark port. Air should come out of CAN mark port.
If check result is not as described, replace tank pressure control valve.
WARNING: DO NOT SUCK air through tank pressure control valve. Fuel vapor inside the valve is harmful.
6. Install tank pressure control valve.
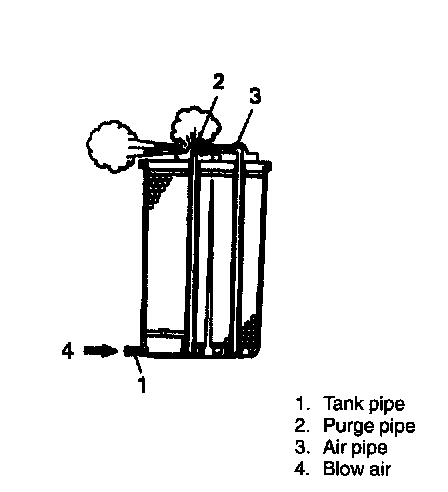
EVAP Canister Check
Tank Pressure Control Solenoid Valve Inspection
1. With ignition switch OFF, disconnect coupler from valve.
2. Check resistance between two terminals of tank pressure control solenoid valve.
Resistance of tank pressure
control solenoid valve: 28 - 36 Ohm at 20 °C (68 °F)
If resistance is as specified, proceed to next step. If not, replace.
3. With coupler disconnected, blow into nozzle "A". Air should come out of filter and not out of nozzle "B".
If not, replace tank pressure control solenoid valve.
4. Connect 12 V-battery to tank pressure control solenoid valve terminals.
In this state, blow into nozzle "A".
Air should come out of nozzle "B" and not out of filter. If check result is not described above, replace tank pressure control solenoid valve.
5. Connect vacuum hoses.
6. Connect tank pressure control solenoid valve coupler securely.
Tank Pressure Control Valve Inspection
1. Disconnect hoses from tank pressure control valve and then remove tank pressure control valve.
2. Air should pass through valve smoothly from fuel tank side (TANK mark side of tank pressure control valve) to EVAP canister side when blown hard.
3. From CAN mark side, even when blown softly, air should come out of TANK mark side.
4. If air doesn't pass through valve in step 2) or hard blow is required in step 3), replace tank pressure control valve.
WARNING: DO NOT SUCK air through tank pressure control valve. Fuel vapor inside the valve is harmful.
5. Apply vacuum to vacuum port.
In this state, blow TANK mark port. Air should come out of CAN mark port.
If check result is not as described, replace tank pressure control valve.
WARNING: DO NOT SUCK air through tank pressure control valve. Fuel vapor inside the valve is harmful.
6. Install tank pressure control valve.