Exhaust Manifold: Service and Repair
EXHAUST MANIFOLDWARNING: To avoid danger of being burned, do not service exhaust system while it is still hot. Service should be performed after system has cooled off.
REMOVAL
1. Disconnect negative cable at battery.
2. Remove air cleaner upper case and intake air hose.
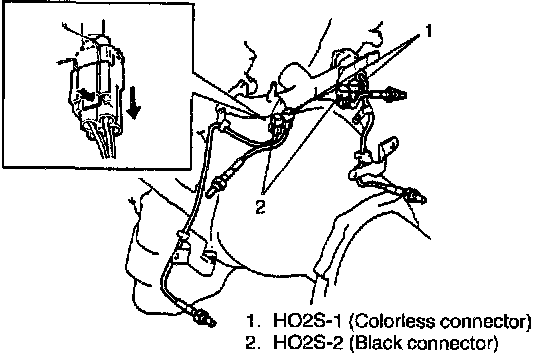
3. Detach couplers from their bracket and disconnect oxygen sensor lead wires at couplers.
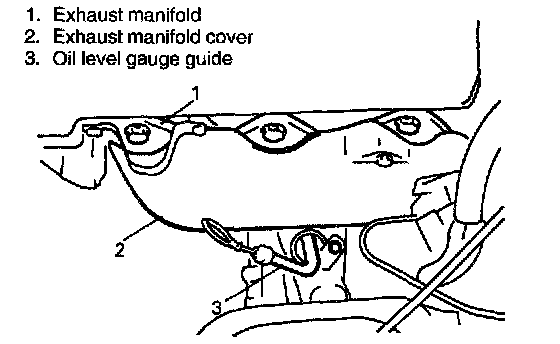
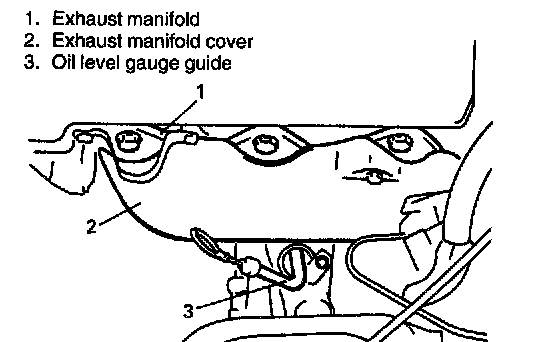
4. Remove oil level gauge guide.
5. Disconnect EGR pipe from right (No.2) bank exhaust manifold.
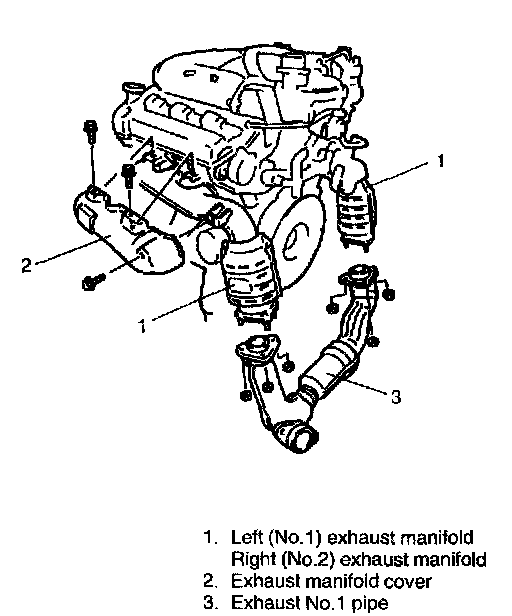
6. Remove exhaust manifold covers from exhaust manifolds.
NOTE: Detach EVAP canister from its bracket if necessary.
7. Hoist vehicle.
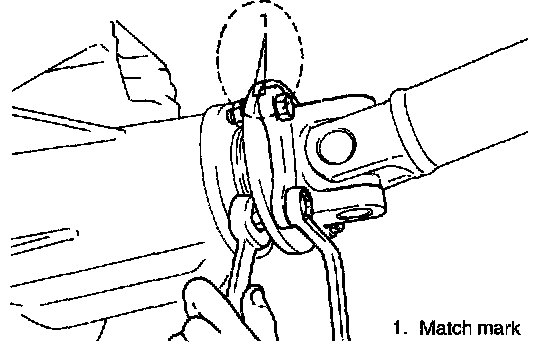
8. For 4WD vehicle, before disconnecting front propeller shaft, put match mark on joint flange and propeller shaft to facilitate their installation as shown in figure.
9. For4WDvehicle, disconnect propeller shaft from front differential.
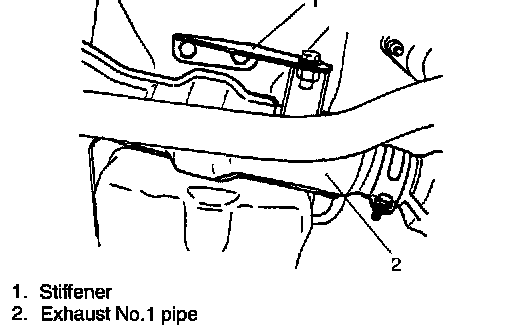
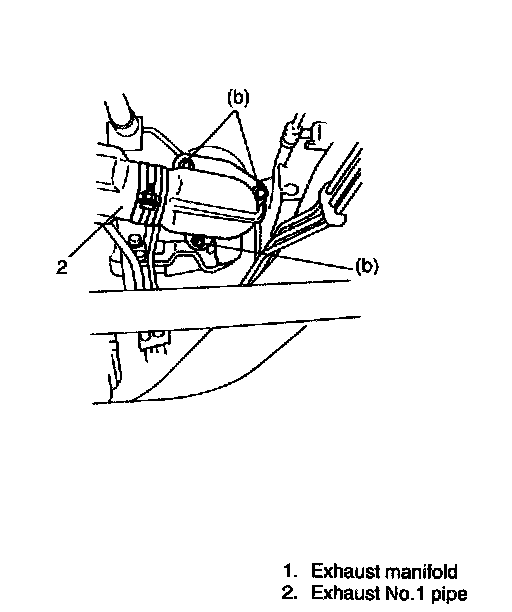
10. Remove exhaust No.1 pipe.
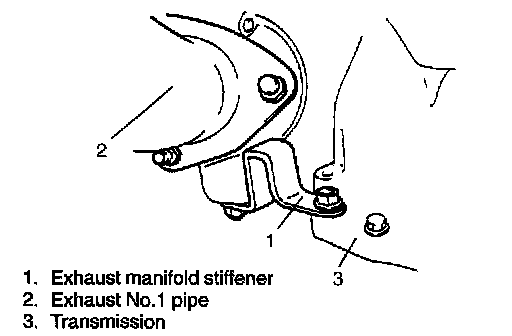
11. Detach exhaust manifold stiffener from transmission case.
12. Remove exhaust manifolds and their gaskets from cylinder heads.
INSTALLATION
1. Install new manifold gaskets to cylinder heads and No.1 pipe gasket to exhaust No.1 pipe.
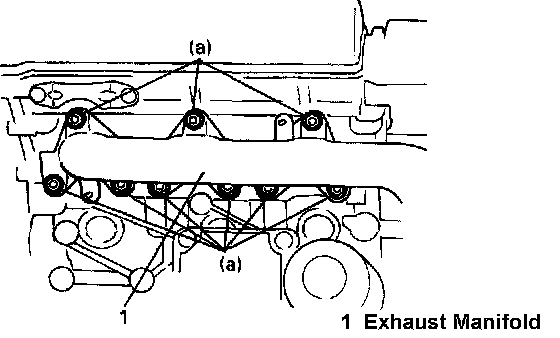
2. Install exhaust manifolds. Tighten manifold nuts to specified torque.
Tightening Torque (a): 30 Nm (3.0 kg-m, 21.5 ft. lbs.)
3. Attach exhaust manifold stiffener to transmission.
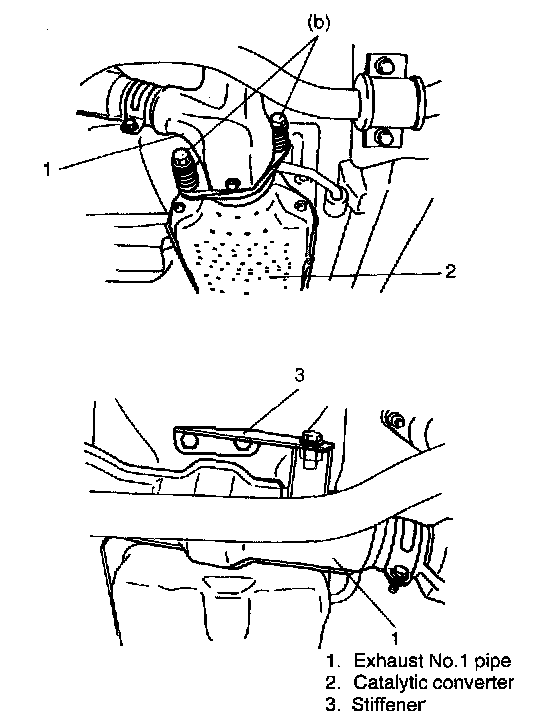
4. Install exhaust No.1 pipe and stiffener. Tighten exhaust No.1 pipe bolts and nuts to specified torque.
Tightening Torque (b): 50 Nm (5.0 kg-m, 36.5 ft. lbs.)
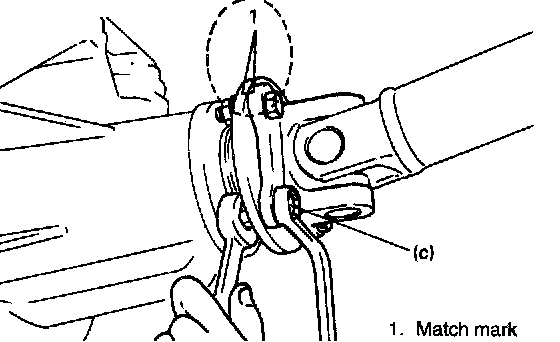
5. Reverse removal procedure to install front propeller shaft if removed. When installing propeller shaft, align match mark. Use following specification to torque universal joint flange.
Tightening Torque (c): 55 Nm (5.5 kg-m, 40.0 ft. lbs.)
6. Connect EGR pipe to left (No.1.) bank exhaust manifold.
7. Install exhaust manifold covers.
8. Install oil level gauge guide using new O-ring.
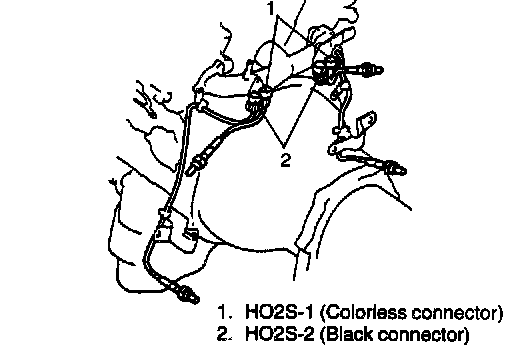
9. Connect oxygen sensor lead wire couplers. Be sure to clamp its lead wires.
10. Connect negative cable to battery. Upon completion of installation, start engine and check that no exhaust gas leakage exists.