Control Arm Bushing: Service and Repair
REMOVAL1. To remove suspension control arm, use the same procedure as that for Coil Spring Removal. Then proceed as follows.
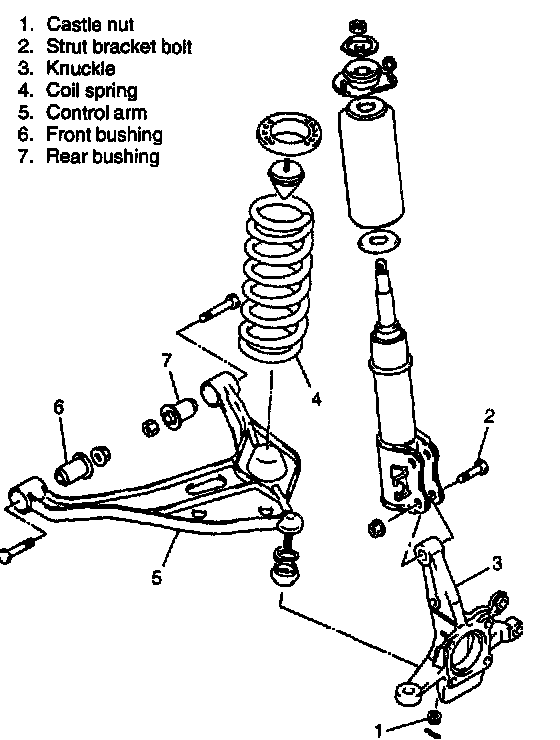
2. Remove control arm bolts and nuts.
3. Remove control arm.

4. Remove front bushing by using hydraulic press and special tools, pull out bushing.
Special Tool
(A): 09951-16060
(B): 09924-74510
(C): 09951-46020
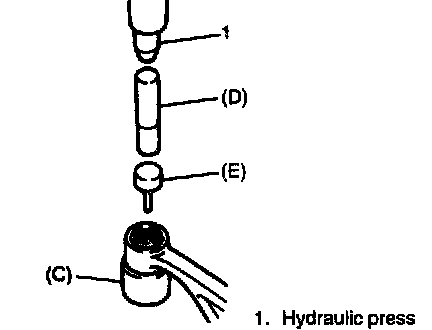
5. Remove rear bushing by using hydraulic press and special tools, pull out bushing.
Special Tool
(C): 09951-46020
(D): 09913-80112
(E): 09925-58210
INSTALLATION
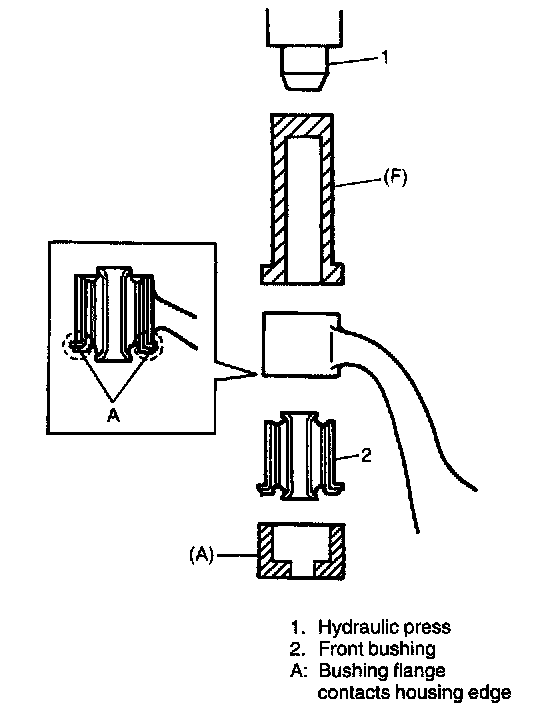
1. Front bushing
Press-fit front bushing until its flange contacts housing edge of control arm, use special tools as shown.
Special Tool
(A): 09951-16060
(F): 09913-85210
NOTE: When press-fitting bushing, compounding oil or soap water applied to inside of control arm housing will facilitate work.
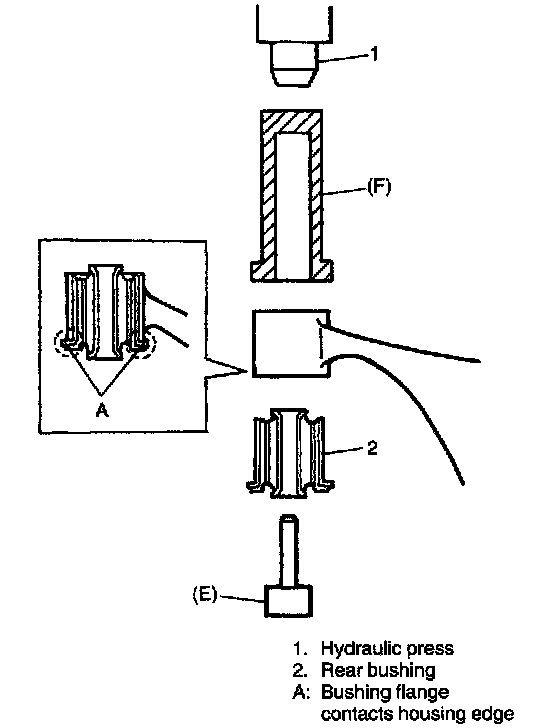
2. Rear bushing
Press-fit rear bushing until its flange contacts housing edge of control arm, use special tools as shown.
Special Tool
(E): 09925-58210
(F): 09913-85210
NOTE: When press-fitting bushing, compounding oil or soap water applied to inside of control arm housing will facilitate work.
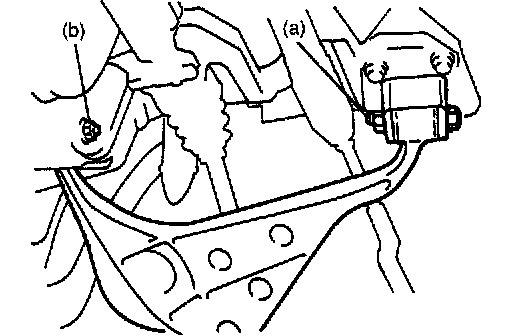
3. Install control arm to chassis.
Tighten suspension arm nut to specified torque after lowering hoist and vehicle in non-loaded condition.
Tightening Torque:
(a): 85 Nm (8.5 kg-m, 61.5 ft. lbs.)
(b): 127 Nm (12.7 kg-m, 92.0 ft. lbs.)
4. As installation procedure hereafter is the same as that for coil spring.
NOTE: For any tightening torque other than those specified in text, refer to specifications.