Valve Body
VALVE BODY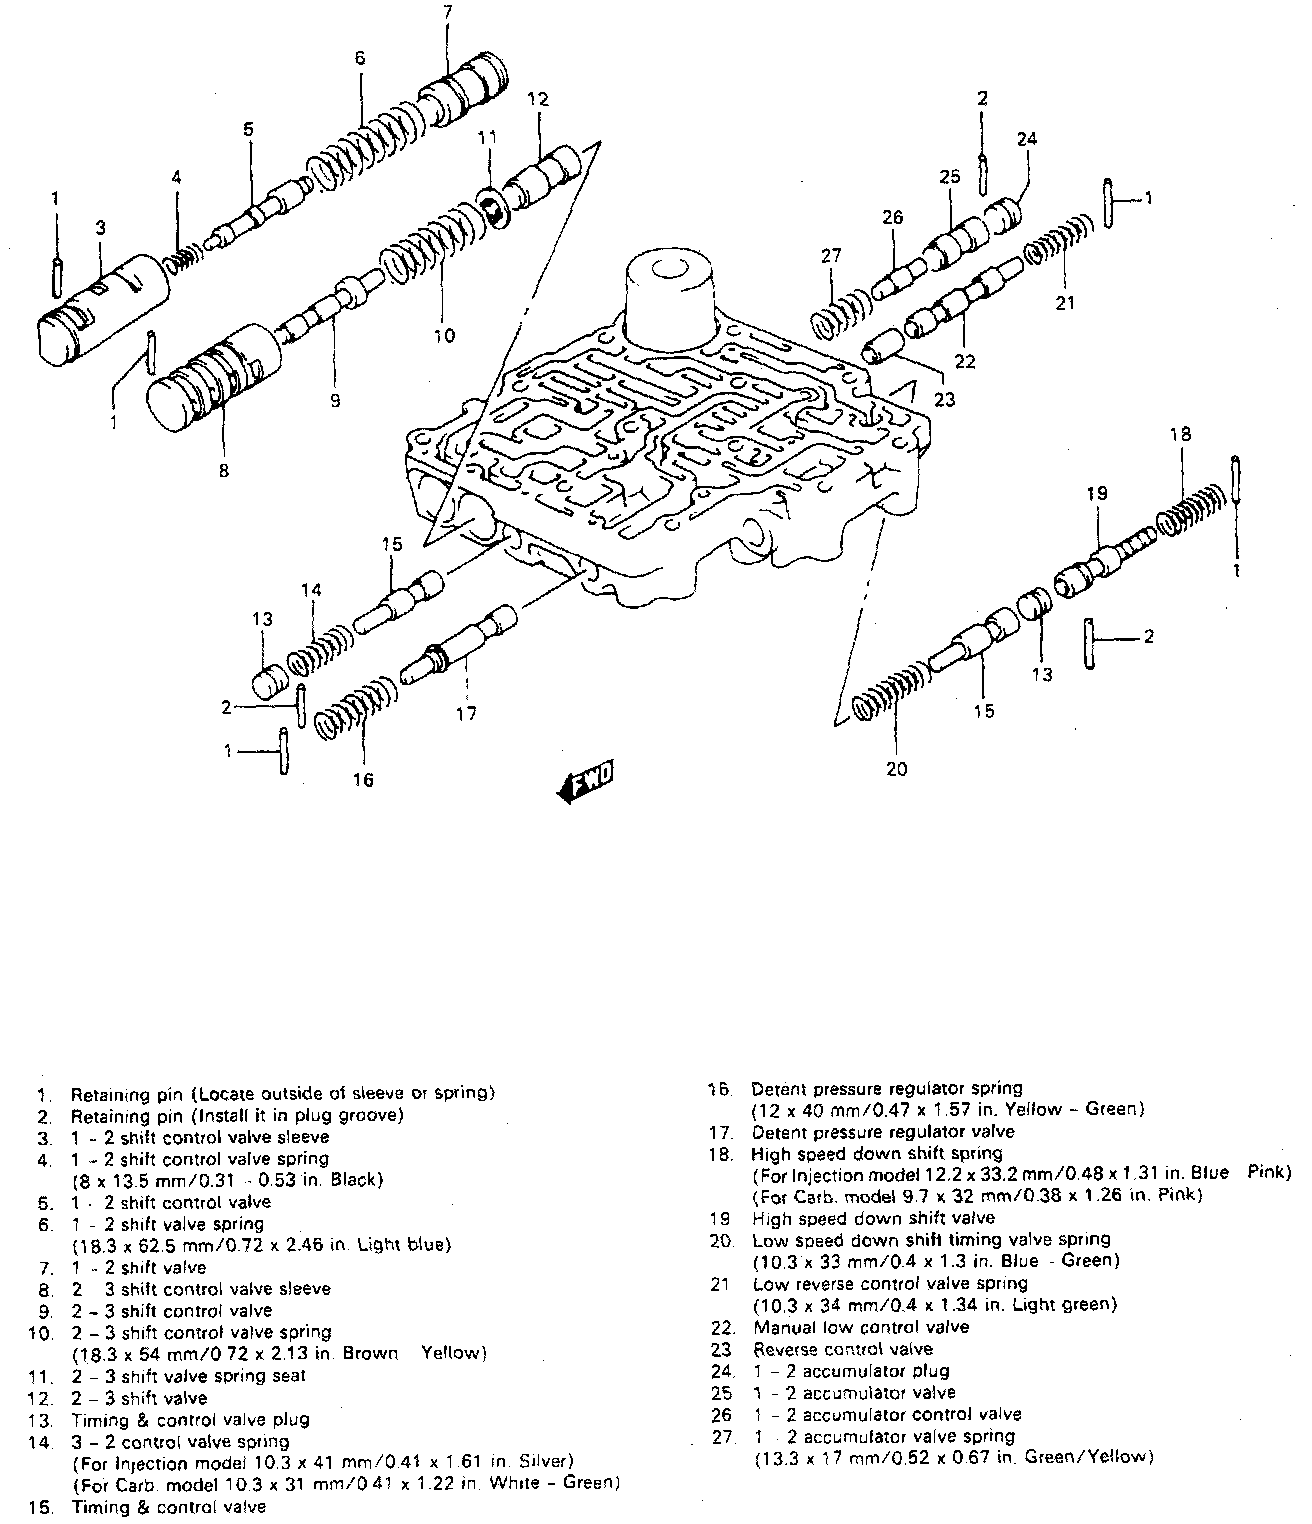
DISASSEMBLY
1. Remove manual valve and manual valve link from valve body. Do not drop manual valve.
2. Remove 1-2 shift control valve retaining pin.
1-2 shift control valve sleeve, control valve spring, control valve, 1-2 shift valve spring and 1-2 shift valve. It may be necessary to remove burrs in valve body bore made by retaining pin prior to removal of sleeves and valves.
3. Remove 2-3 shift control valve retaining pin and sleeve. Also, remove 2-3 shift control valve, spring, spring seat and 2-3 shift valve.
4. Remove 3-2 control valve retaining pin and plug. Remove 3-2 control valve spring and control valve.
5. Remove detent pressure regulator valve retaining pin, spring and detent pressure regulator valve.
6. Remove high speed downshift timing valve retaining pin and spring. Remove the valve.
7. At the same bore, remove downshift timing valve plug retaining pin and remove downshift timing valve plug. Remove low speed downshift timing valve and spring.
8. Remove low and reverse control valve retaining pin. Remove spring, manual low control valve, and reverse control valve.
9. Remove 1-2 accumulator plug retaining pin, plug, 1-2 accumulator valve, 1-2 accumulator control valve and spring.
NOTE:
^ A 2.8-3.0 mm (0.11 inch) diameter pin remover is necessary to remove retaining pins (spring pins).
^ Use special care to retain springs and valves in the same order as they are removed so that they won't be mixed.
^ Do not remove accumulator piston.
INSPECTION AND INSTALLATION
CAUTION:
^ Inspection, cleaning and installation of valves should be performed in a clean area with enough light and devoid of dirt or dust.
^ Handle valve components with clean hands and tools.
^ DO NOT use paraffin to clean valve body passages and valve bores.
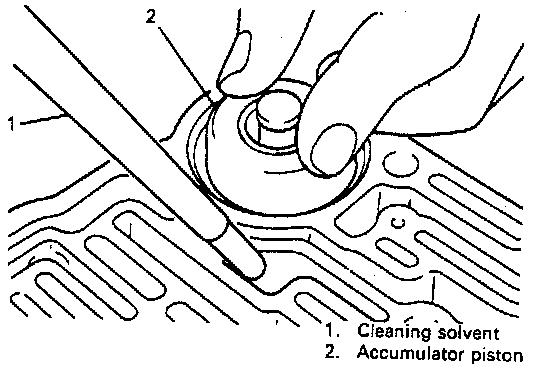
1. Pour cleaning solvent into valve body as shown in figure and wash inside of accumulator piston by compressing and decompressing piston repeatedly.
2. Wash valve body passages and valve bores thoroughly with cleaning solvent and dry them by blowing compressed air through them.
3. Inspect each valve for free movement in its respective bore in valve body. If necessary, use crocus cloth to remove small burrs on valve. Do not remove sharp edges of valves as they serve to clean inside of bores.
4. Inspect valve springs for distortion or collapsed coils.
Replace entire valve body assembly if any parts are damaged.
5. Inspect transfer plate for dents or distortion. Replace transfer plate if necessary.
6. Reinstall valves, springs, plugs and retaining pins in their proper location and order into valve body using a liberal amount of transmission fluid.