Kick-Down Valve and Modulator Valve
KICK-DOWN VALVE AND MODULATOR VALVE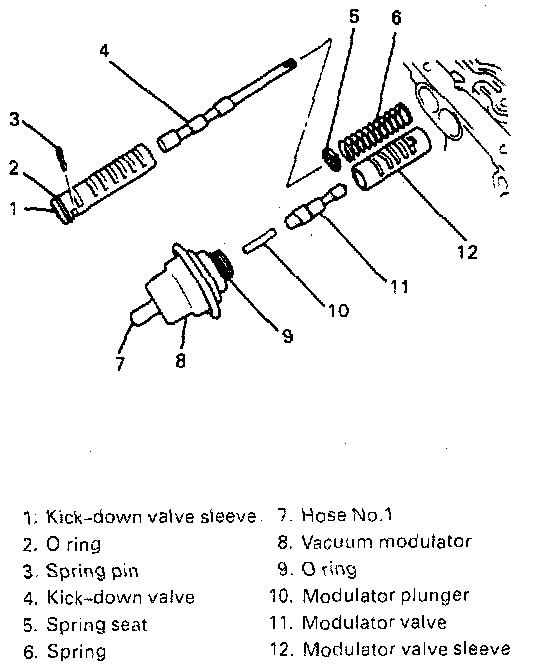
1. Coat thoroughly cleaned valve with oil and install those parts shown in figure.
2. Push kick-down valve sleeve into proper position and fix it with spring pin.
3. Install modulator valve into sleeve from its small end. Then, install sleeve into case. The tab at the end of modulator sleeve must fit in the slot at the rear of modulator valve bore.
NOTE:
^ Each sleeve should be installed with its slot faced toward oil pan.
^ Spring pin must fit in its locating groove properly.
CAUTION: Be careful not to push in kick-down valve sleeve beyond proper position. Once it is pushed in too far, it may break O-ring when it must be pushed back to proper position.
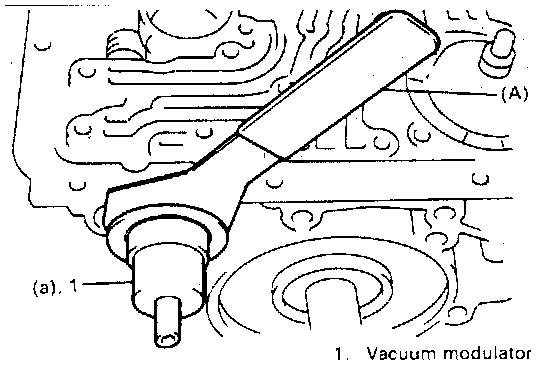
4. Install a new O-ring to vacuum modulator and then screw in modulator with its plunger. Use special tool to tighten it.
Tightening Torque (a): 52 Nm (5.2 km-m, 38 ft. lbs.)
Special Tool (A): 09920-36020/J-23100
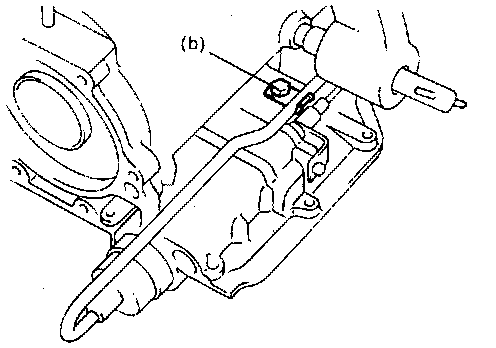
5. Connect vacuum modulator pipe and hose No.1 as they were originally connected.
Tightening Torque (b): 13 Nm (1.3 kg-m, 9 ft. lbs.)