Automatic Transmission Removal and Installation
DISMOUNTING OF TRANSMISSION (WITH TRANSFER IF EQUIPPED)IN CABIN
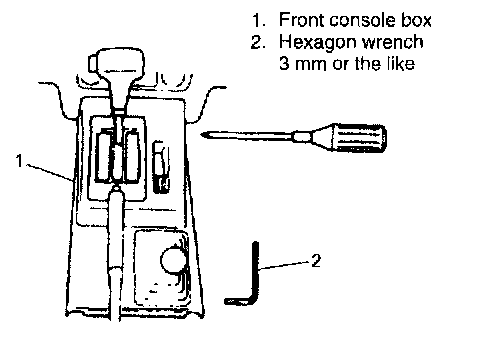
1. Remove clips at the front of rear console box.
NOTE: To remove clip, push in its center pin first.
2. Remove screws at the front and clips at the rear, and then remove front console box.
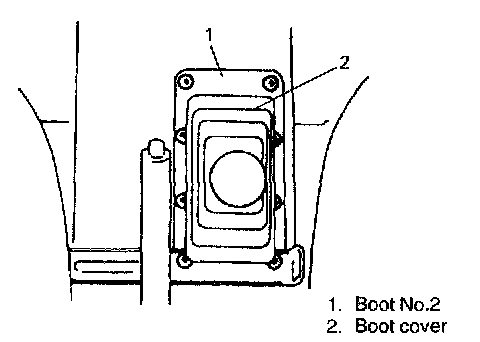
3. Remove boot cover and boot No. 2 (if equipped)
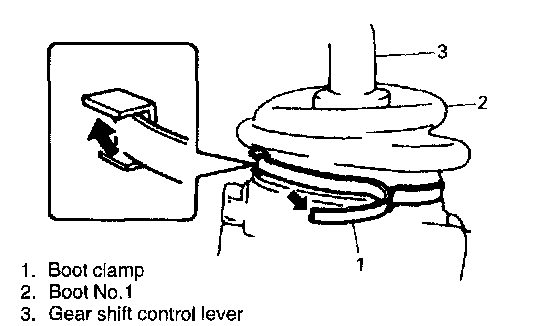
4. Remove boot clamp and then remove boot No. 1 from transfer gear shift lever case. (if equipped)

5. With transfer shift control case cover pushed down with fingers, turn it counterclockwise and take out shift control lever. (if equipped)
IN ENGINE ROOM
1. Remove battery, dipstick and oil filler tube.
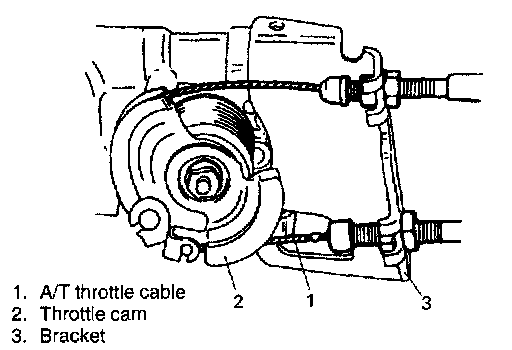
2. Disconnect A/T throttle cable from throttle cam and bracket.
3. Disconnect wiring harness couplers.
4. Remove starter motor. But don't disconnect its wiring harness.
5. Remove transmission to engine bolts.
NOTE: Right side bolt is longer.
ON LIFT
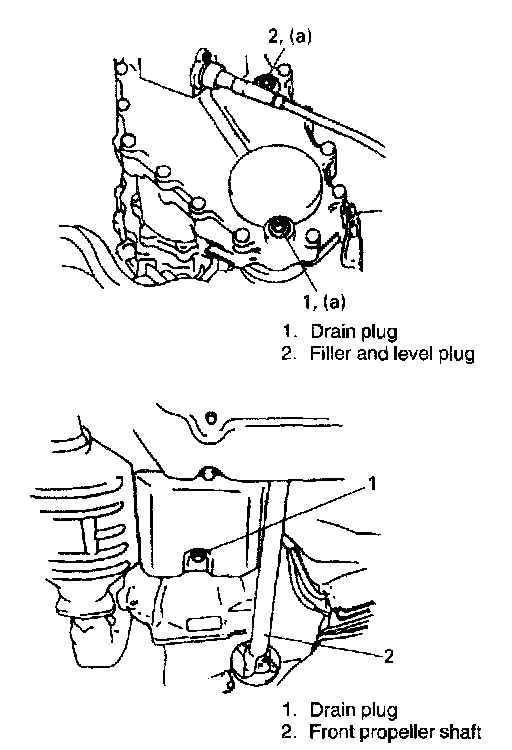
1. Drain transfer oil for 4WD vehicle or A/T fluid for 2WD vehicle.
NOTE: If 4WD automatic transmission is overhauled later on, draining A/T fluid at this point will facilitate work.
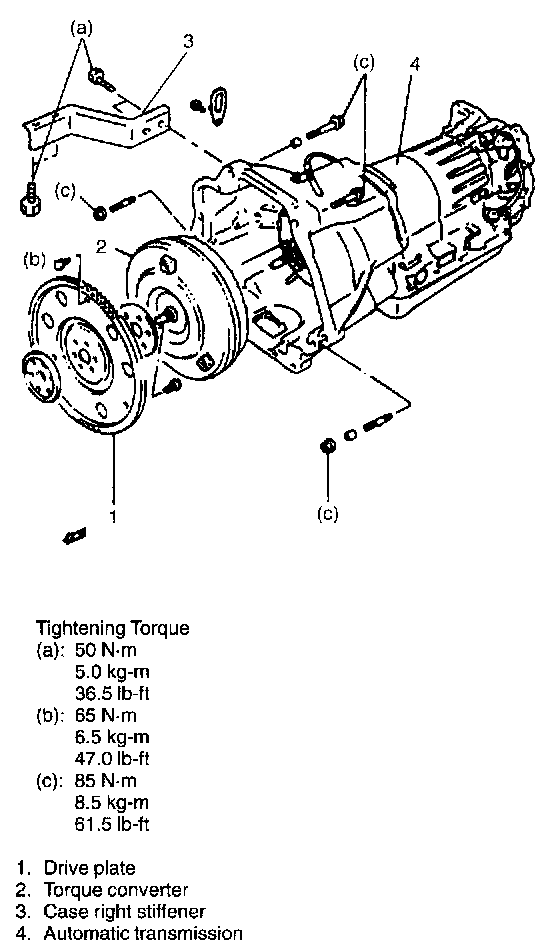
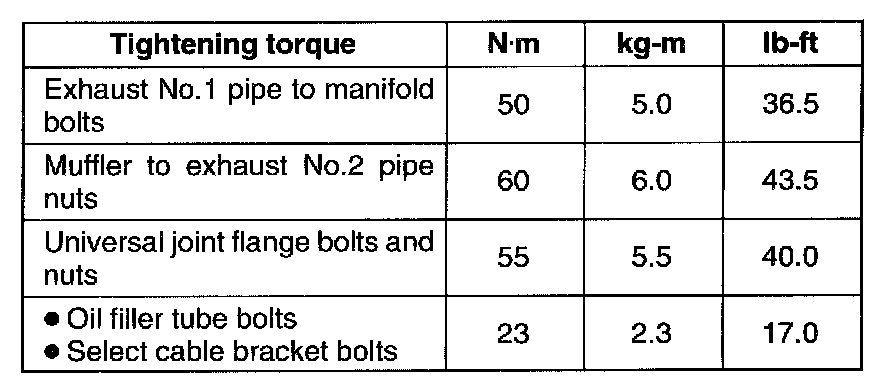
Tightening Torque
(a): 23 Nm (2.3 kg-m, 17.0 ft. lbs.)
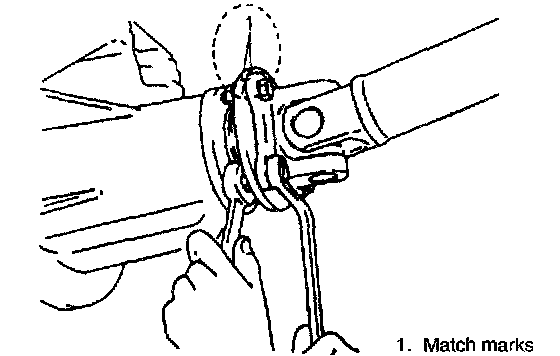
2. Before removing propeller shaft, give match marks on joint flange and propeller shaft as shown in image.
3. Remove universal joint flange bolts and take out rear propeller shaft.
4. Likewise, take out front propeller shaft. (if equipped)
5. Remove nut from the end of select cable and E-ring from bracket to set cable free.
6. Remove select cable bracket by removing its 2 bolts.
7. Remove exhaust pipe No.1 and No.2.

8. Remove transmission stiffener (right side).
9. Unclamp and disconnect oil cooler hoses from pipes.
NOTE: To avoid leakage of transmission fluid, plug open ends of oil cooler pipes and hoses right after they are disconnected.
10. Remove torque converter housing lower plate.
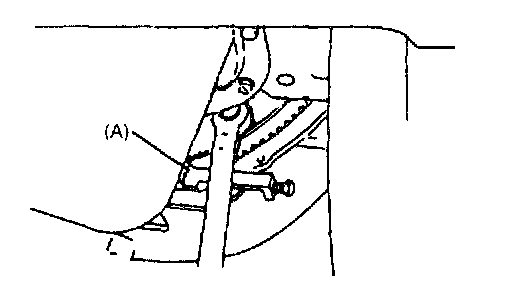
11. Holding drive plate stationary with special tool, remove torque converter mounting bolts with wrench.
Special Tool
(A): 09927-56010
12. Remove engine to transmission nuts.
13. Remove speedometer cable end nut and disconnect cable.
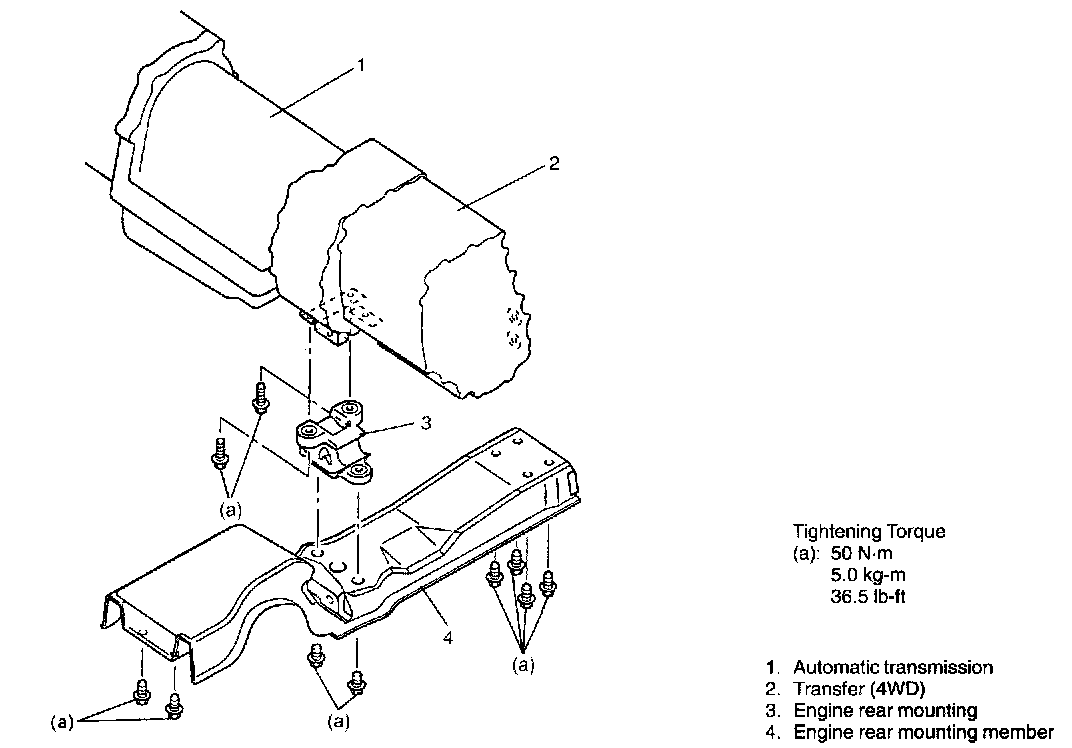
14. Apply transmission jack and take off rear mounting member by removing its bolts.
15. With transmission (and transfer if equipped) assembly held up on jack, move them to the rear and lower them including torque converter.
WARNING: Transmission (and transfer if equipped) assembly may tilt rearward on jack. It is recommended to use an auxiliary arm of lack for the purpose of safety.
AFTER DISMOUNTING
WARNING: Be sure to keep transmission (and transfer if equipped) assembly horizontal throughout the work. Should they be tilted, torque converter may fall off and cause personal injury and A/T fluid may flow out.
1. Remove wiring harness and breather hoses.
2. Remove transfer by removing its 12 bolts, if equipped.
REMOUNTING
WARNING: When moving transmission assembly with torque converter equipped in it, be sure to keep it horizontal. Tilting it with its front facing down may allow converter to fall off. Whereby an injury may result.
For remounting, reverse dismounting procedure. Use specified torque as given.
- Clamp wiring harness and hoses securely.
- Adjust select cable.
- Adjust A/T throttle cable.
- Refill automatic transmission fluid and check its level.
- When remounting drive plate, use specified bolts.
- Connect the battery, and confirm that engine and transmission function acceptably.