Overdrive (Case Side) Disassembly/Assembly
OVERDRIVE (CASE SIDE)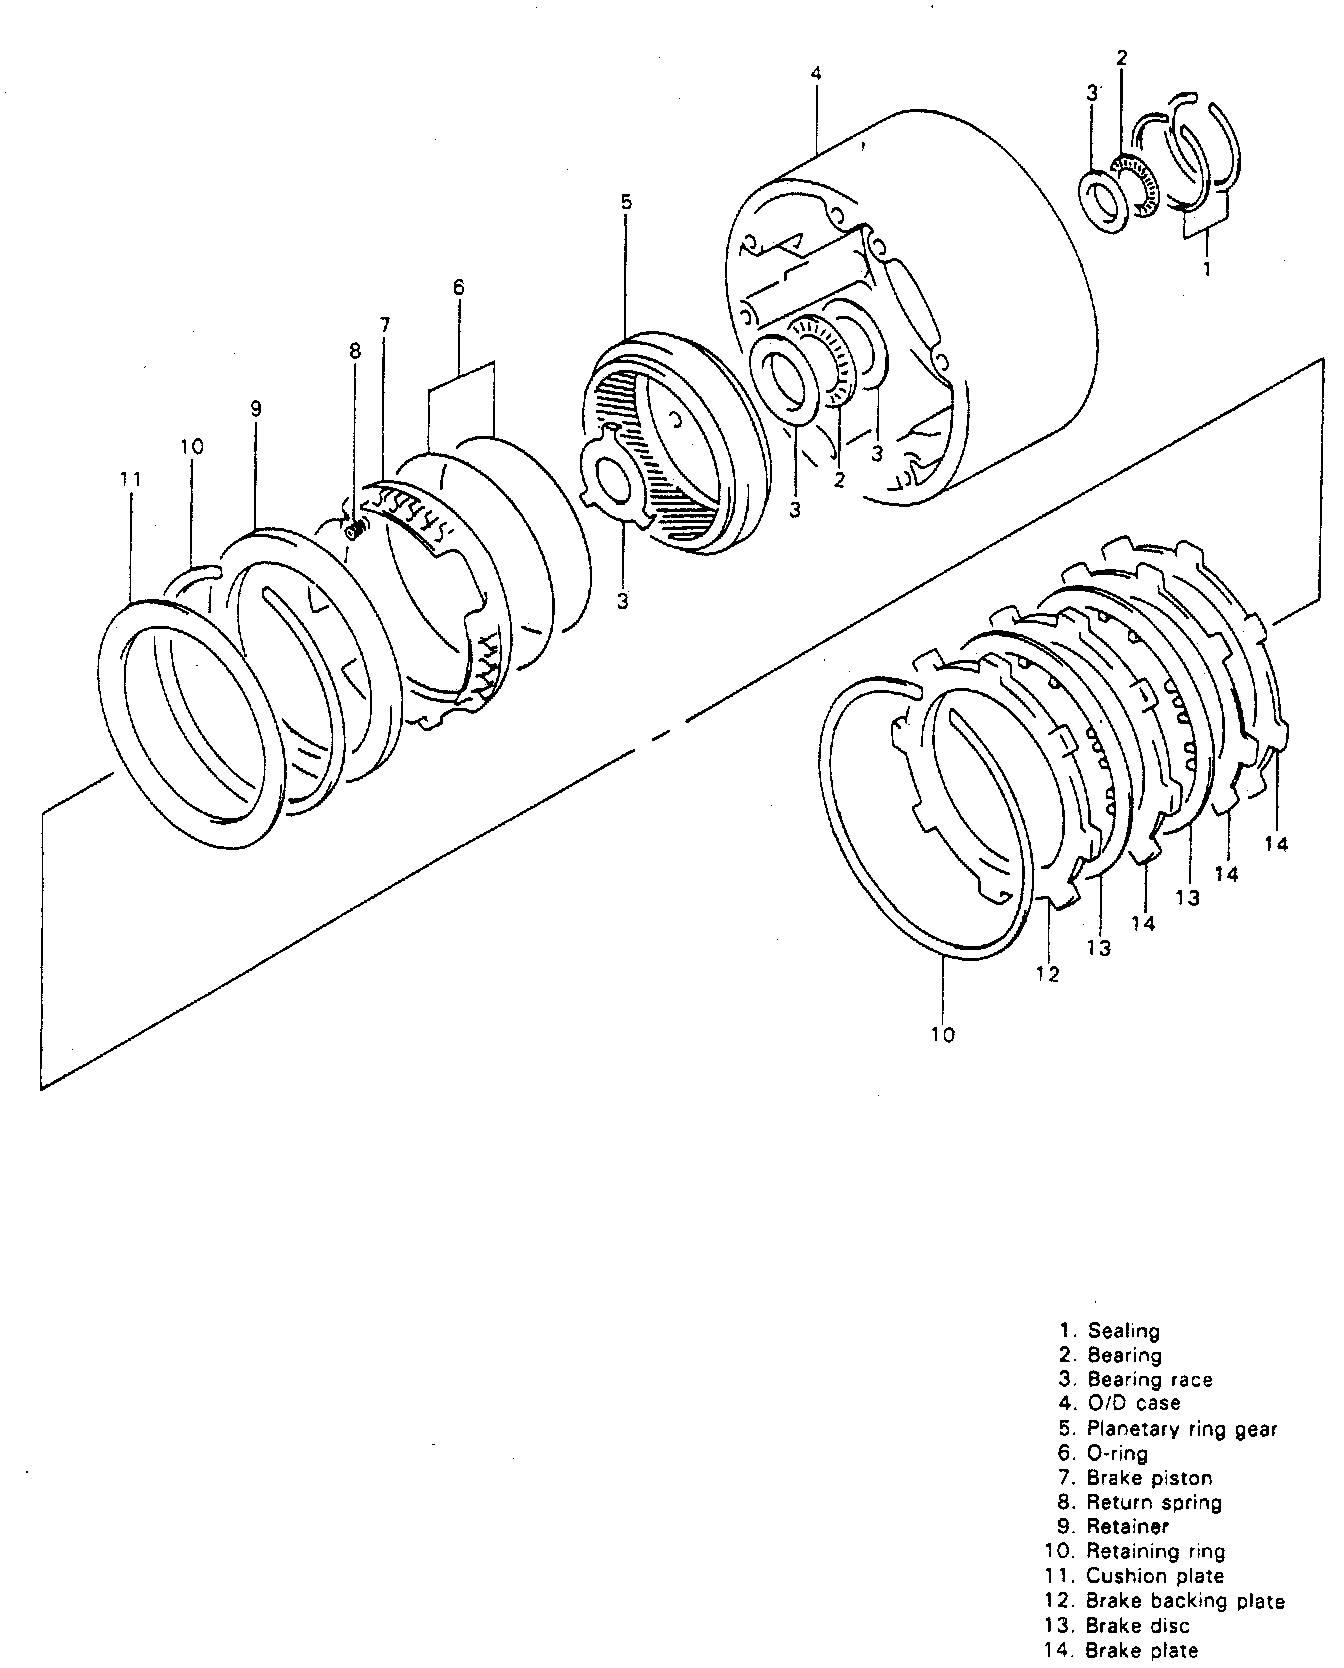
DISASSEMBLY
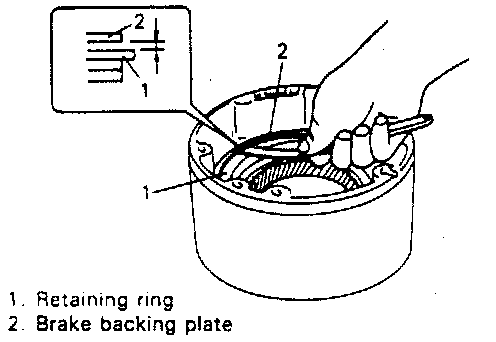
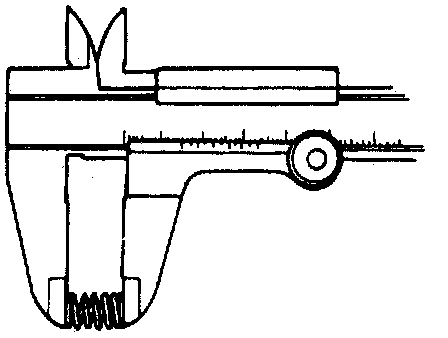
1. Measure clearance between retaining ring and brake backing plate with thickness gauge.
Standard clearance: 0.35-1.91 mm (0.014-0.075 inch)
If it is not within standard range, replace brake disc or brake plate.
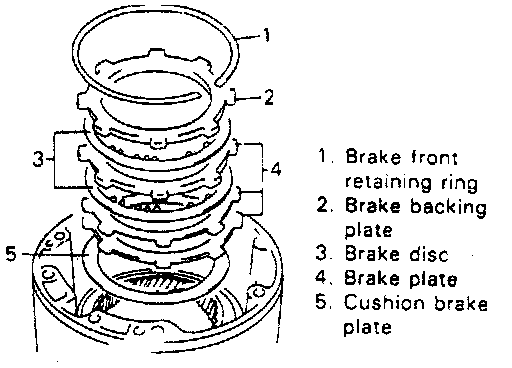
2. Remove retaining ring, brake backing plate, brake disc, brake plate, cushion brake plate in that order. Then remove planetary ring gear, thrust bearing race and thrust rear bearing.
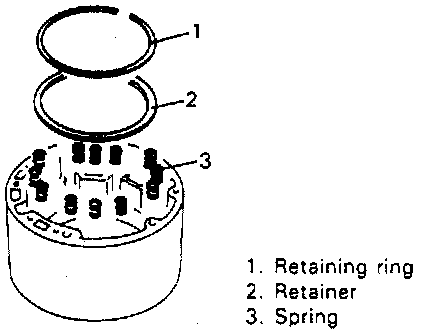
3. Remove retaining ring, retainer and piston return spring.
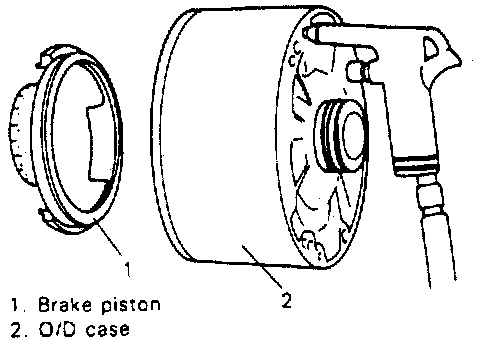
4. Blow air into fluid hole in O/D case and remove brake piston.
5. Remove brake piston inner ring and brake piston outer ring from brake piston.
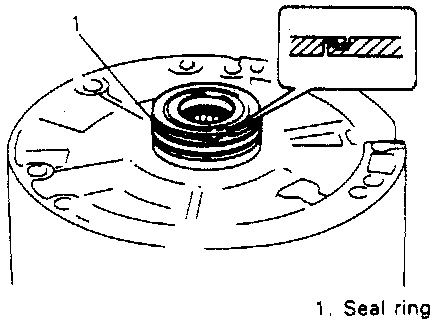
6. Unsnap seal ring.
7. Remove 2 seal rings.
NOTE: Be careful not to open seal ring more than necessary.
INSPECTION
- Measure free length of piston return spring.
Standard free length: 15.10 mm (0.594 inch)
ASSEMBLY
- Install each component by reversing removal procedure and noting following points.
- When installing rear seal ring, use care not to open it too wide.
- Apply A/T fluid to O-ring, disc, etc. before installing them.
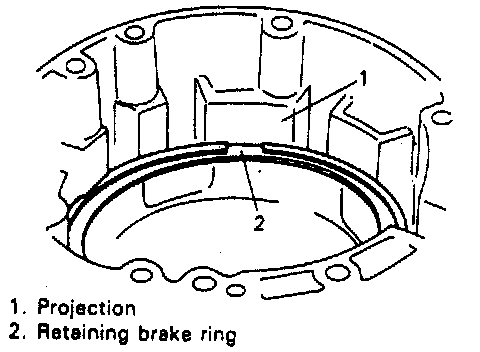
- Opening of retaining brake front ring and projection of O/D case should be matched.
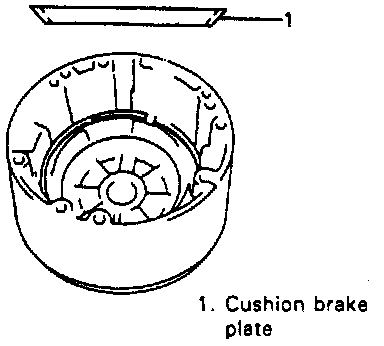
- Install cushion brake plate so that it warps convexly.
- As a final step, measure clearance between retaining brake front ring and brake backing plate again.
Standard clearance: 0.35-1.91 mm (0.014-0.075 inch)