2nd Timing Chain and Chain Tensioner
INSTALLATION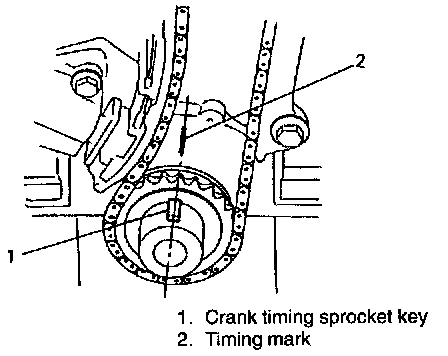
1. Check that crank timing sprocket key is in match with timing mark on cylinder block as shown in figure.
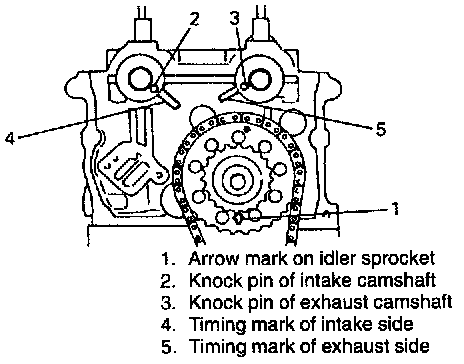
2. Check that arrow mark on idler sprocket faces upward as shown in figure.
3. Check that knock pins of intake and exhaust camshafts are aligned with timing marks on cylinder head as shown in figure.
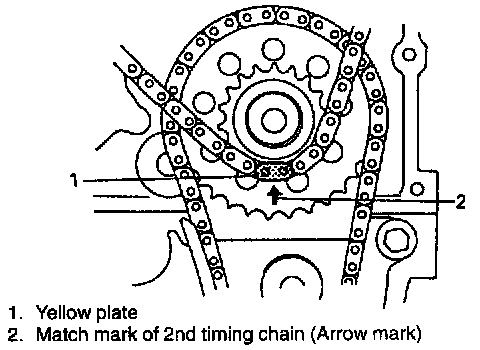
4. Install 2nd timing chain by aligning yellow plate of 2nd timing chain and match marks on idler sprocket.
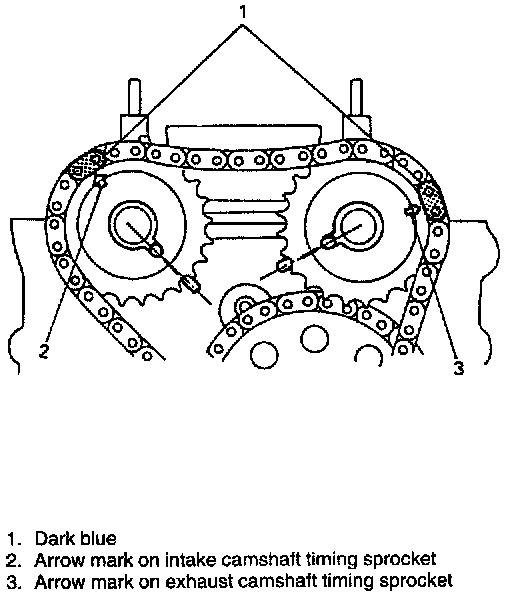
5. Install sprockets to intake and exhaust camshafts by aligning dark blue plate of 2nd timing chain, match marks on intake sprocket and exhaust sprocket respectively.
CAUTION: Do not turn camshaft more than necessary. If turned excessively, valve and piston may get damaged.
NOTE: As an arrow mark is provided on both sides, camshaft timing sprocket has no specific installation direction.
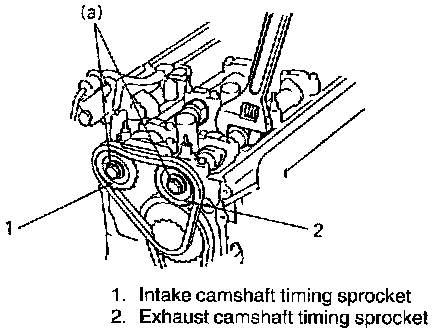
6. Install intake and exhaust camshaft timing sprocket bolts. To install it, fit a spanner to hexagonal part at the center of camshaft to hold stationary.
Tightening Torque (a): 80 Nm (57.5 ft. lbs.)

7. Plunger pushed back into body, insert stopper into body. After inserting it, check to make sure that plunger will not come out.
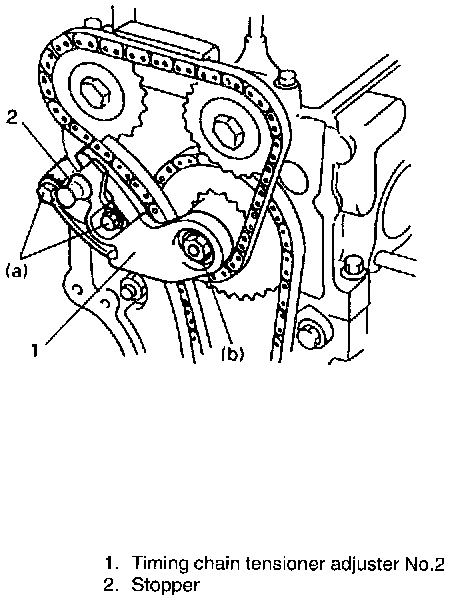
8. Install timing chain tensioner adjuster No.2 with gasket.
Tightening Torque
(a): 11 Nm (8.0 ft. lbs.)
(b): 45 Nm (33.0 ft. lbs.)
9. Pull out stopper form timing chain tensioner adjuster No.2.
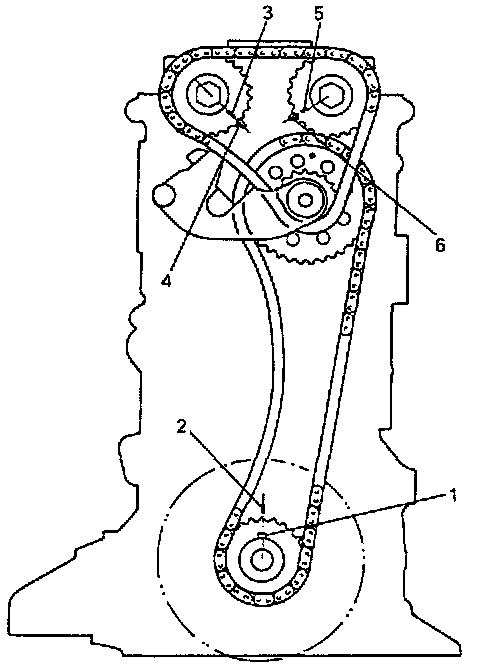
10. Turn crankshaft two rotations clockwise then align timing mark on crankshaft and timing mark on cylinder block as shown in figure.
Check that timing marks of cylinder head and cylinder block are in match with match marks on sprockets respectively.
11. Apply oil to timing chains, tensioner, tensioner adjusters, sprockets and guides.
12. Install timing chain cover.
Refer to item TIMING CHAIN COVER for installation.
13. Install cylinder head cover.
Refer to item CYLINDER HEAD COVER for installation.
14. Install oil pan and oil pump strainer.
Refer to item OIL PAN AND OIL PUMP STRAINER for installation.
15. Check to ensure that all removed parts are back in place.
Install if any.
16. Refill cooling system with coolant, front differential with gear oil and engine with engine oil.
17. Verify that there is no water leakage and oil leakage at each connection.
18. Check wheel alignment.