1st Timing Chain and Chain Tensioner
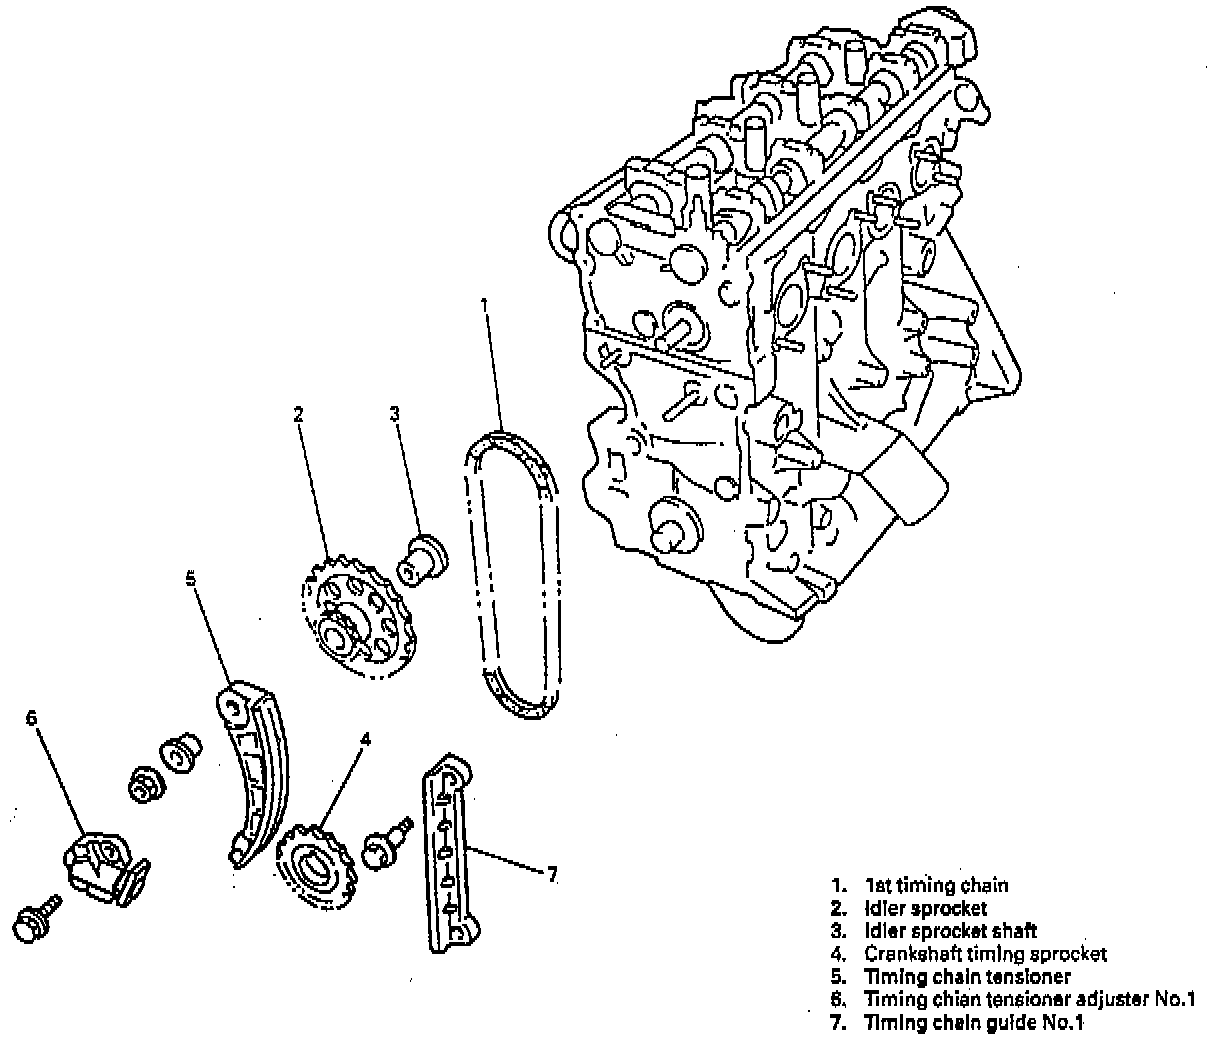
REMOVAL
1. Disconnect negative cable at battery.
2. Drain engine oil.
3. Drain coolant.
4. Remove oil pan and oil pump strainer.
Refer to item OIL PAN AND OIL PUMP STRAINER for removal.
5. Remove cylinder head cover.
Refer to item CYLINDER HEAD COVER for removal.
6. Remove timing chain cover.
Refer to item TIMING CHAIN COVER for removal.
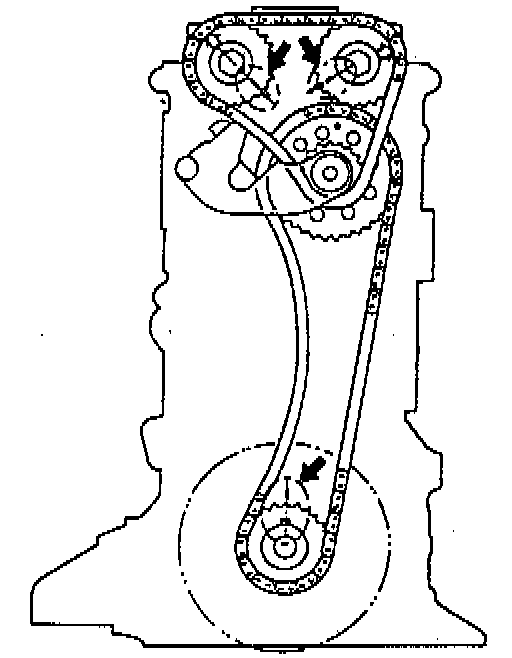
7. For reinstallation of timing chain, turn crankshaft so that timing marks on cylinder head and cylinder block match with those on sprockets as shown in figure.
8. Remove 2nd timing chain. Refer to item 2ND TIMING CHAIN AND CHAIN TENSIONER for removal.

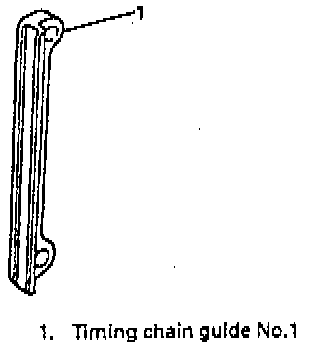
9. Remove timing chain guide No.1.
10. Remove timing chain tensioner adjuster No.1.
11. Remove timing chain tensioner.
12. Remove idler sprocket and 1st timing chain.
13. Remove crankshaft timing sprocket.
INSPECTION
Timing Chain Guide No.1.
- Check shoe for wear or damage
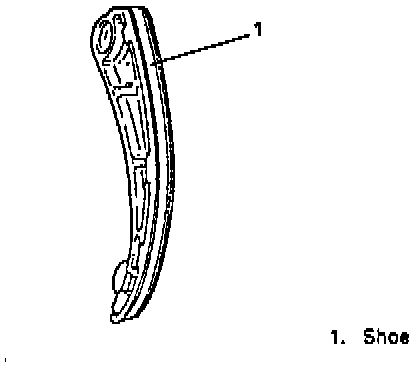
Timing Chain Tensioner
- Check shoe for wear or damage.
Crankshaft Riming Sprocket
- Check teeth of sprocket for wear or damage.
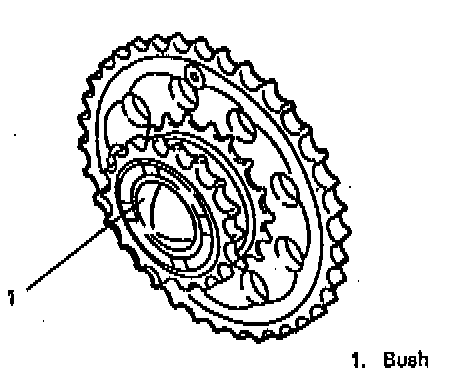
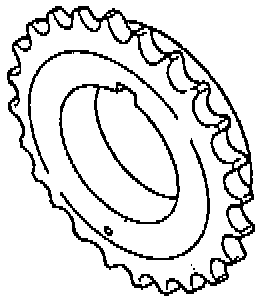
Idler Sprocket
- Check teeth and bush of sprocket for wear or damage.

1st Timing Chain
- Check timing chain for wear or damage.
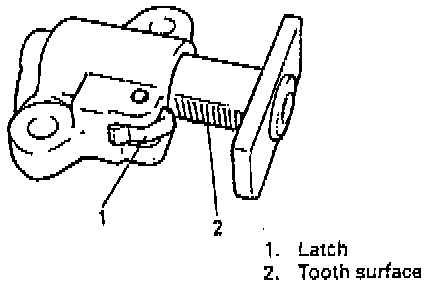
Timing Chain Tensioner Adjuster No.1
- Check that latch and tooth surface are free from damage and latch functions properly.
INSTALLATION
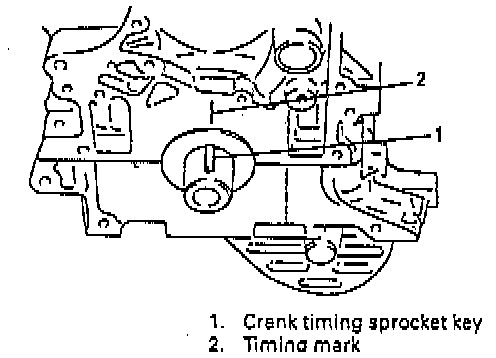
1. Check that crank timing sprocket key is in match with timing mark on cylinder block.
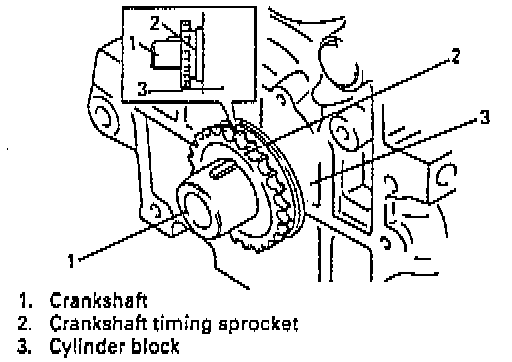
2. Install crankshaft timing sprocket as shown in figure.
3. Apply oil to bush of idler sprocket.
4. Install idler sprocket and sprocket shaft.
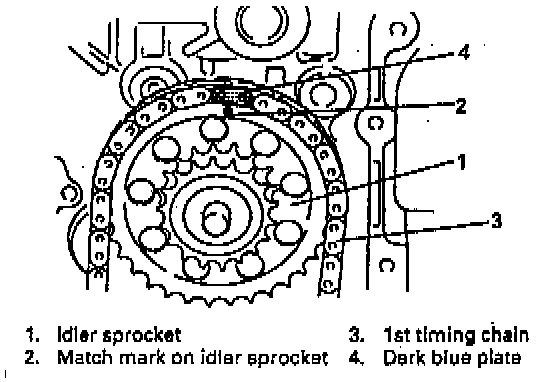
5. Install 1st timing chain by aligning dark blue plate of 1st timing chain and match mark on idler sprocket.
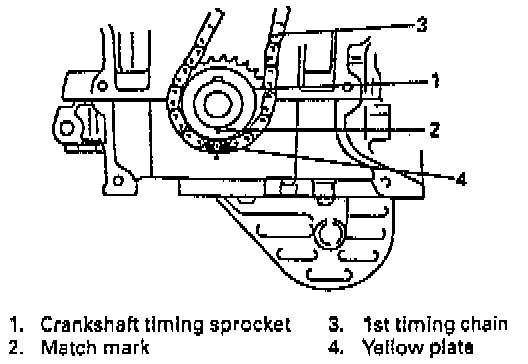
6. Bring yellow plate of 1st timing chain into match with match marks on crankshaft timing sprocket.
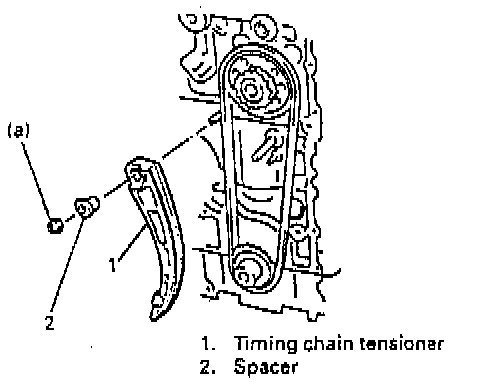
7. Install timing chain tensioner as shown in figure.
Tightening Torque (a): 25 Nm (18.5 ft. lbs.)
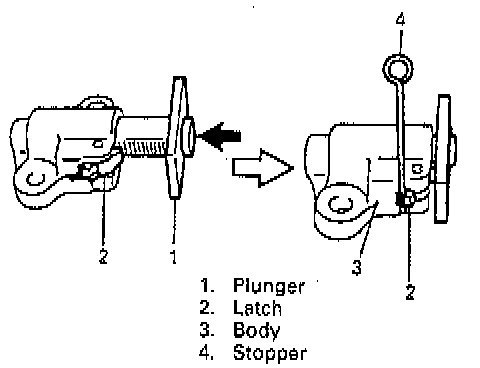
8. With latch of tensioner adjuster No.1 returned and plunger pushed back into body, insert stopper into latch and body. After inserting it, check to make sure that plunger will not come out.
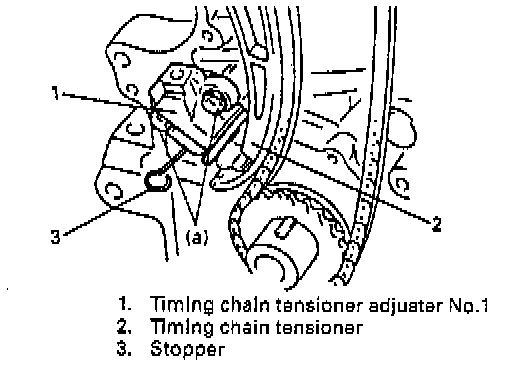
9. Install timing chain tensioner adjuster No.1.
Tightening Torque (a): 11 Nm (8.0 ft. lbs.)
10. Pull out stopper from adjuster No.1.
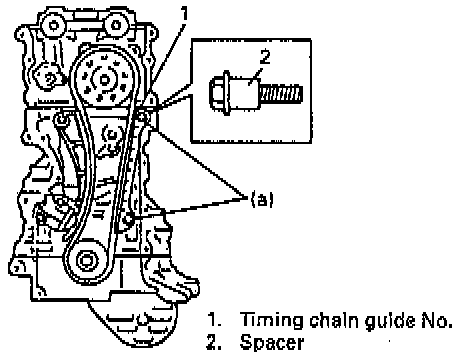
11. Install timing chain guide No.1.
Tightening Torque (a): 11 Nm (8.0 ft. lbs.)
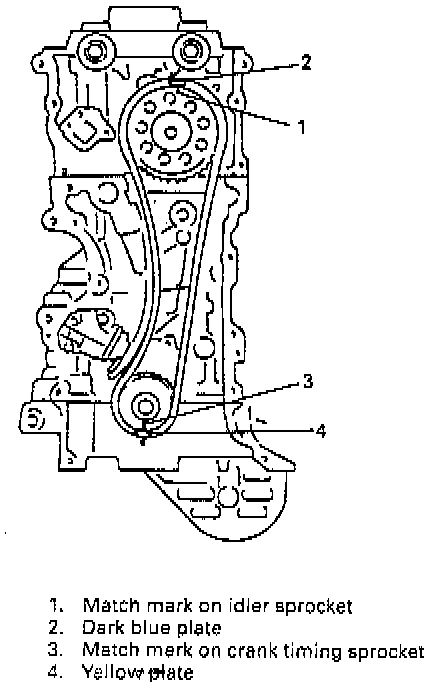
12. Check that dark blue and yellow plate of 1st timing chain are in match with match marks on sprockets respectively.
13. Install 2nd timing chain.
Refer to item 2ND TIMING CHAIN AND TENSIONER for installation.
14. Install timing chain cover.
Refer to item TIMING CHAIN COVER for installation.
15. Install cylinder head cover.
Refer to item CYLINDER HEAD COVER for installation.
16. Install oil pan and oil pump strainer.
Refer to item OIL PAN AND OIL PUMP STRAINER for installation.
17. Install cooling system and other parts.
18. Refill cooling system with coolant, front differential with gear oil and engine with engine oil.
19. Verify that there is no water leakage and oil leakage at each connection.
20. Check wheel alignment.