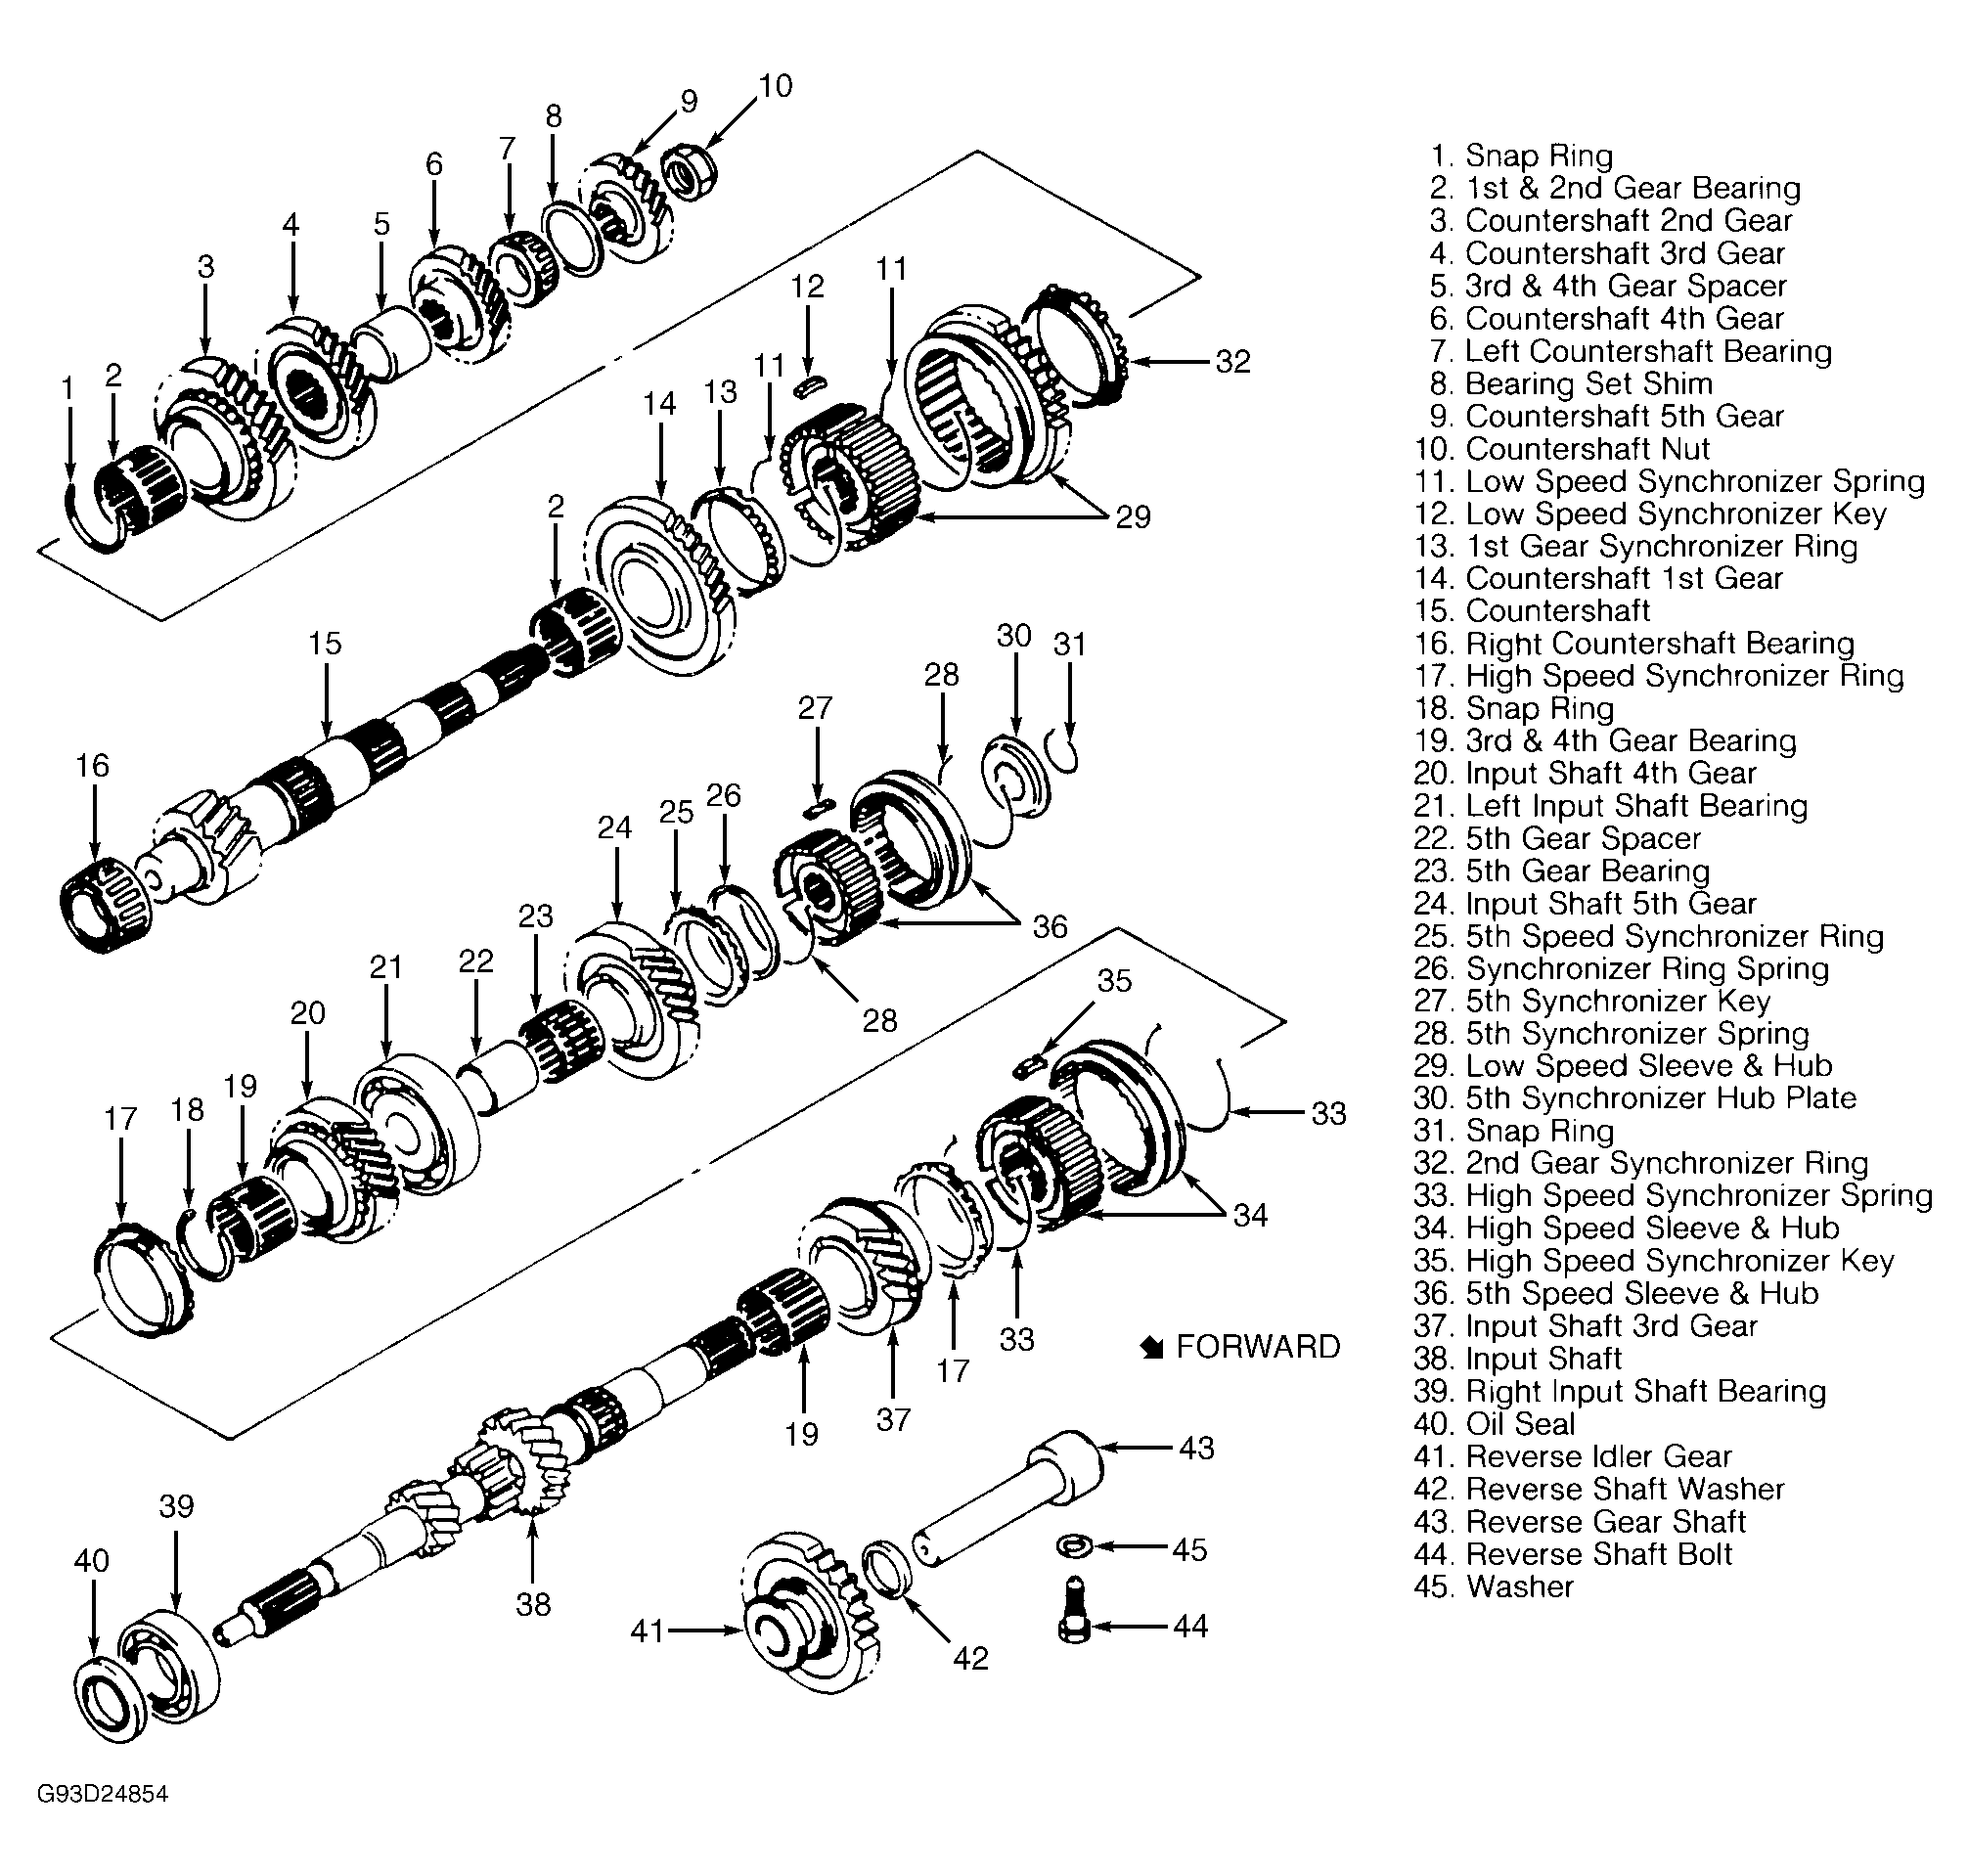
Countershaft Assembly: Reassembly
- Drive on RH bearing using a hammer and Bearing Installer (Geo J34846, Suzuki 09923-78210). Install needle bearing, apply oil and install 1st gear and 1st gear synchronizer ring. Ensure proper synchronizer ring is used. See Figure.
- Support countershaft in bearing installer and press on low speed sleeve and hub assembly using Pinion Shaft Bearing Installer (Geo J35664, Suzuki 09940-53111). Ensure synchronizer key slots are aligned with keys and free rotation of 1st gear.
- Install snap ring. Ensure snap ring is installed securely in groove. Install needle bearing, apply oil and install 2nd gear synchronizer ring and 2nd gear.
- Support countershaft in bearing installer. Press on 3rd gear and spacer using pinion shaft bearing installer with Adapter (Geo J37754, Suzuki 09913-80112). Press on 4th gear. With countershaft still supported in bearing installer, install LH bearing using Transaxle Shaft Bearing Installer (Geo J34844, Suzuki 09925-98221).
 Courtesy of GENERAL MOTORS CORP.
 Courtesy of GENERAL MOTORS CORP.