Distributor Harness - Connector Repair Procedure
90suzuki05Division: Automotive
Category: Technical
TSB No. TS 4-09 10300
Section Title: Engine
SUBJECT: REPAIR OF DISTRIBUTOR HARNESS CONNECTOR
MODEL: SIDEKICK
YEAR: 1991
The purpose of this bulletin is to provide a repair procedure for the harness connector at the distributor on 1991 Sidekicks.
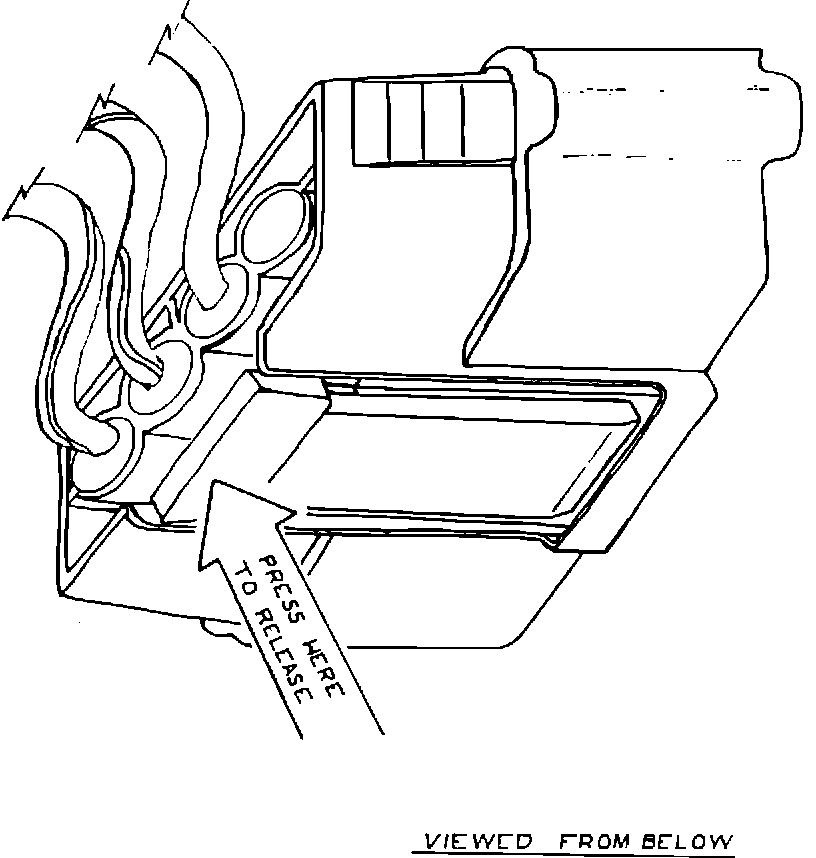
STEP 1
To remove the connector from the distributor: Press the tab at the bottom, rear of the connector. Then pull the connector away from the distributor.

STEP 2
Fashion a special tool from an old hacksaw blade as illustrated. The illustration is drawn full sized so it can be used as a template.
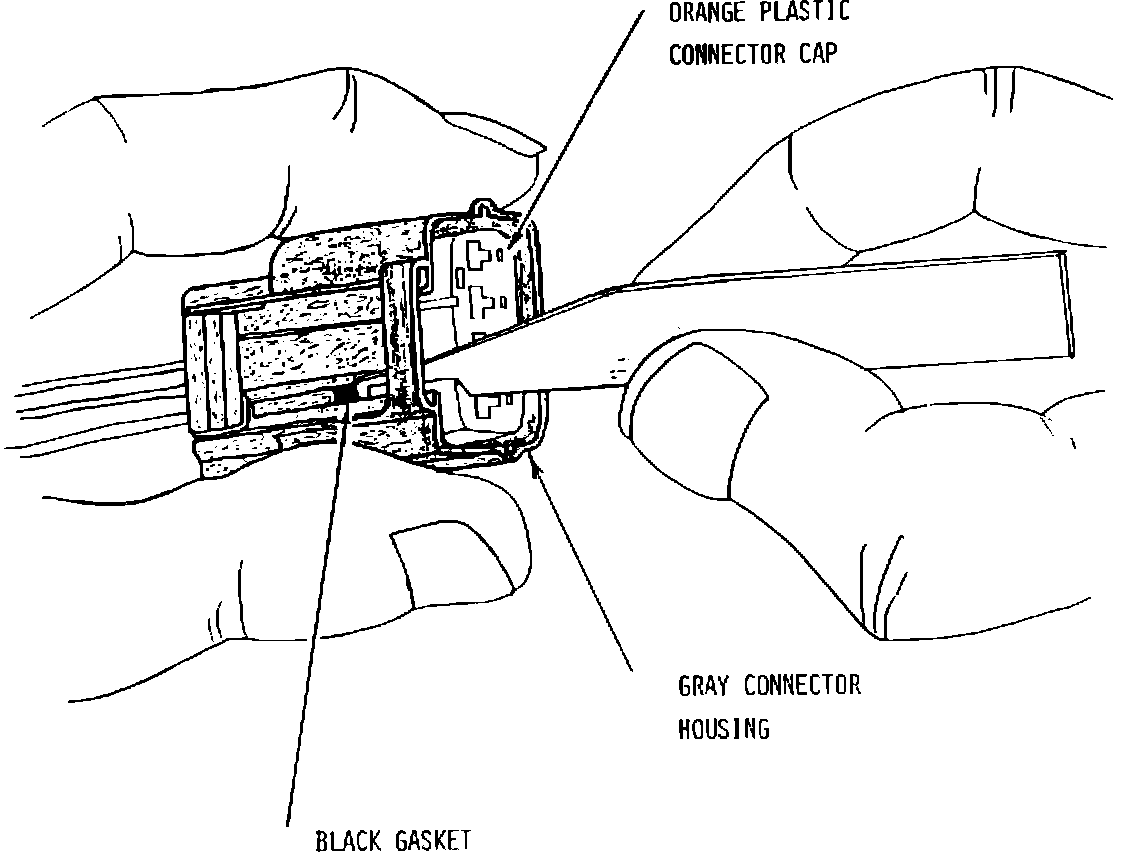
STEP 3
Using the special tool, pull the "orange plastic connector cap" out of the "connector housing" as shown. The cap fits tightly so this will require some force.
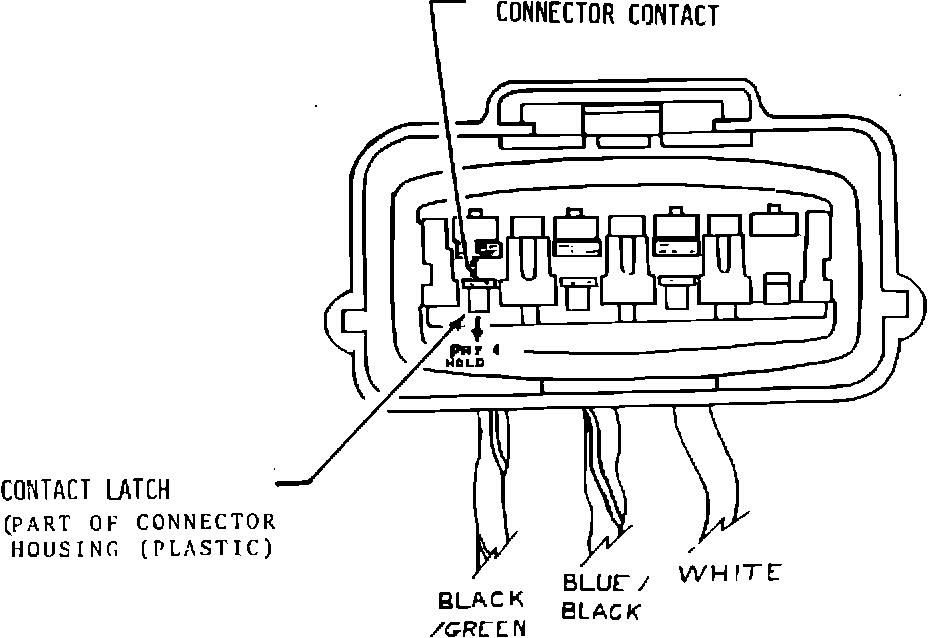
STEP 4
Pry the "contact latch" down and hold in the direction indicated by the arrow. While holding, pull the contact out the back of the connector housing.
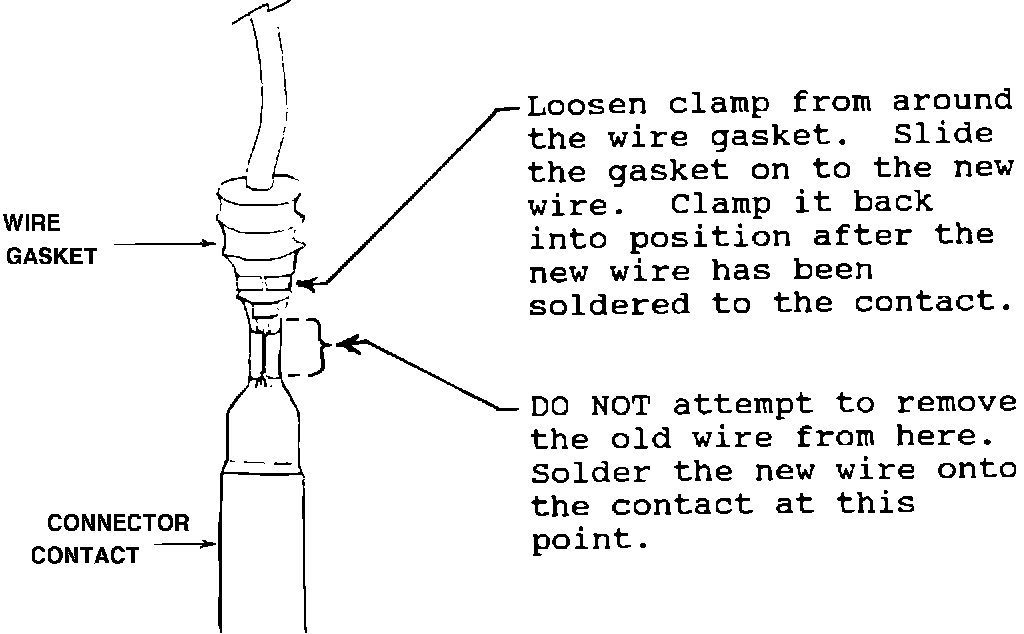
STEP 5
The existing contact and gasket will need to be reused. And the new wire will have to be soldered onto the contact.
STEP 6
After wires have been resecured to the contact, push the contact back into the housing -- the latch will "snap" into position when the connector is full seated.
STEP 7
Snap the "orange plastic connector cap" back into position.