October 30: LEMON manuals on a temporary server, it is slow and having issues, download the manuals you need! Later in November we will switch back to the fast server.
CVT Control Relay Check
- Remove the CVT control relay.
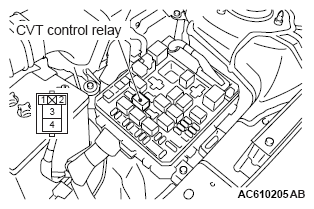 Courtesy of MITSUBISHI MOTOR SALES OF AMERICA.
- Use a jumper wire to connect the positive battery terminal (+) to the CVT control relay terminal No. 2, and the negative battery terminal (-) to the terminal No. 1.
- Check for continuity between the CVT control relay terminals No. 3 and No. 4.
CVT CONTROL RELAY CONTINUITY CHECK
| Jumper wire |
Continuity between terminals No. 3 and No. 4 |
| Connect |
Yes (2 Ω or less) |
| Disconnect |
No |
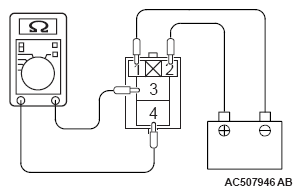 Courtesy of MITSUBISHI MOTOR SALES OF AMERICA.
- If not as specified, replace the CVT control relay.