September 30: LEMON manuals is back up on a temporary server! Slowness is possible
Power Outer Mirror Removal/Installation: Notes
- Fully open the front door glass.
- Disconnect the negative battery terminal. (See NEGATIVE BATTERY TERMINAL DISCONNECTION/CONNECTION
.)
- Remove the following parts.
- Inner garnish (See INNER GARNISH REMOVAL/INSTALLATION
.)
- Power window main switch component (to remove from driver's side) (See POWER WINDOW MAIN SWITCH REMOVAL/INSTALLATION .)
- Power window subswitch component (to remove from passenger's side) (See POWER WINDOW SUBSWITCH REMOVAL/INSTALLATION .)
- Front door trim (See FRONT DOOR TRIM REMOVAL/INSTALLATION
.)
- Disconnect the connectors.
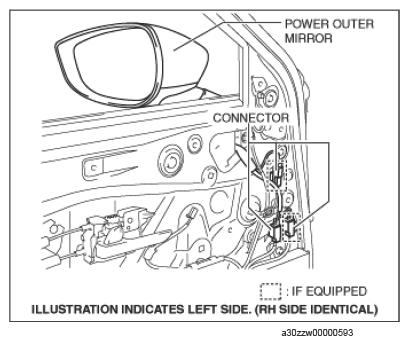 Courtesy of MAZDA MOTORS CORP. Courtesy of MAZDA MOTORS CORP.
|
- Move the tape-wrapped flathead screwdriver in the direction of the arrow shown in the figure below and detach the hooks on the service hole cover from the front door panel.
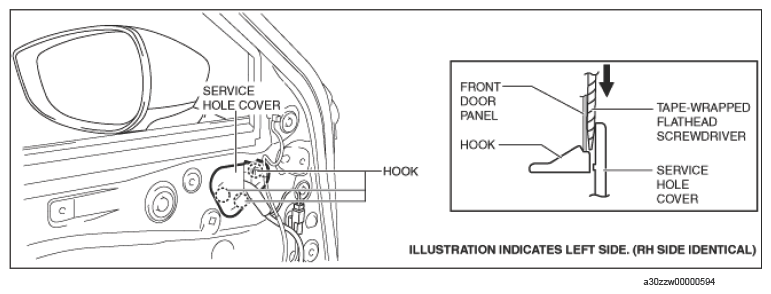 Courtesy of MAZDA MOTORS CORP. Courtesy of MAZDA MOTORS CORP.
|
- Remove the service hole cover.
- Remove the bolts.
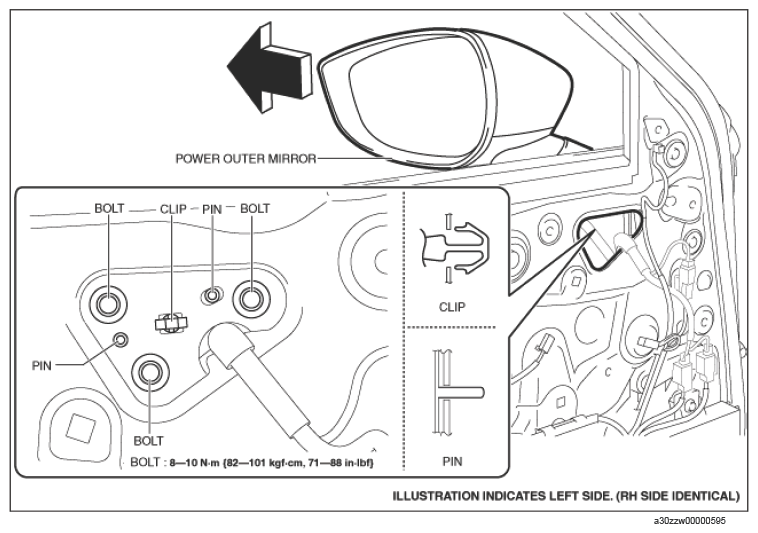 Courtesy of MAZDA MOTORS CORP.
CAUTION:
- If the clip is removed, the power outer mirror may fall off and be damaged. When removing the clip, perform the work while supporting the power outer mirror with your hand.
- Pull the power outer mirror in the direction of the arrow shown in the figure above while detaching the clip and pins.
- Remove the power outer mirror.
- Install in the reverse order of removal. (See POWER OUTER MIRROR INSTALLATION NOTE .)
- Perform the 360° view monitor system aiming. (With 360° view monitor system) (See 360°VIEW MONITOR SYSTEM AIMING
.)