September 30: LEMON manuals is back up on a temporary server! Slowness is possible
Repair Procedures: Installation
WARNING: This page is about a different variant/trim than selected.
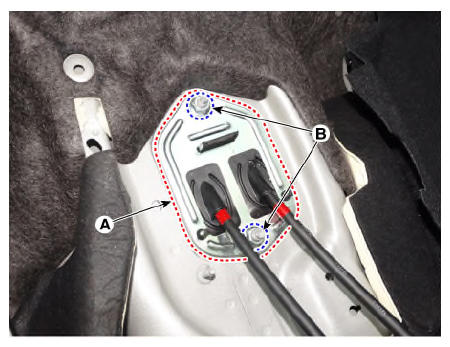
- Install the shift cable retainer (A) by tightening nuts (B).
Tightening torque:
11.8 - 14.7 N.m (1.2 - 1.5 kgf.m, 8.7 - 10.8 lb.ft)
 Courtesy of KIA MOTORS AMERICA, INC. Courtesy of KIA MOTORS AMERICA, INC.
|
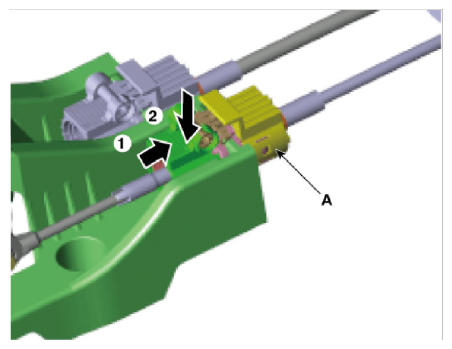
- Install the select cable.
- Install the select cable (A) from the shift lever.
 Courtesy of KIA MOTORS AMERICA, INC. Courtesy of KIA MOTORS AMERICA, INC.
|
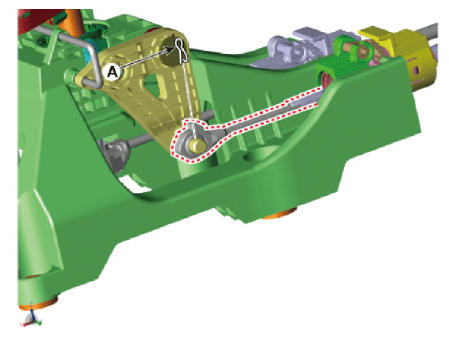
- Install the select cable to the lever pin and then insert the snap pin (A).
 Courtesy of KIA MOTORS AMERICA, INC. Courtesy of KIA MOTORS AMERICA, INC.
|
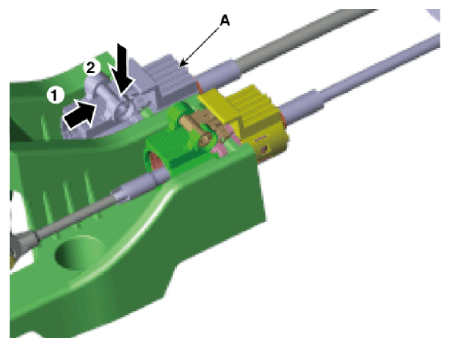
- Install the shift cable.
- Install the shift cable (A) from the shift lever.
 Courtesy of KIA MOTORS AMERICA, INC. Courtesy of KIA MOTORS AMERICA, INC.
|
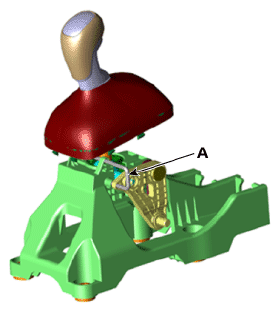
- Install the shift cable end (A).
- Check that the shift lever and control shaft are placed in the "4th" position and then install the 4th fixing pin (A).
 Courtesy of KIA MOTORS AMERICA, INC. Courtesy of KIA MOTORS AMERICA, INC.
|
- Install the control cable.
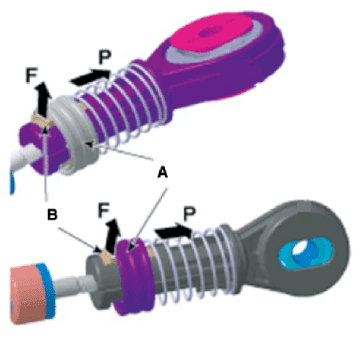
- After pulling the holder (A) in the direction of the "P", pull the lock (B) in the direction of the "F".
 Courtesy of KIA MOTORS AMERICA, INC. Courtesy of KIA MOTORS AMERICA, INC.
|
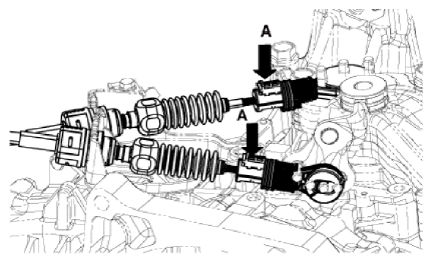
- Push the lock (A) after installing the control cable to the control shaft and cable bracket.
 Courtesy of KIA MOTORS AMERICA, INC. Courtesy of KIA MOTORS AMERICA, INC.
|
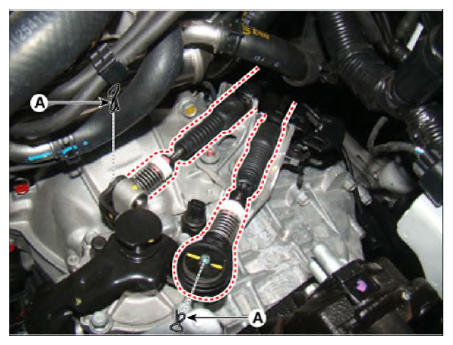
- Insert the snap pins (A).
 Courtesy of KIA MOTORS AMERICA, INC. Courtesy of KIA MOTORS AMERICA, INC.
|
- Remove the 4th fixing pin (A).
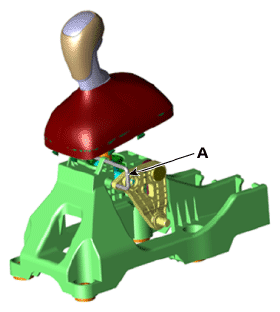 Courtesy of KIA MOTORS AMERICA, INC. Courtesy of KIA MOTORS AMERICA, INC.
|
- Check for proper operation of control shaft lever when operated (1st, 2nd, 3rd, 4th, 5th, 6th, R gear).
- Install the floor console assembly.
(Refer to Body - " FLOOR CONSOLE ASSEMBLY
")
- Install the battery and battery tray.
(Refer to Engine Electrical System - " BATTERY
")
- Install the air cleaner assembly and air duct.
(Refer to Engine Mechanical System - " AIR CLEANER
")