September 30: LEMON manuals is back up on a temporary server! Slowness is possible
Hatch Outer Handle Switch Test/Replacement
- Open the hatch, and remove the hatch lower trim (see
TRIM REMOVAL/INSTALLATION - HATCH AREA
).
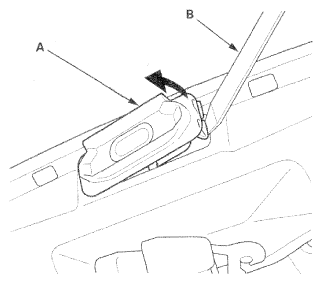
- Remove the hatch outer handle switch (A) from the hatch by plastic tool (B).
NOTE:
Take care not to scratch the seal.
 Courtesy of AMERICAN HONDA MOTOR CO., INC.
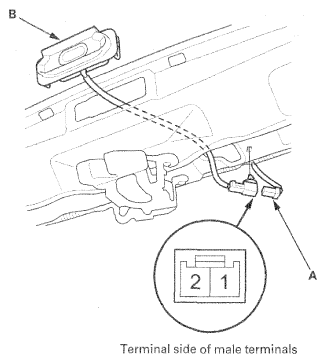
- Disconnect the 2P connector (A) from the hatch outer handle switch (B).
 Courtesy of AMERICAN HONDA MOTOR CO., INC.
- Check for continuity between tailgate outer handle switch 2P connector terminals No. 1 and No. 2.
- There should be continuity when the hatch outer handle switch is pressed.
- There should be no continuity when the hatch outer handle switch is released.
- If the continuity is not as specified, replace the hatch outer handle switch.
- Install the switch in the reverse order of removal.