Starter Solenoid: Testing and Inspection
Starter Solenoid Test
1. Remove the air intake duct.
2. Do the battery removal procedure Removal and Replacement.
3. Remove the battery base.
4. Remove the harness clamp (A), then disconnect the positive starter cable (B), the motor wire (C), and the S terminal connector (D) from the starter.
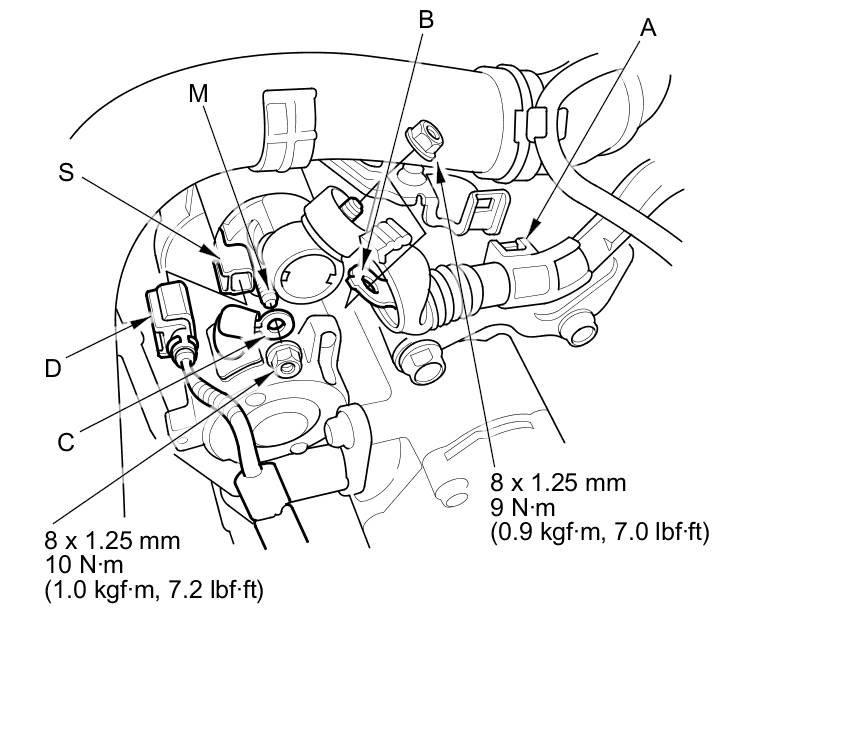
5. Check the hold-in coil for continuity between the S terminal and the armature housing (ground). There should be continuity:
- If there is continuity, go to step 6.
- If there is no continuity, replace the solenoid.
6. Check the pull-in coil for continuity between the S terminal and the M terminal. There should be continuity:
- If there is continuity, the solenoid is OK.
- If there is no continuity, replace the solenoid.
7. Connect the wire and the connector in the reverse order of removal.
8. Install the battery base.
9. Do the battery installation procedure Removal and Replacement.
10. Install the air intake duct.