September 30: LEMON manuals is back up on a temporary server! Slowness is possible
Rack End Removal and Installation: Installation
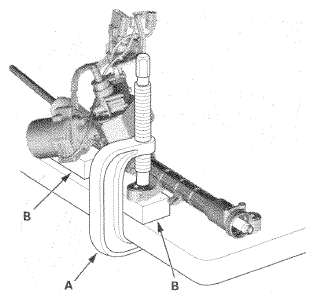
- Hold the gearbox housing using a C-clamp (A) and wooden blocks (B) to a work bench as shown. Do not clamp the cylinder part of the gearbox housing in a vise.
 Courtesy of AMERICAN HONDA MOTOR CO., INC.
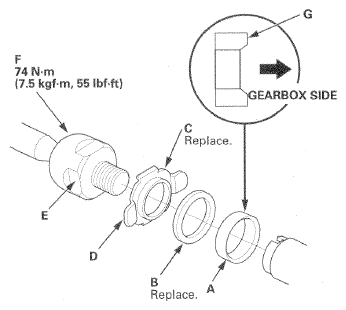
- Install the damper (A), a new spacer (B), and a new lock washer (C). Align the lock washer tabs (D) with the flat spots (E) on the rack end ball joint housing. Install the rack end (F) while holding the lock washer in place.
NOTE:
Make sure that the tapered side (G) of the damper is facing toward the gearbox.
 Courtesy of AMERICAN HONDA MOTOR CO., INC.
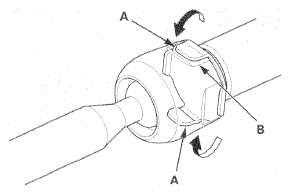
- Bend the lock washer tabs (A) back against the flat spots (B) on the rack end joint housing.
 Courtesy of AMERICAN HONDA MOTOR CO., INC.
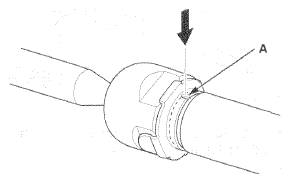
- Stake the lock washer at the stake point (A) on the rack.
 Courtesy of AMERICAN HONDA MOTOR CO., INC.
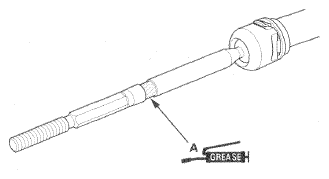
- Apply a light coat of multipurpose grease to the boot installation groove (A) on the rack end.
 Courtesy of AMERICAN HONDA MOTOR CO., INC.
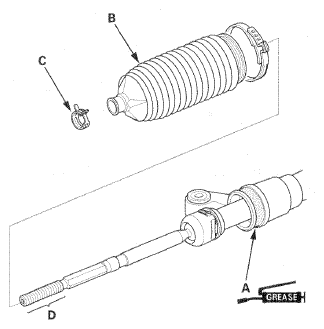
- Apply a light coat of multipurpose grease to the boot installation groove (A) around the gearbox housing. Install the boot (B) on the rack end with the tie-rod clip (C), and fit the boot end in the installation groove in the housing properly.
 Courtesy of AMERICAN HONDA MOTOR CO., INC.
- After installing the boot, wipe the grease off the threaded section (D) of the rack end.
 Courtesy of AMERICAN HONDA MOTOR CO., INC.
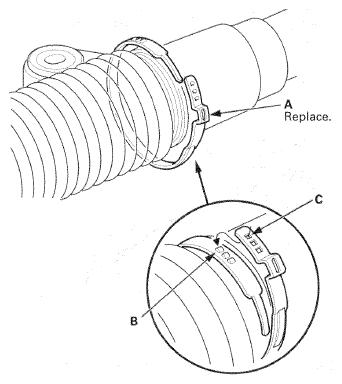
- Install a new boot band (A) by aligning the tabs (B) with the holes (C) of the band.
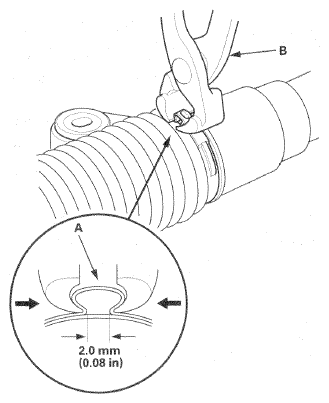
- Close the ear portion (A) of the boot band with commercially available boot band pliers, Oetiker 1098 or equivalent (B).
 Courtesy of AMERICAN HONDA MOTOR CO., INC.
- Slide the rack right and left to be certain that the boots are not deformed or twisted.
- Install the heat shield (A).
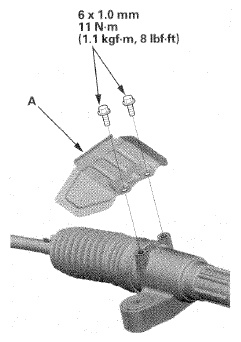 Courtesy of AMERICAN HONDA MOTOR CO., INC.
- Install the tie-rod end and the locknut to the rack end.
- Install the steering gearbox (see INSTALLATION
).