September 30: LEMON manuals is back up on a temporary server! Slowness is possible
Fuel Tank Replacement: Removal
- Remove the fuel fill cap.
- Relieve the fuel pressure (see FUEL PRESSURE RELIEVING
).
- Remove the rear tray (see
TRIM REMOVAL/INSTALLATION - REAR TRAY AREA
).
- Drain the fuel tank: Remove the fuel tank unit (see FUEL PUMP/FUEL GAUGE SENDING UNIT REPLACEMENT
). Using a hand pump, hose, and a container suitable for fuel, draw the fuel from the fuel tank.
- Reinstall the fuel tank unit.
- Remove the brake fluid from the master cylinder reservoir with a syringe.
NOTE:
Do not spill brake fluid on the vehicle; it may damage the paint; if brake fluid does contact the paint, wash it off immediately with water.
- Remove the access panel (A) from the floor, and disconnect the fuel tank 5P connector (B).
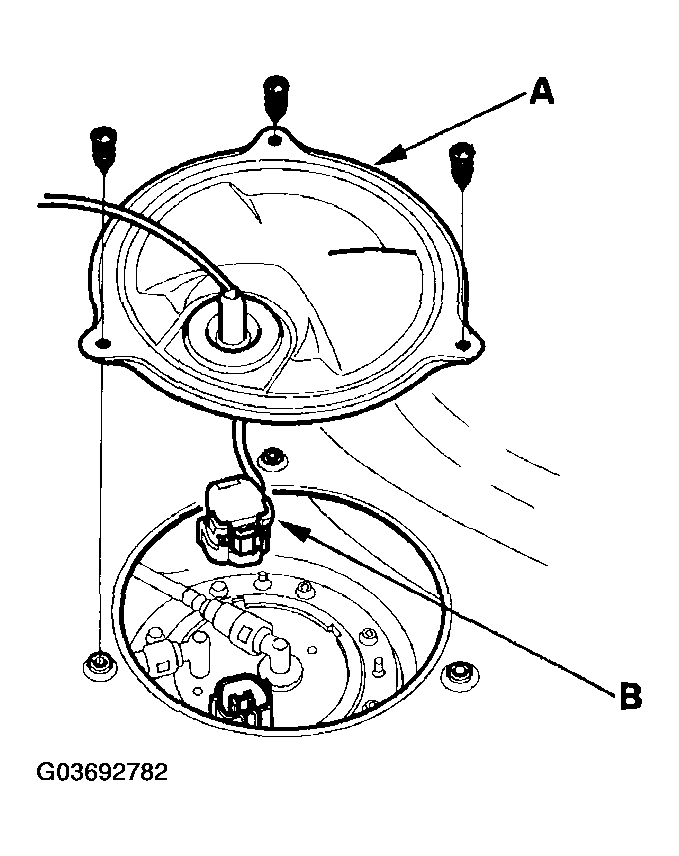 Courtesy of AMERICAN HONDA MOTOR CO., INC.
- Disconnect both ABS rear wheel sensors 2P connectors (A), and push the connectors out (B).
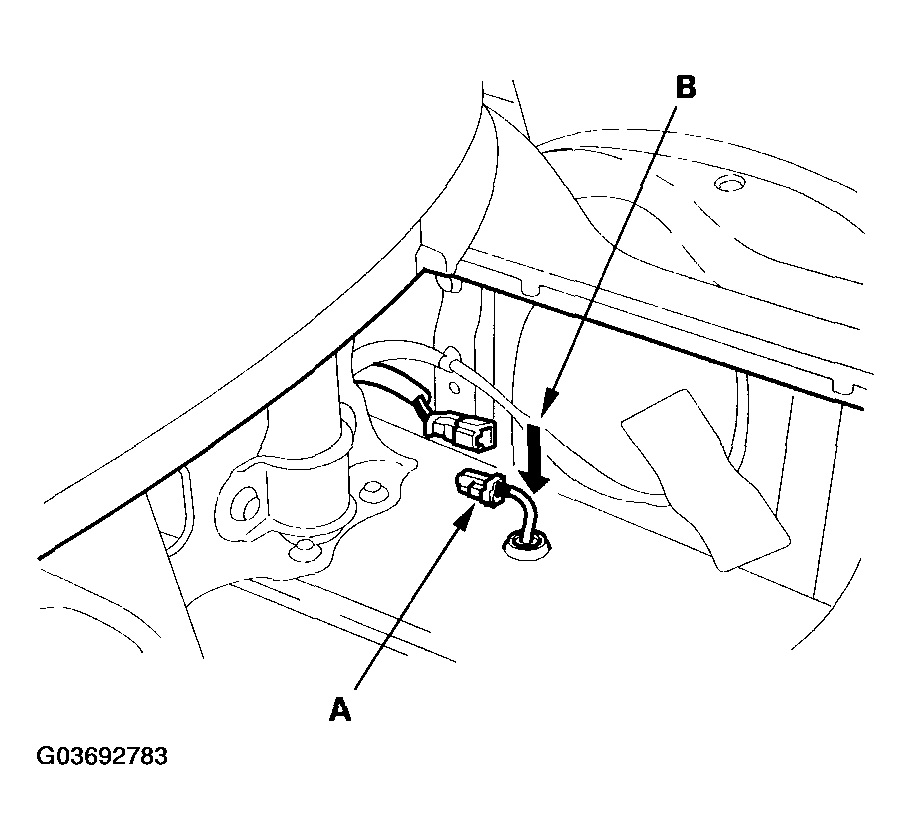 Courtesy of AMERICAN HONDA MOTOR CO., INC.
- Remove the fuel pipe cover (A), and disconnect the fuel fill neck tube (B), the fuel tank vapor recirculation tube (C) and the fuel tank vapor signal tube (D) from the fuel fill pipes (E).
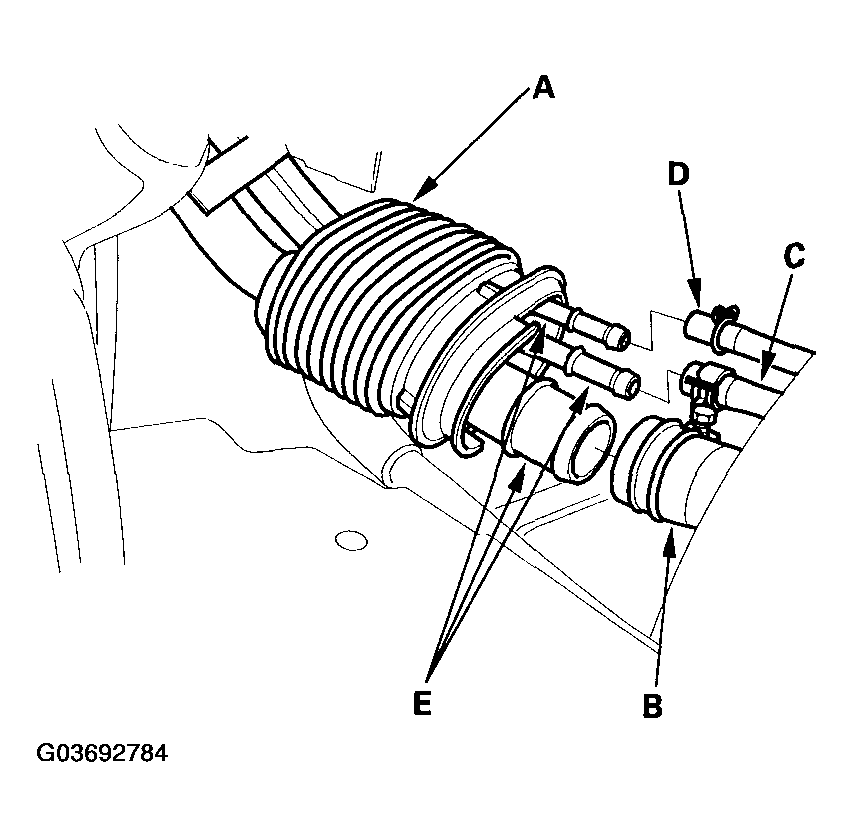 Courtesy of AMERICAN HONDA MOTOR CO., INC.
- Loosen the rear wheel nuts slightly, then raise the vehicle and make sure it is securely supported.
- Remove the rear wheels.
- Remove the bolts from both ABS rear wheel sensor harness brackets (A).
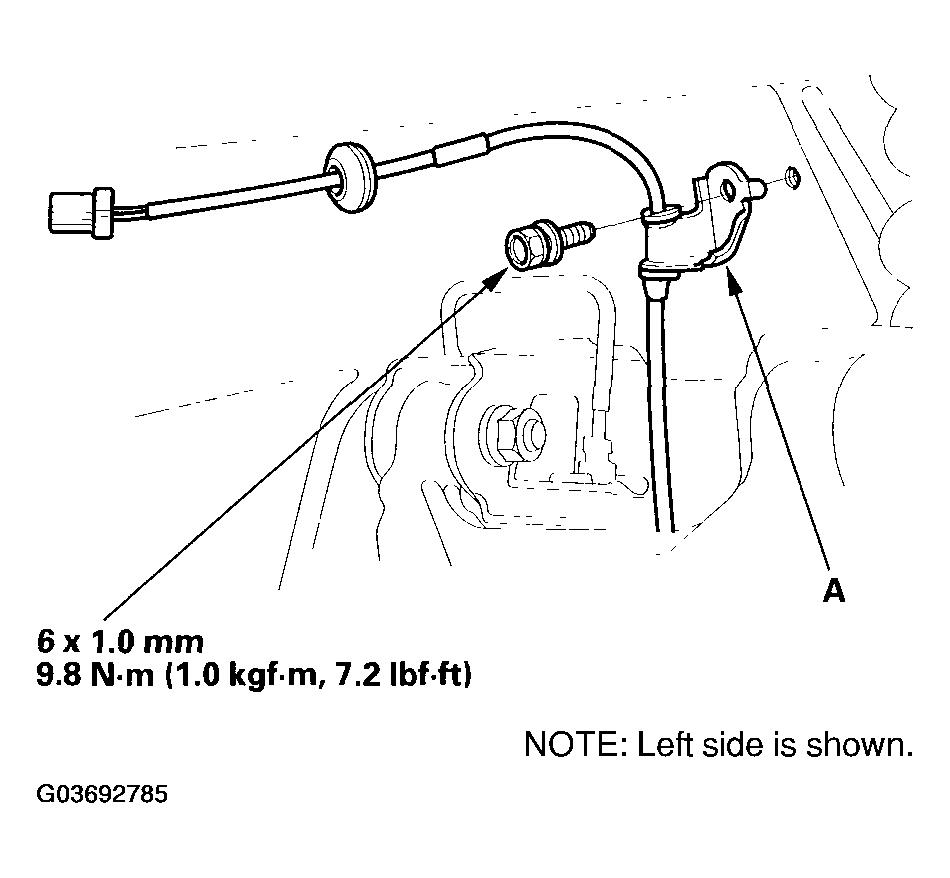 Courtesy of AMERICAN HONDA MOTOR CO., INC.
- Remove both caliper shields (A).
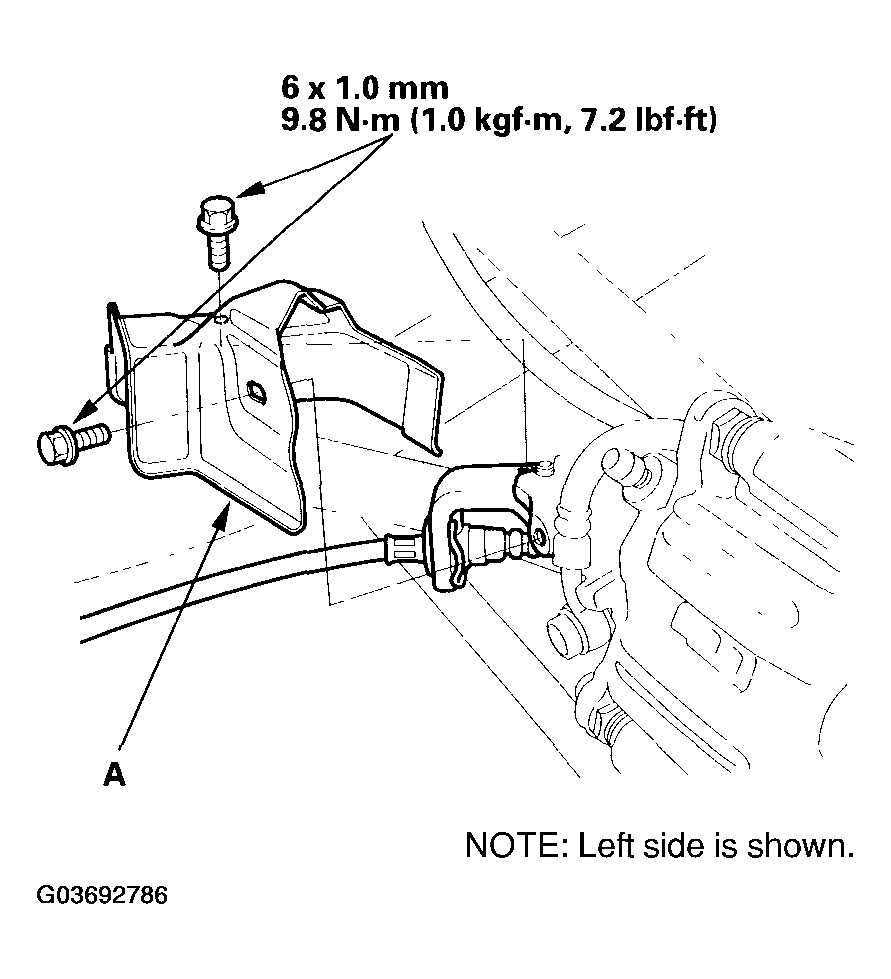 Courtesy of AMERICAN HONDA MOTOR CO., INC.
- Disconnect both parking brake cables (A), and move them out of the way.
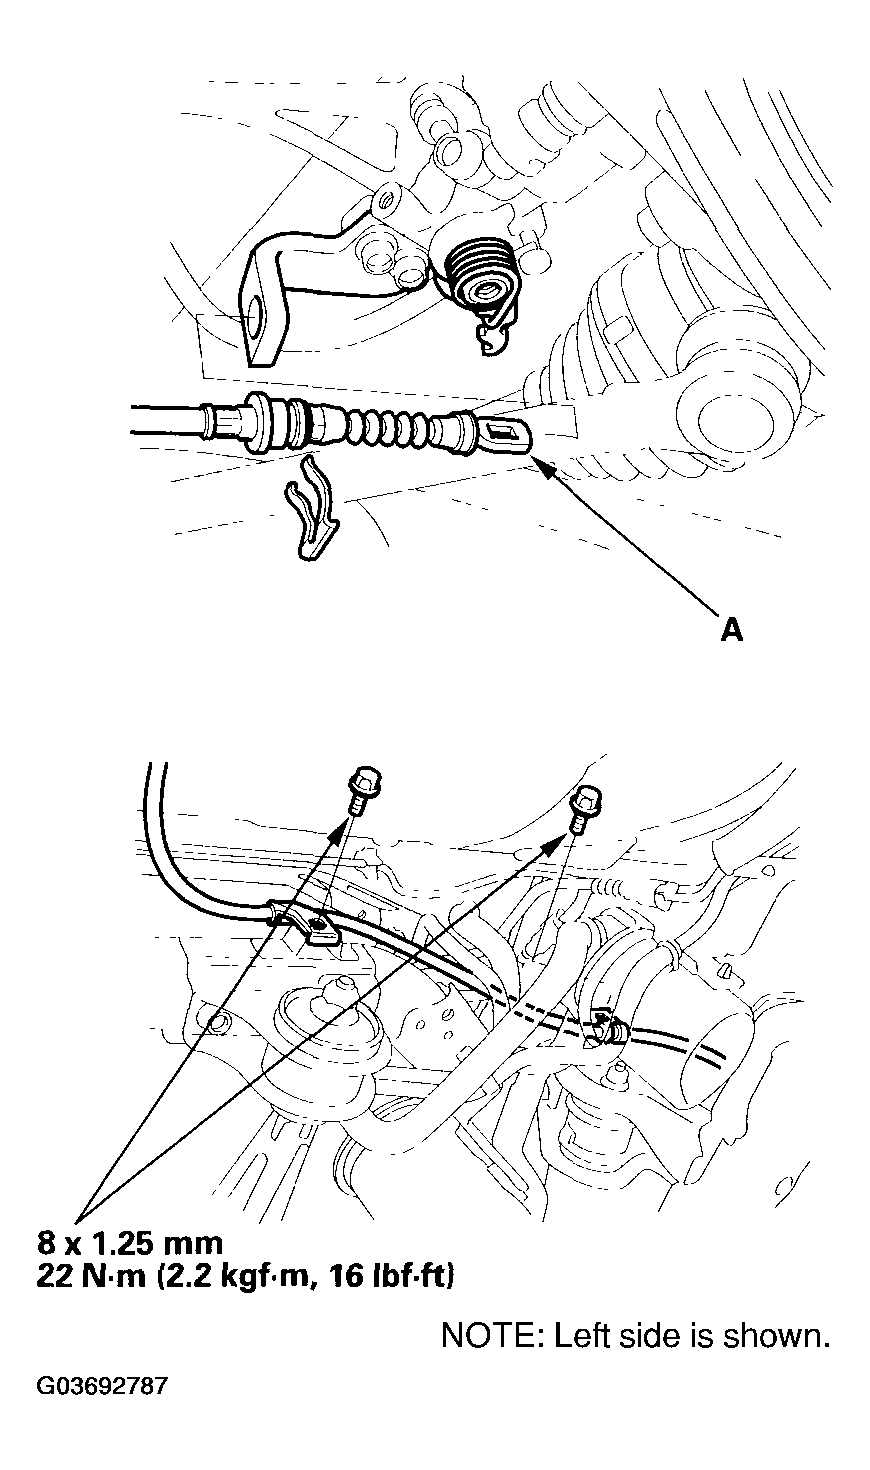 Courtesy of AMERICAN HONDA MOTOR CO., INC.
- Disconnect the brake hoses from both rear brake lines using a 10 mm flare-nut wrench.
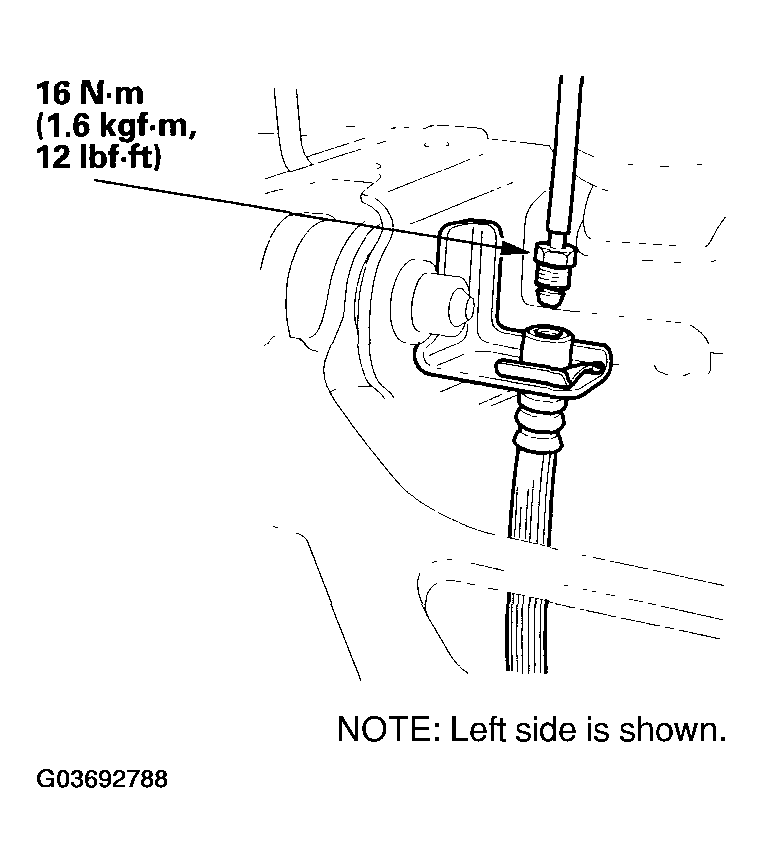 Courtesy of AMERICAN HONDA MOTOR CO., INC.
- Remove the flange bolt (A) from both rear dampers (B).
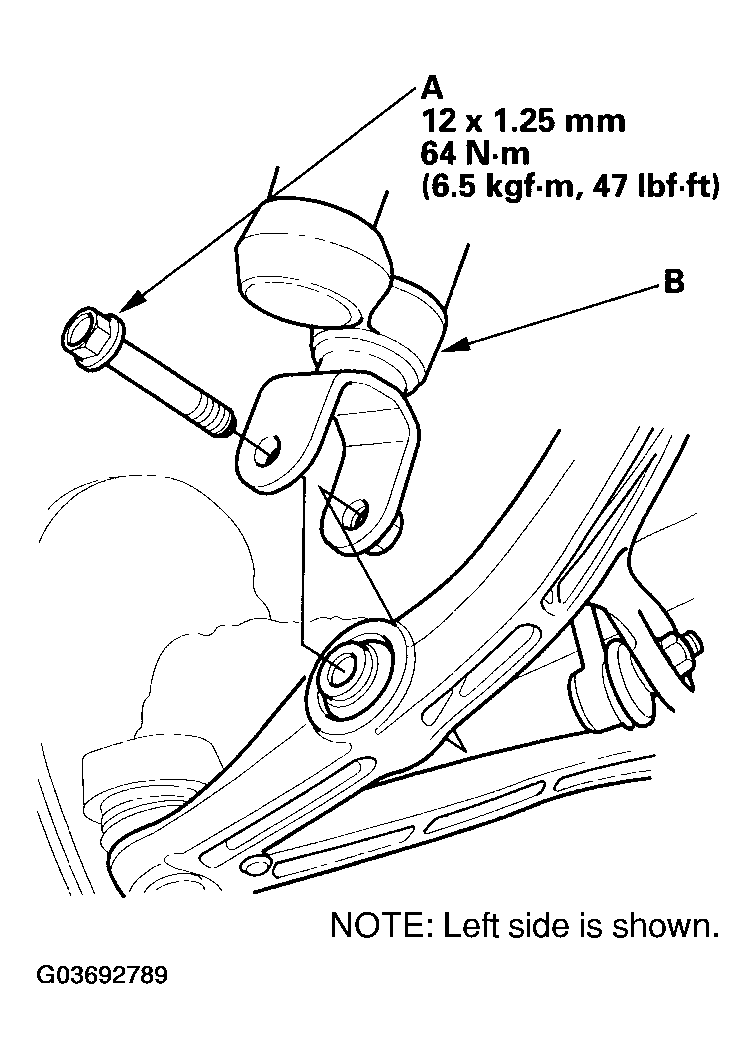 Courtesy of AMERICAN HONDA MOTOR CO., INC.
- Remove the canister cover (A), rear suspension stiffener (B), and the propeller shaft (C) (see
PROPELLER SHAFT REMOVAL
).
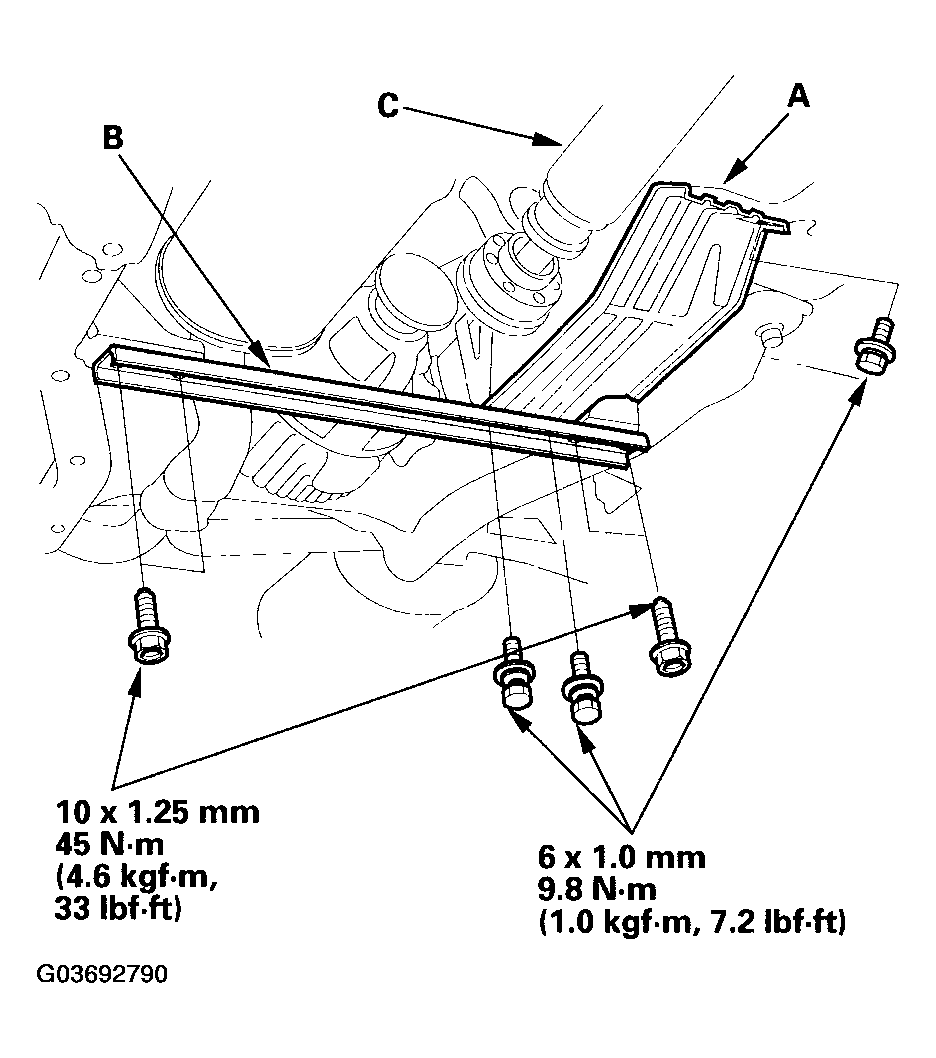 Courtesy of AMERICAN HONDA MOTOR CO., INC.
- Remove the muffler (A).
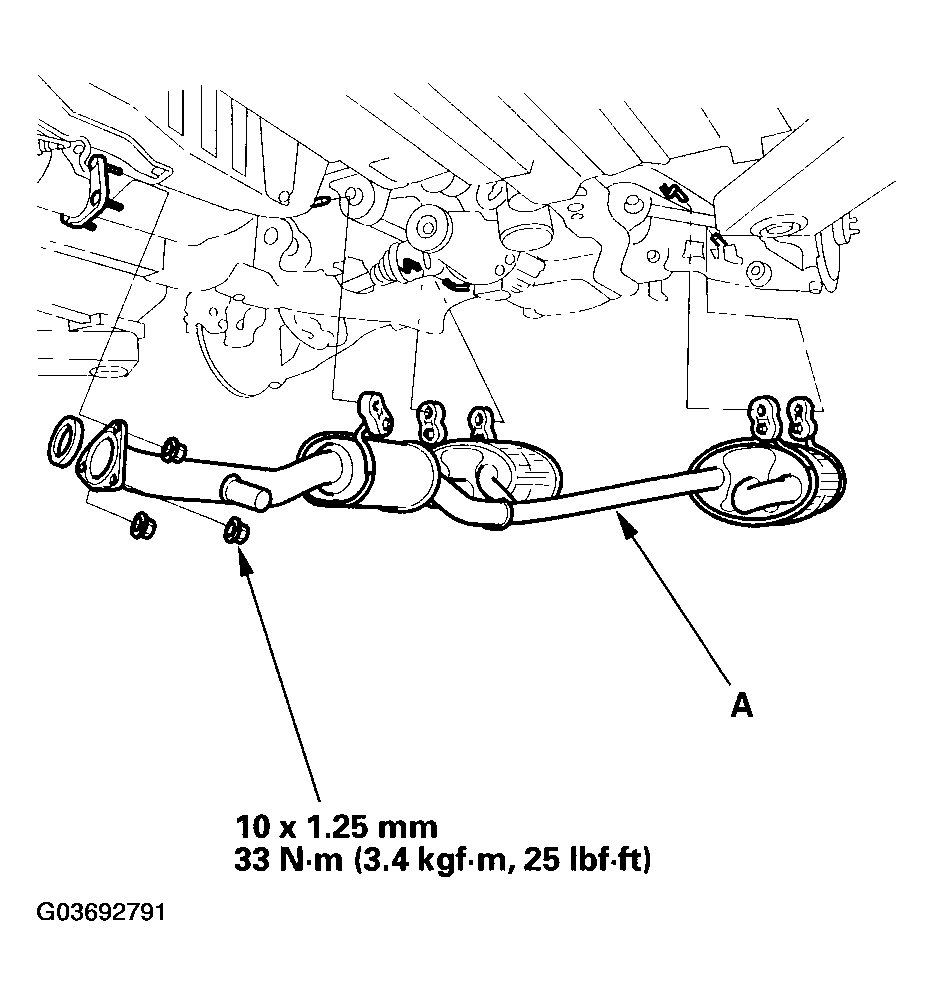 Courtesy of AMERICAN HONDA MOTOR CO., INC.
- Disconnect the quick-connect fittings (A) (see FUEL LINE/QUICK-CONNECT FITTING PRECAUTIONS
).
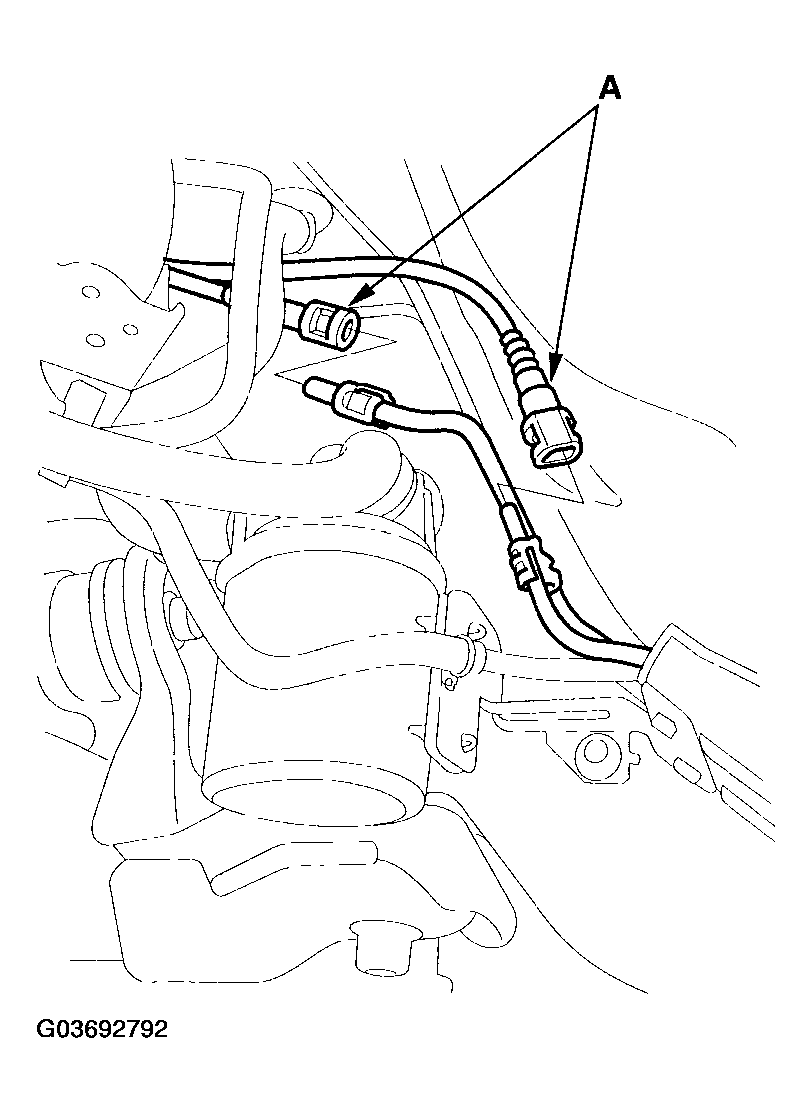 Courtesy of AMERICAN HONDA MOTOR CO., INC.
- Disconnect the fuel tank vapor vent tube (A), then remove the bolt (B) and the EVAP canister (C).
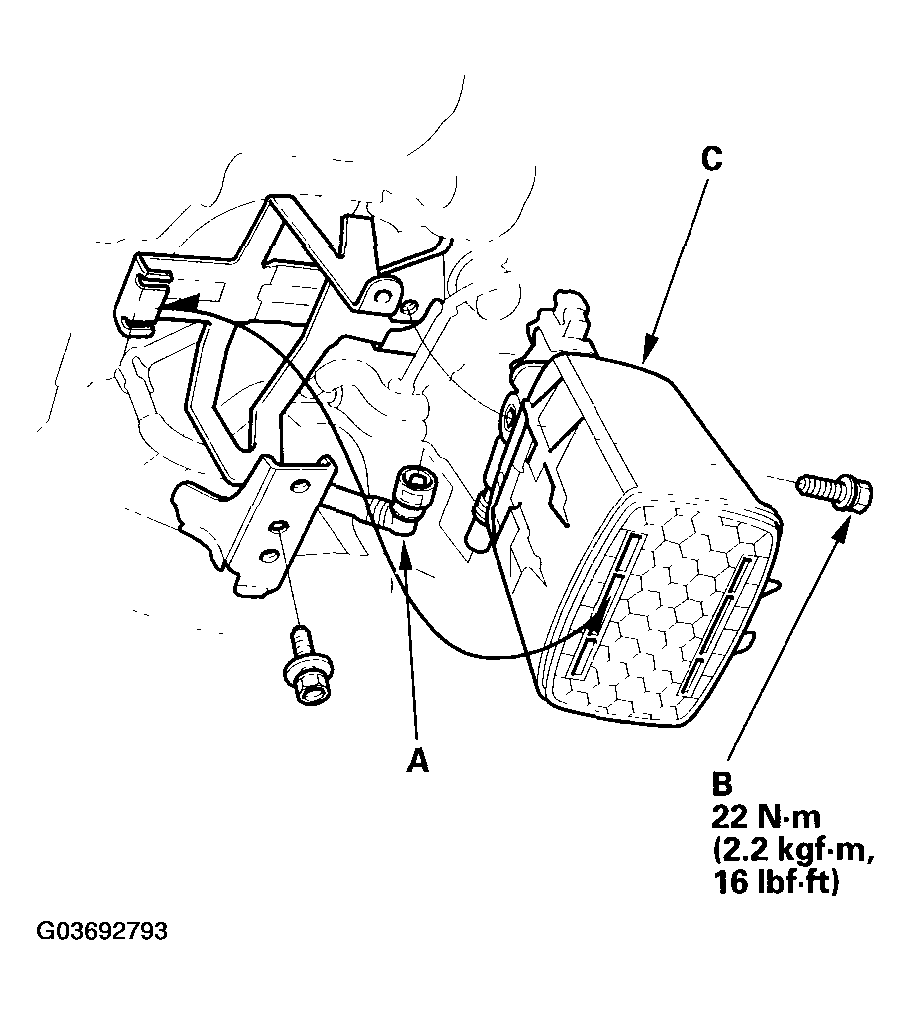 Courtesy of AMERICAN HONDA MOTOR CO., INC.
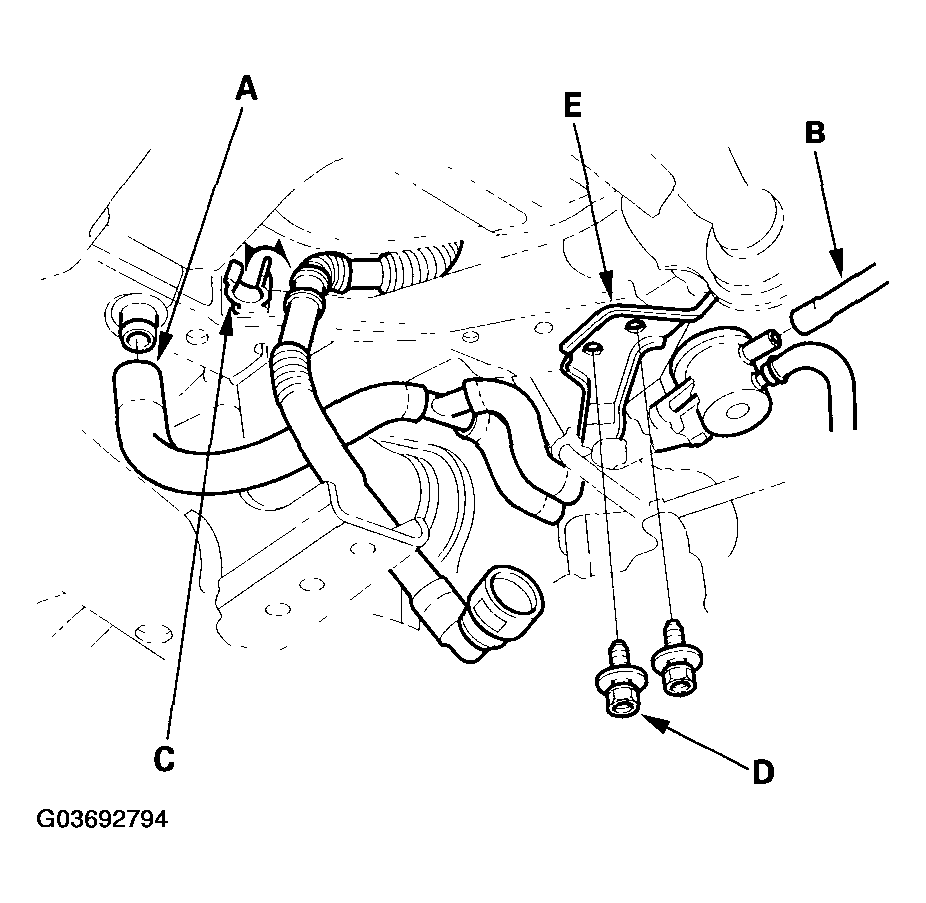
- Disconnect the hose (A) and fuel vent tube (B), then remove the fuel tank vapor vent tube from the tube holder (C). Remove the bolts (D) and the fuel vent assembly (E).
 Courtesy of AMERICAN HONDA MOTOR CO., INC.
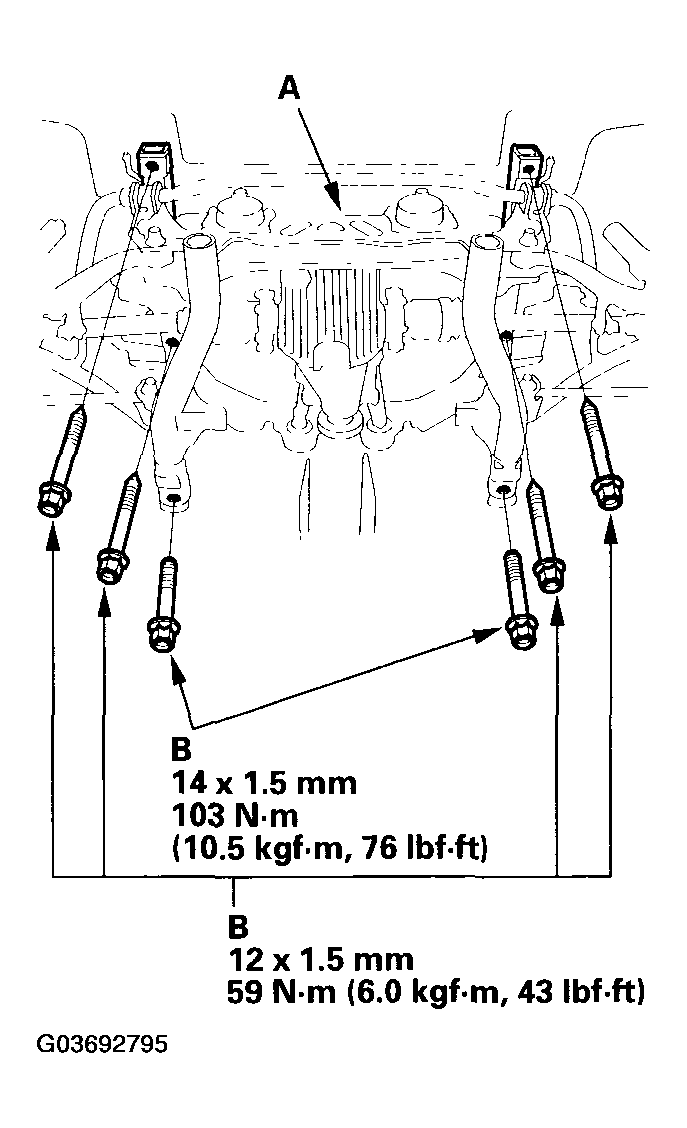
- Place a jack or other support under the rear suspension subframe (A). Remove the mounting bolts (B) and the rear suspension subframe (A).
 Courtesy of AMERICAN HONDA MOTOR CO., INC.
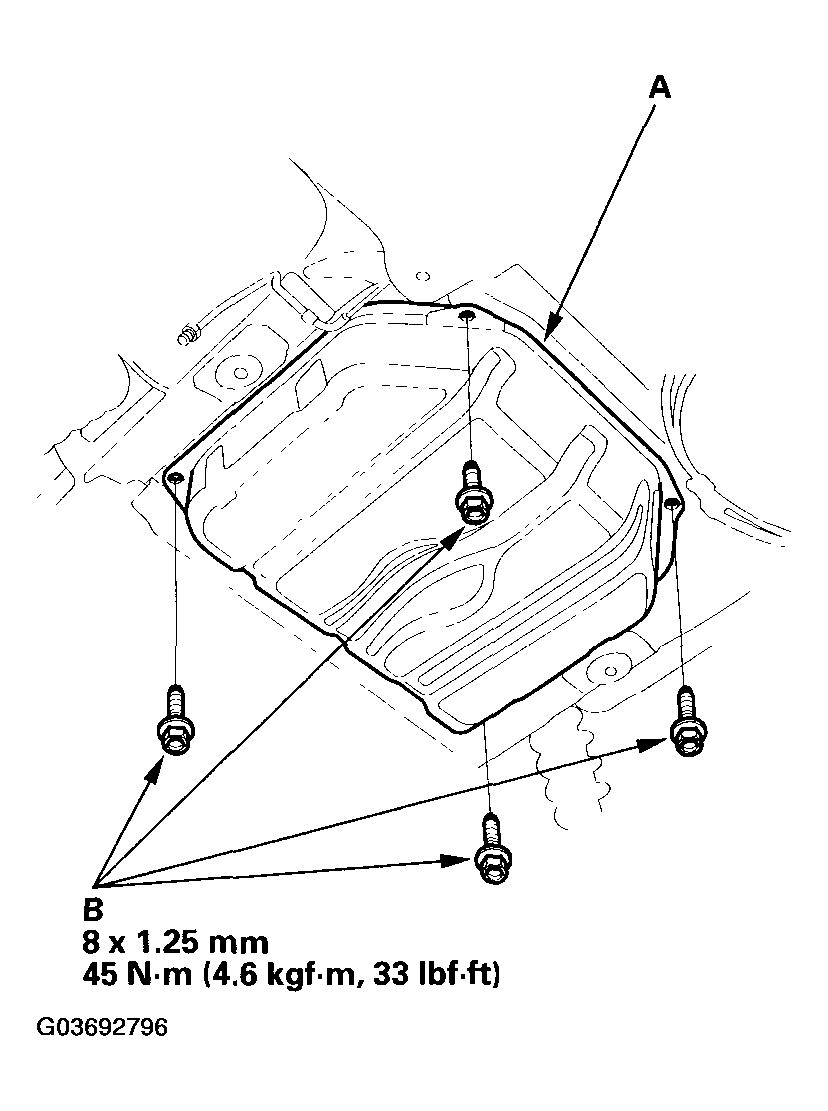
- Place the jack or support under the fuel tank (A) and remove the mounting bolts (B) and the fuel tank.
 Courtesy of AMERICAN HONDA MOTOR CO., INC.