October 30: LEMON manuals on a temporary server, it is slow and having issues, download the manuals you need! Later in November we will switch back to the fast server.
Removal Procedure
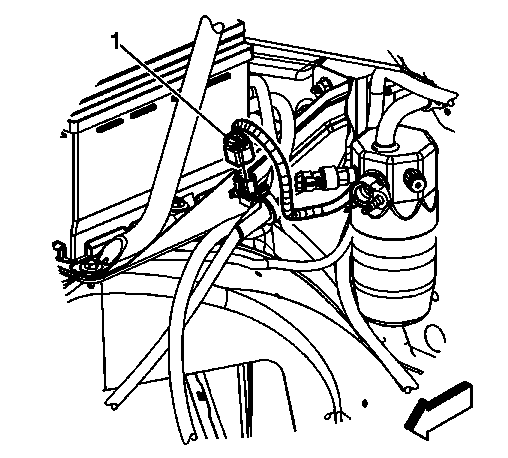 Courtesy of GENERAL MOTORS COMPANY
- Disconnect the negative battery cable. Refer to Battery Negative Cable Disconnection and Connection .
- Remove the air cleaner outlet duct. Refer to Air Cleaner Resonator Outlet Duct Replacement
.
- Disconnect the engine harness electrical connector (1) from the battery current sensor.
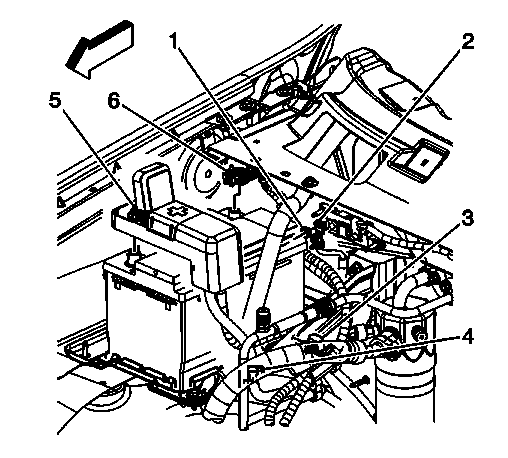 Courtesy of GENERAL MOTORS COMPANY
- Remove the battery current sensor (3) clip from the battery tray, if equipped with a battery current sensor.
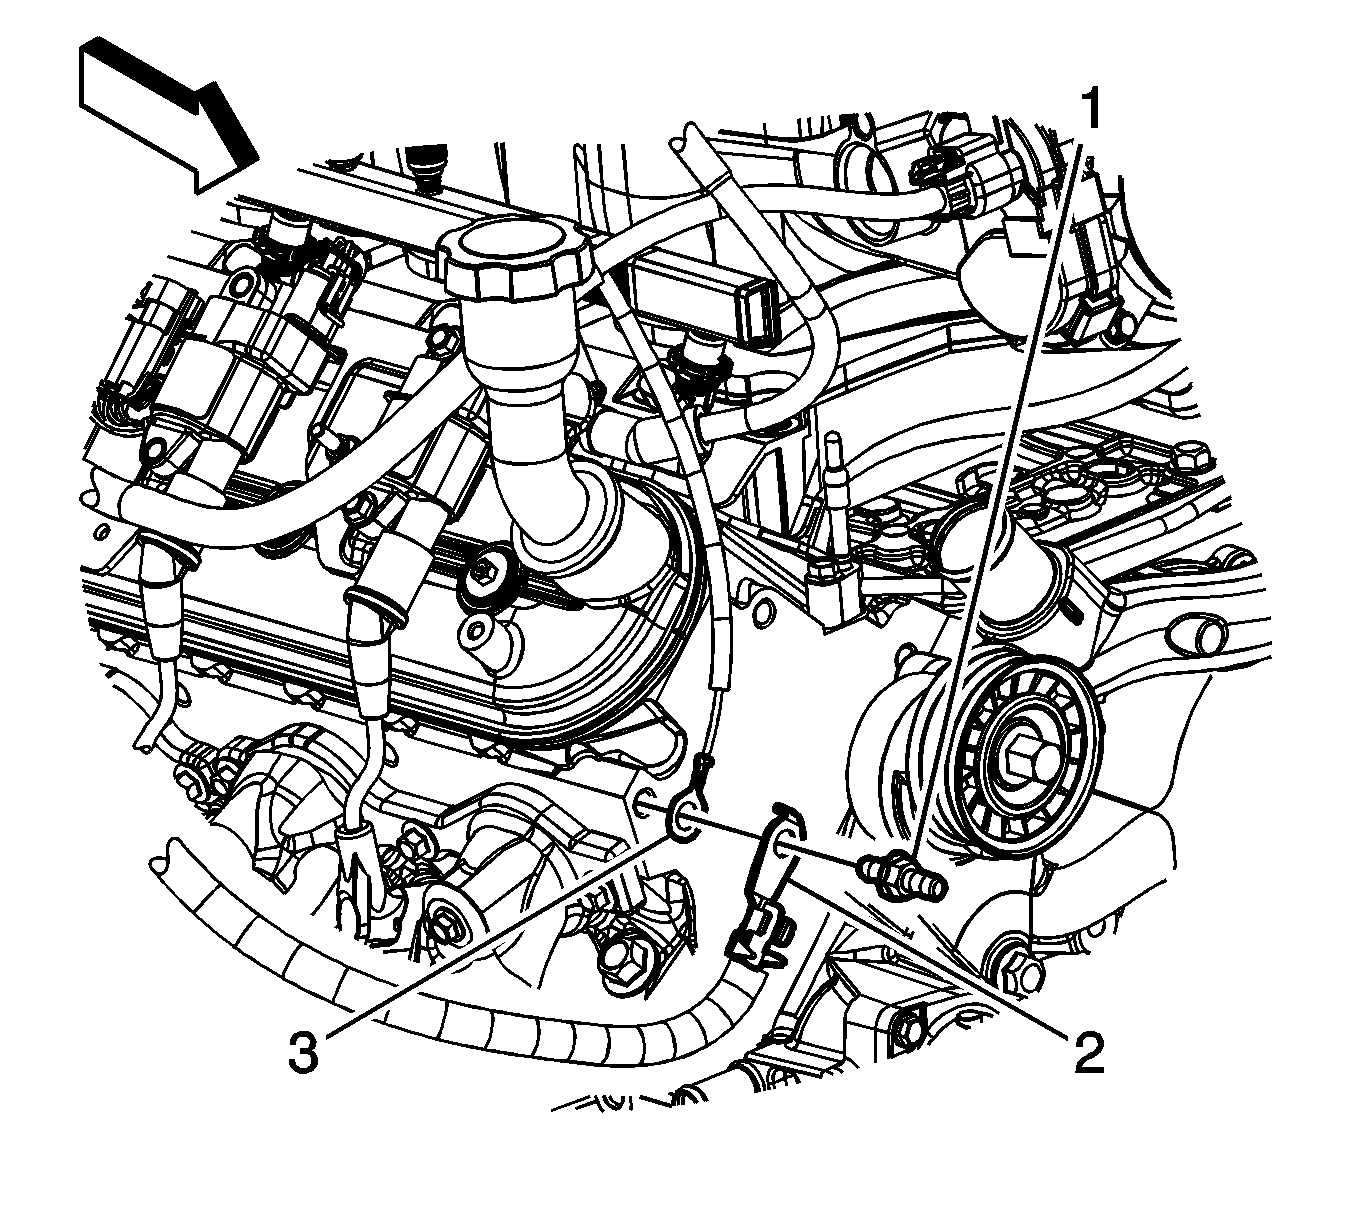 Courtesy of GENERAL MOTORS COMPANY
- Remove the negative battery cable stud (1) from the front of the right cylinder head.
- Remove the negative battery cable terminal (2) from the cylinder head.
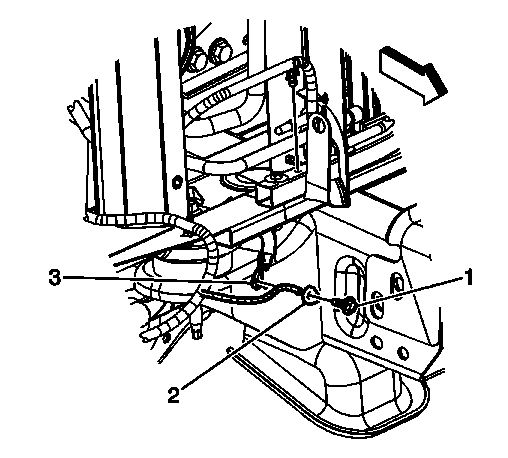 Courtesy of GENERAL MOTORS COMPANY
- Raise and support the vehicle. Refer to Lifting and Jacking the Vehicle
.
- Remove the forward lamp wiring harness ground bolt (1).
- Remove the forward lamp wiring harness terminal (2) from the frame.
- Remove the negative battery cable terminal (3) out through the opening between the radiator support and frame.
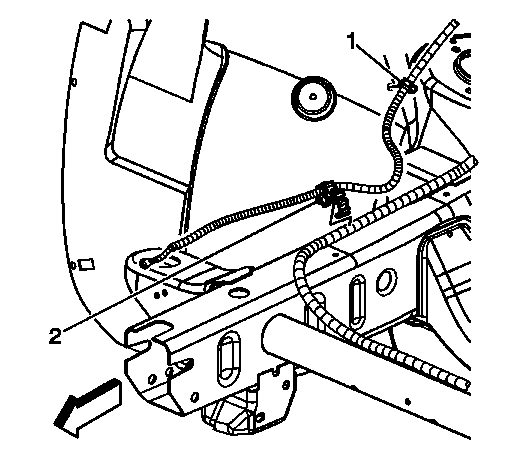 Courtesy of GENERAL MOTORS COMPANY
- Remove the negative battery cable clip (2) from the chassis harness.
- Lower the vehicle.
- Remove the negative battery cable clip (1) from the right wheelhouse liner.
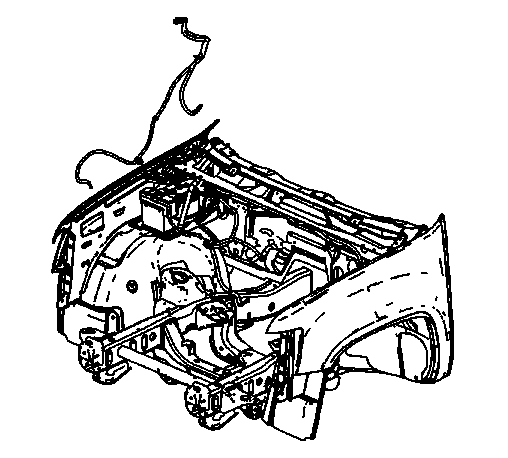 Courtesy of GENERAL MOTORS COMPANY
- Remove the negative battery cable from the vehicle, if equipped without a battery current sensor.
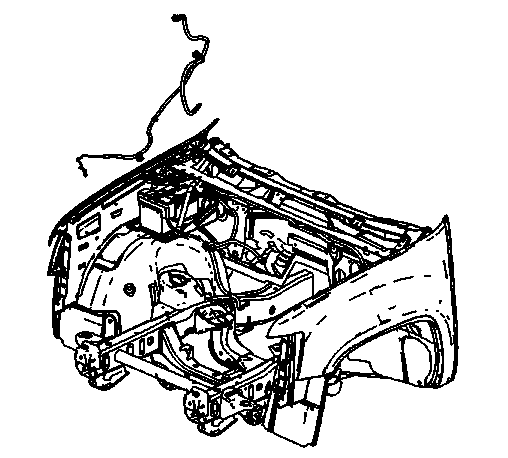 Courtesy of GENERAL MOTORS COMPANY
- Remove the negative battery cable from the vehicle, if equipped with a battery current sensor.
- If replacing the negative battery cable, remove the battery current sensor, if equipped. Refer to Battery Current Sensor Replacement .