Front Floor Console Assembly Replacement
WARNING: This page is about a different car, the 2016 Buick LaCrosse. However, it is still accessible from the selected car via links, so may be relevant.
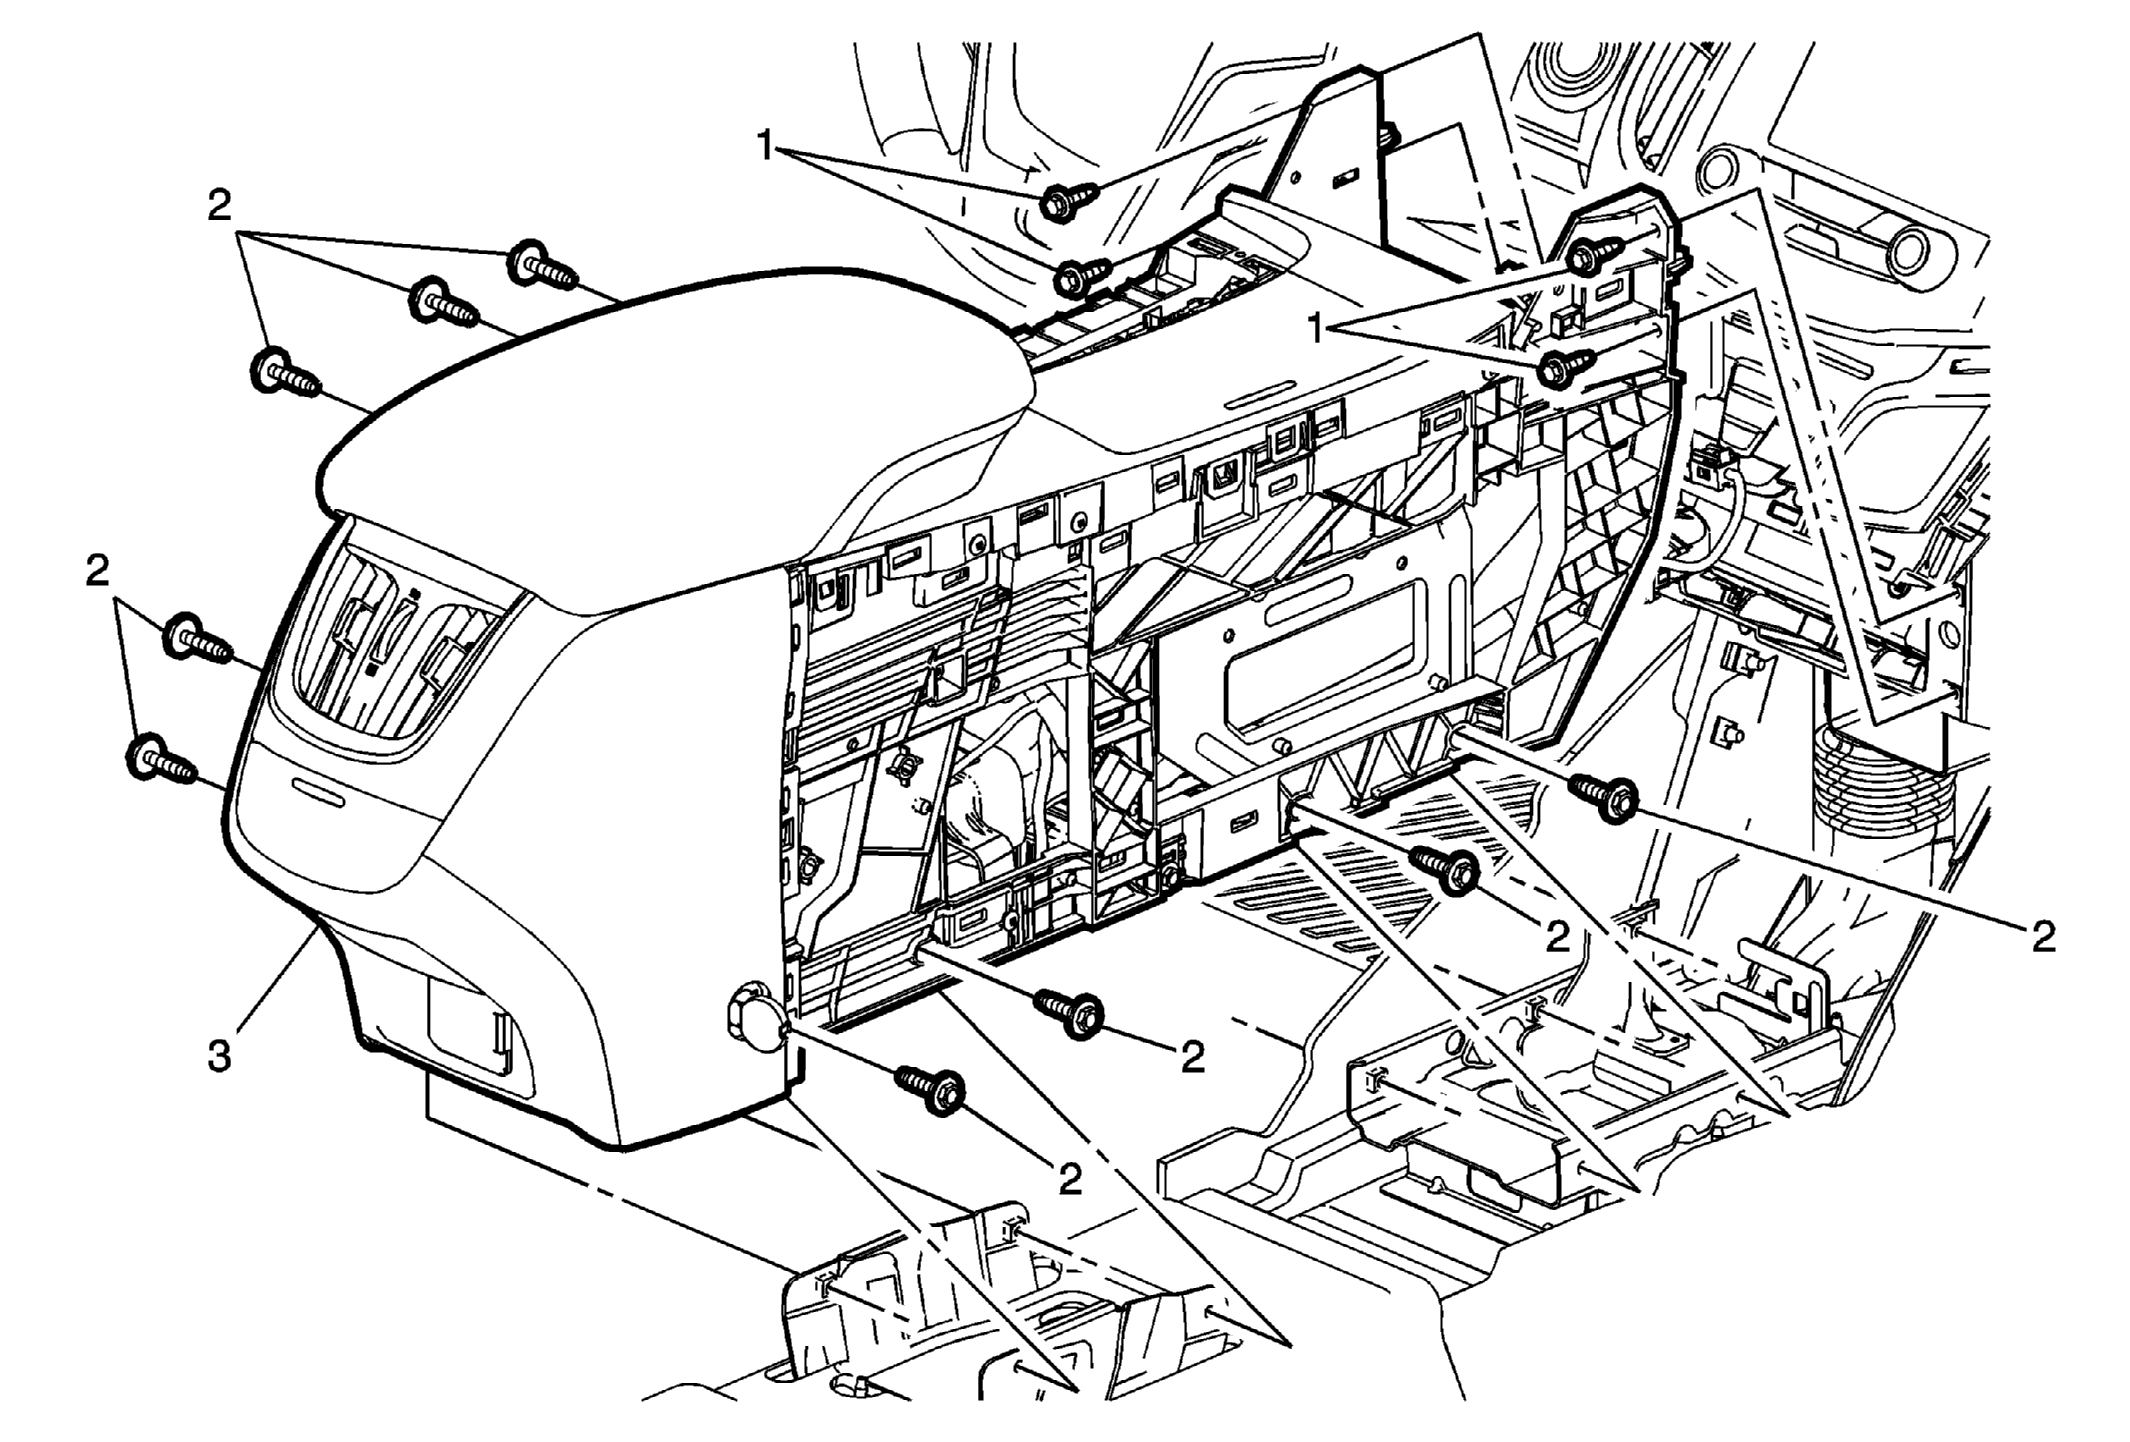 Courtesy of GENERAL MOTORS COMPANY
| Callout |
Component Name |
|
Preliminary Procedure
- Remove the front floor console front insert. Refer to Front Floor Console Front Insert Replacement .
- Remove the right front floor console extension panel. Refer to Front Floor Console Extension Panel Replacement - Right Side .
- Remove the left front floor console extension panel. Refer to Front Floor Console Extension Panel Replacement - Left Side .
- Remove the range selector lever cable from the transmission control. Refer to Range Selector Lever Cable Replacement
.
|
| 1 |
Front Floor Console Fastener (Qty: 4)
Tighten
2.5 N.m (22 lb in) |
| 2 |
Front Floor Console Fastener (Qty: 9) Procedure
- Reposition the seats as necessary to access the fasteners.
- Remove the plastic fastener covers in order to gain access to the rear fasteners.
- Pull back the carpet and insulator to access the fasteners from the floor console.
Tighten
6 N.m (53 lb in) |
| 3 |
Front Floor Console Assembly Procedure
- Disconnect the electrical harnesses and connectors.
- With the aid of an assistant, remove the console from the vehicle.
- When replacing the front floor console assembly, transfer all necessary components.
NOTE:
Depending on option content, it may be required to remove the right lower instrument panel support brace in order to easily access the electrical connections.
|