September 30: LEMON manuals is back up on a temporary server! Slowness is possible
Injector Base Removal and Installation: Installation
- Install the front injector base (A) and the rear injector base (B) with new gaskets (C), and tighten the injector base mounting bolts/nuts (D) in a crisscross pattern in three steps, beginning with the inner nuts.
NOTE:
The front injector base gasket is different from the rear one. Do not mix injector base gasket types.
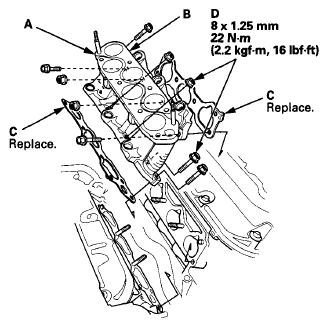 Courtesy of AMERICAN HONDA MOTOR CO., INC.
- Connect the knock sensor connector (A), then install the harness holder mounting bolt (B).
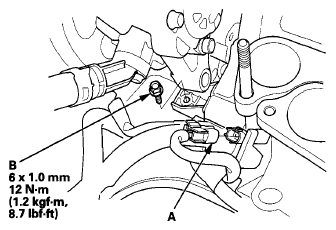 Courtesy of AMERICAN HONDA MOTOR CO., INC.
- Install the injectors (see
INJECTOR REPLACEMENT
).
- Install the intake manifold (see
INSTALLATION ).
- Install the power steering pump and the power steering hose clamp (see step 26 on REAR
)
- Inspect for fuel leaks. Turn the ignition switch to ON (II) (do not operate the starter) so the fuel pump runs for about 2 seconds and pressurizes the fuel line. Repeat this operation three times, then check for fuel leakage at any point in the fuel line.