October 30: LEMON manuals on a temporary server, it is slow and having issues, download the manuals you need! Later in November we will switch back to the fast server.
Shift Cable Adjustment
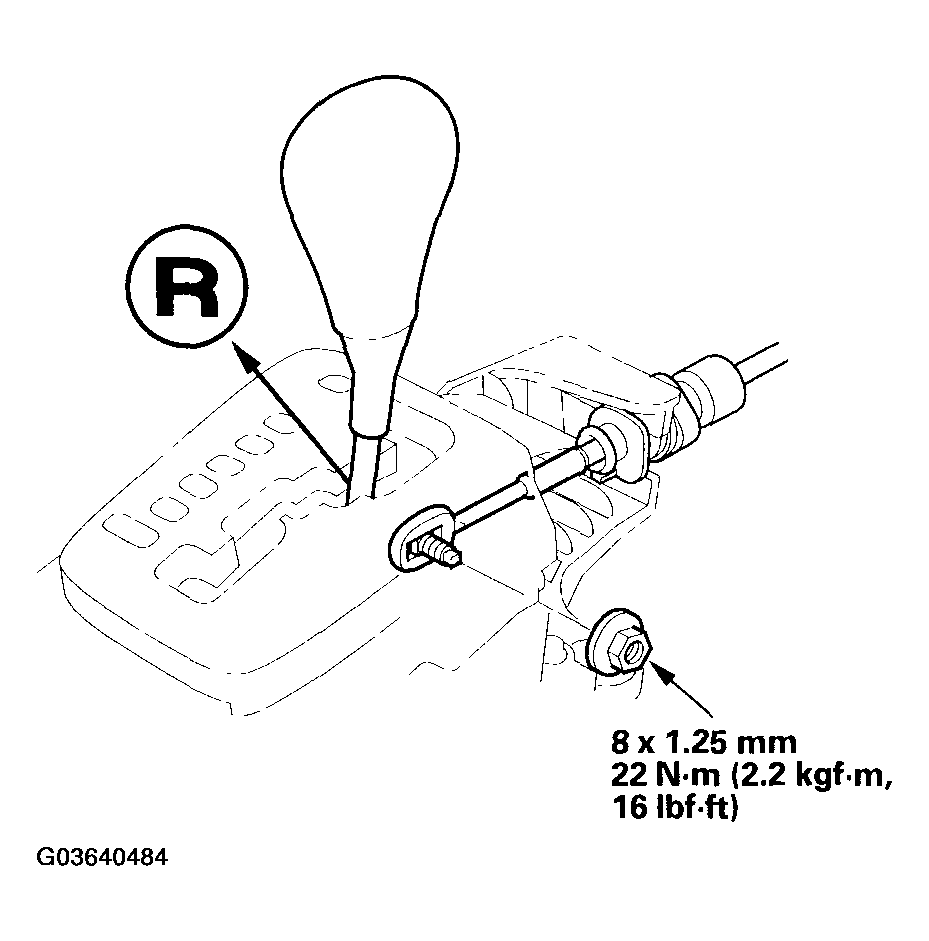
- Shift the transmission into the R position.
- Remove the console panel and center console (see CENTER CONSOLE REMOVAL/INSTALLATION
).
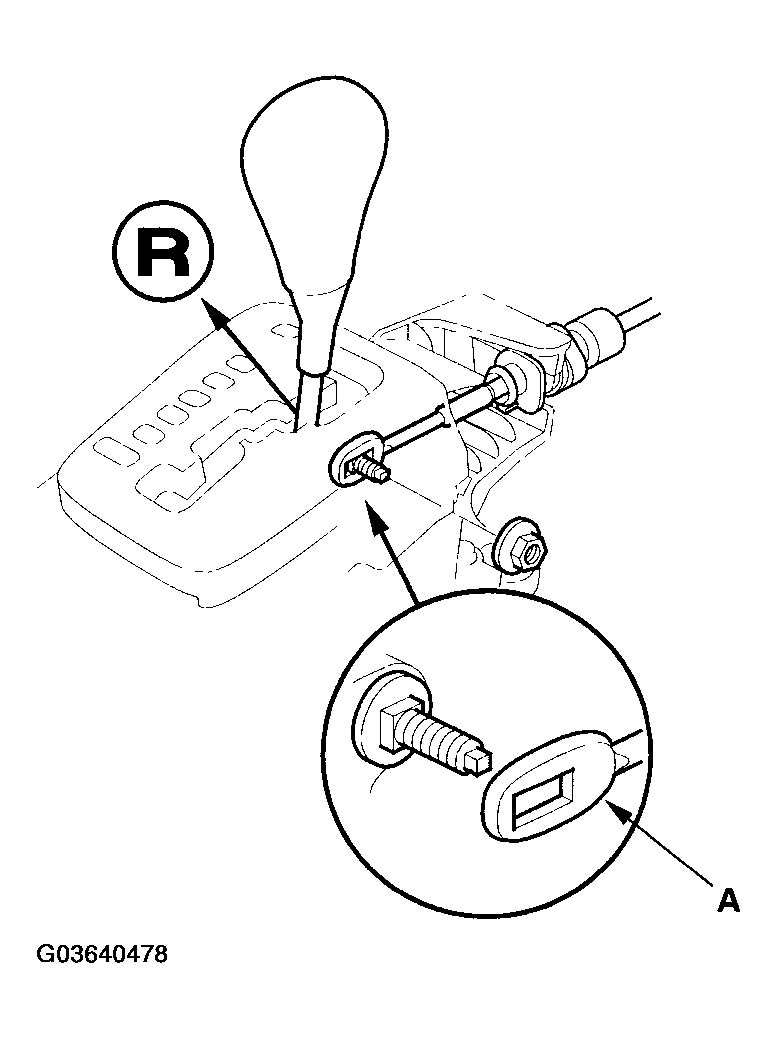
- Remove the nut securing the shift cable end (A), then separate the end from the shift lever assembly.
 Courtesy of AMERICAN HONDA MOTOR CO., INC.
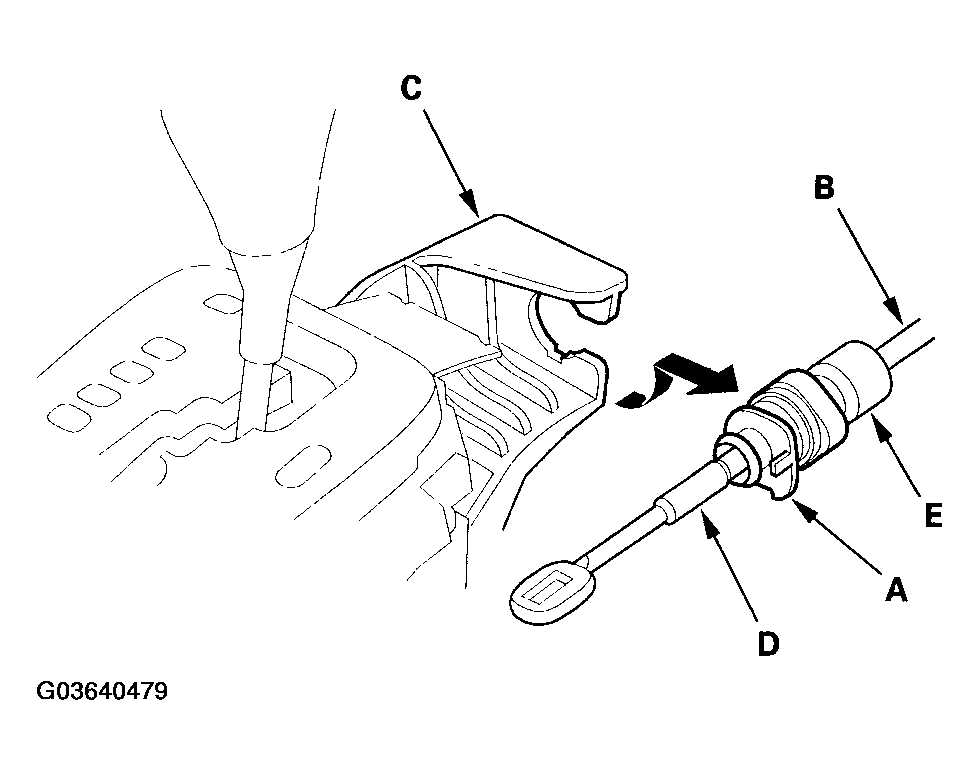
- Rotate the socket holder (A) on the shift cable (B) counterclockwise a quarter turn, then slide the holder to remove the shift cable from the shift lever bracket base (C).
NOTE:
Do not remove the shift cable by twisting the shift cable guide (D) and damper (E).
 Courtesy of AMERICAN HONDA MOTOR CO., INC.
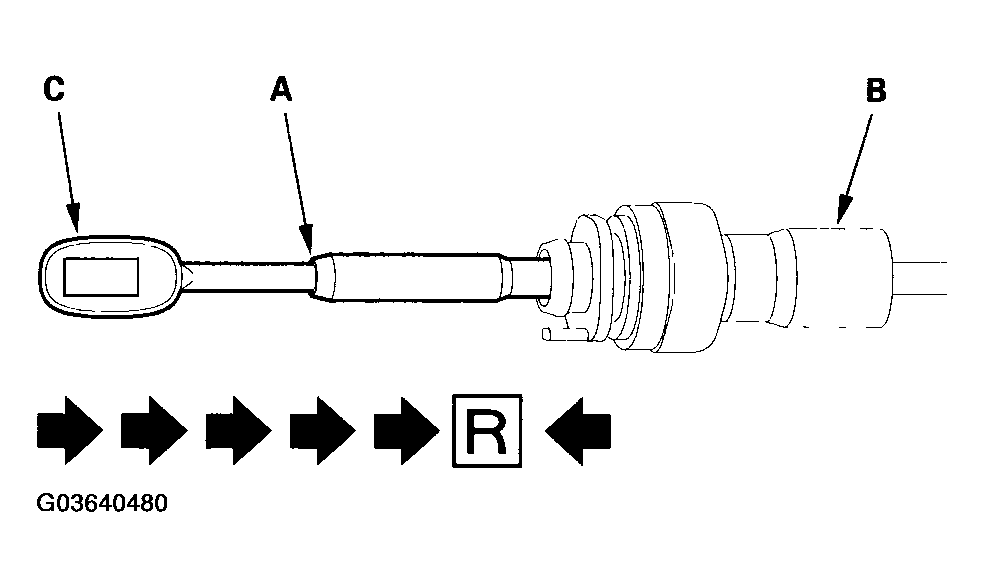
- Push the shift cable until it stops, then release your hand. Pull the shift cable back one step so that the shift position is in R. Do not hold the shift cable guide (A) and damper (B) to adjust the shift cable (C).
 Courtesy of AMERICAN HONDA MOTOR CO., INC.
- Turn the ignition switch ON (II), and verify that the R position indicator comes on.
- Turn the ignition switch OFF.
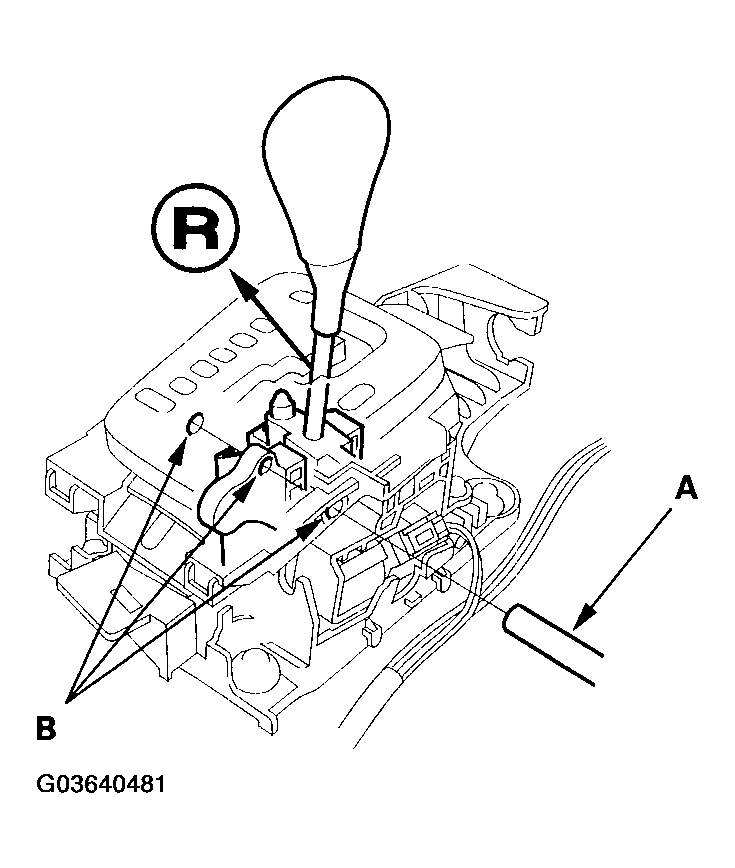
- Insert a 6.0 mm (0.24 in.) pin (A) into the positioning hole (B) on the shift lever bracket base through the positioning hole on the shift lever assembly, and into the positioning hole. The shift lever is secured in the R position.
 Courtesy of AMERICAN HONDA MOTOR CO., INC.
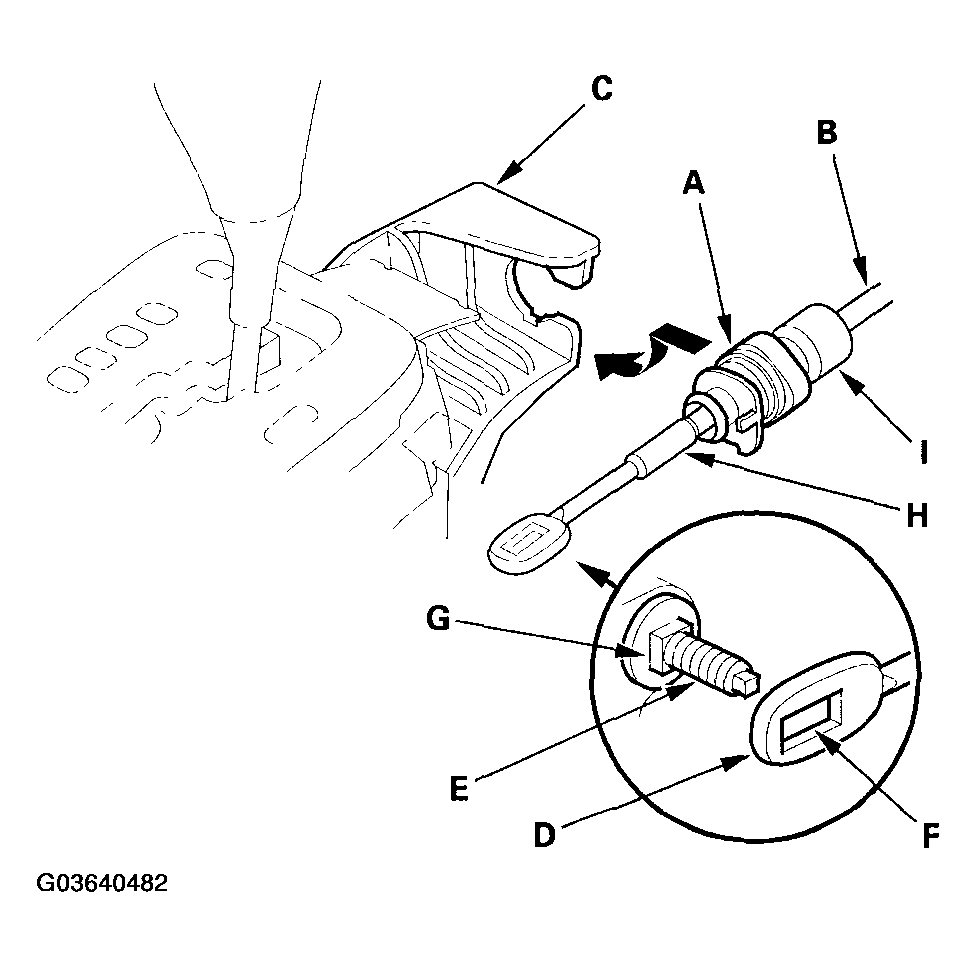
- Rotate the socket holder (A) on the shift cable (B) counterclockwise a quarter turn, then slide the holder onto the shift lever bracket base (C). Install the shift cable end (D) over the mounting stud (E) by aligning its square hole (F) with the square shape (G) at the bottom of the stud. Rotate the holder clockwise a quarter turn to secure the shift cable.
NOTE:
Do not install the shift cable by twisting the shift cable guide (H) and damper (I).
 Courtesy of AMERICAN HONDA MOTOR CO., INC.
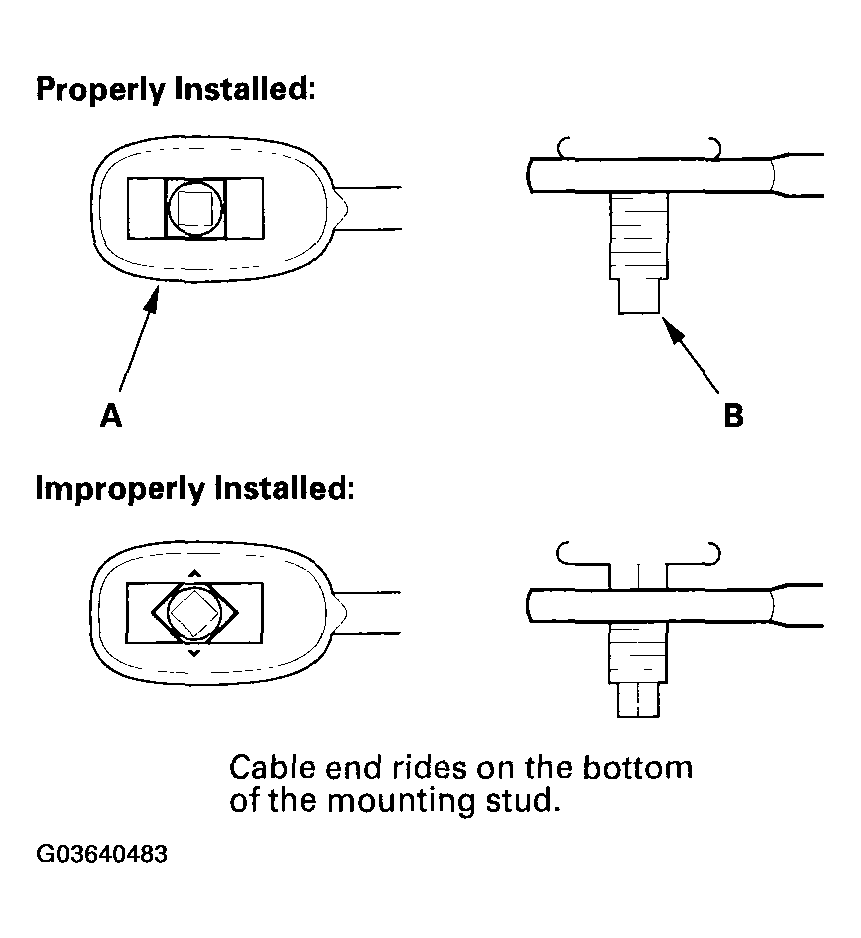
- Verify that the shift cable end (A) is properly installed on the mounting stud (B).
 Courtesy of AMERICAN HONDA MOTOR CO., INC.
- If improperly installed, remove the shift cable from the shift lever bracket base, and reinstall the shift cable. Do not install the shift cable end on the mounting stud while the shift cable is on the shift cable bracket base.
- Install and tighten the nut.
 Courtesy of AMERICAN HONDA MOTOR CO., INC.
- Remove the 6.0 mm (0.24 in.) pin that was installed to hold the shift lever.
- Move the shift lever to each gear, and verify that the A/T gear position indicator follows the transmission range switch.
- Push the shift lock release, and verify that the shift lever releases.
- Reinstall the center console, console panel, and related parts (see CENTER CONSOLE REMOVAL/INSTALLATION
).