Transfer Assembly Installation
Transfer Assembly Installation
1. Clean the areas where the transfer assembly contacts the transmission with solvent, and dry with compressed air. Then apply transmission fluid to the contact area.
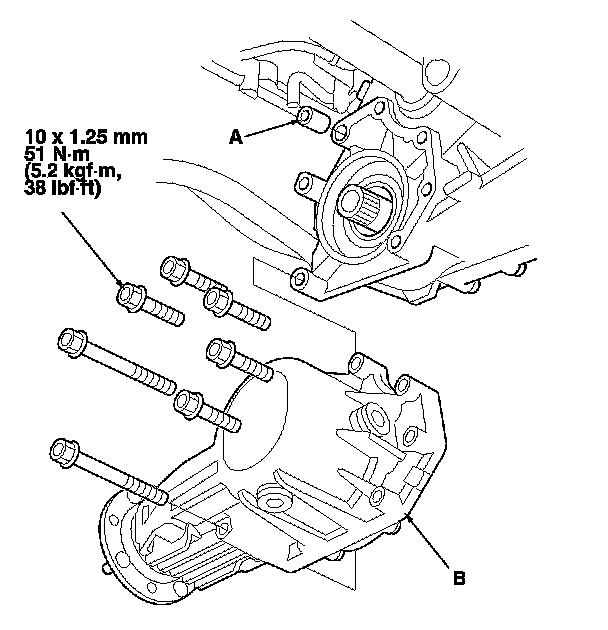
2. Install the dowel pin (A) in the transmission, and install the transfer assembly (B) on the transmission.
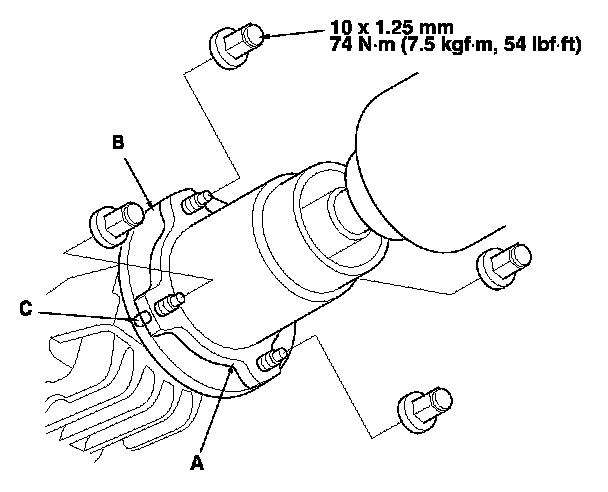
3. Install the propeller shaft (A) to the transfer companion flange (B) by aligning the reference mark (C).
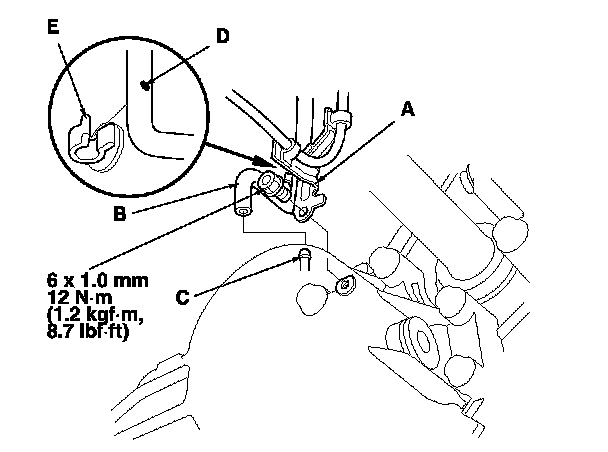
4. Secure the transfer breather tube bracket (A) on the transfer assembly with the bolt, and install the breather tube (B) over the breather pipe (C). If the breather tube was removed from the clamp, install the tube at the dot (D) on the clamp (E).
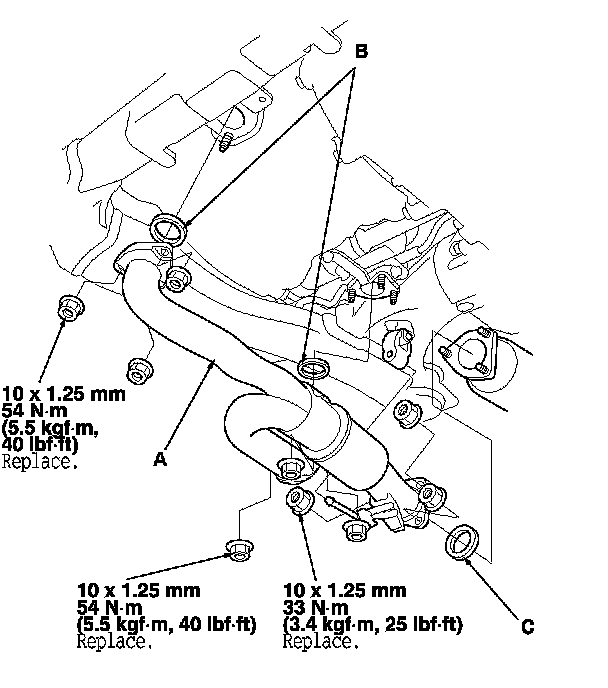
5. Install the exhaust pipe A with the new self-locking nuts and new gaskets (B) (C).
6. Refill the transfer assembly with the transfer fluid (hypoid gear oil), if necessary . Service and Repair
7. Refill the transmission with ATF. ATF Replacement