Fuel Supply Sensor 3 -G237-, Removing and Installing
Fuel Supply Sensor 3 -G237-, Removing And Installing
(AWD Models)
Special tools, testers and auxiliary items required
- Ring nut wrench 3218
- Torque wrench V.A.G 1332
NOTE:
- The fuel tank must not be more than 3/4 full.
- Empty fuel tank if necessary.
- Read safety precautions and rules of cleanliness before beginning work.
Removing
- Check whether a coded radio is installed. If necessary, obtain radio anti-theft coding.
- Switch off ignition and all electrical consumers.
- Disconnect battery Ground (GND) strap, See Electrical Equipment, - Repair Group 27.
- Open fuel filler flap briefly and then close again.
- Remove luggage compartment floor cover.
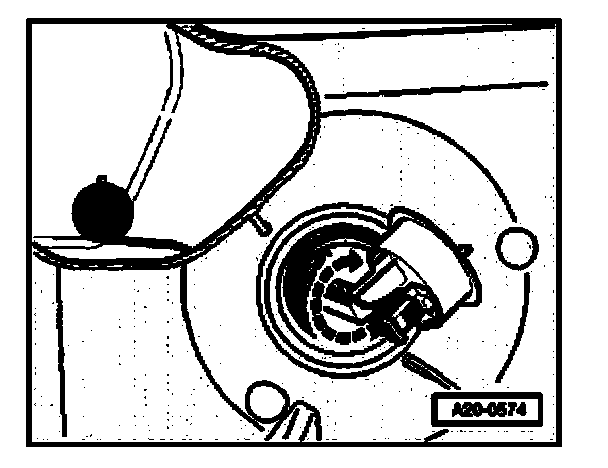
- Remove Fuel Supply Sensor 3 -G237.
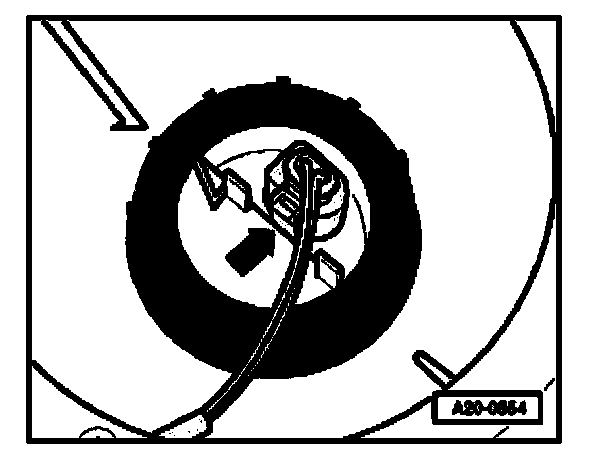
- Disengage 2-pin connector - arrow - carefully and remove.
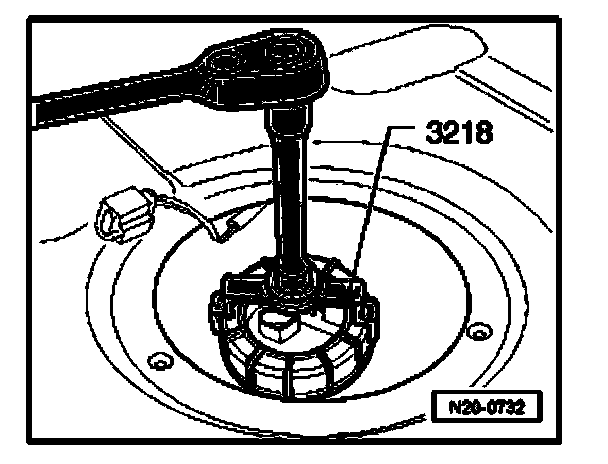
- Use ring nut spanner 3218 to remove union nut.
- Remove gasket.
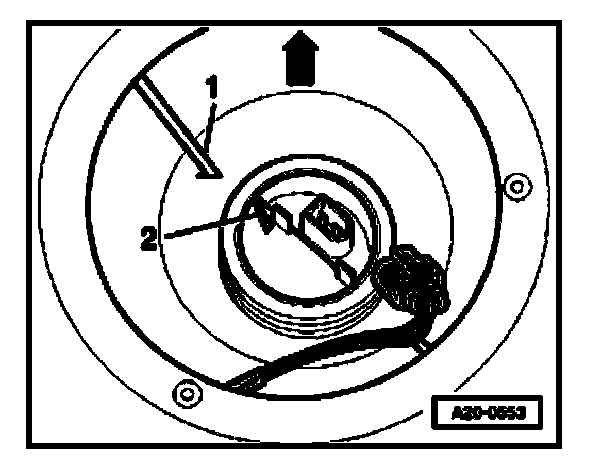
- Remove Fuel Supply Sensor 3 -G237. by turning it counter-clockwise about its axis - arrow -.
Installing
Installation is performed in reverse order of removal. Note the following:
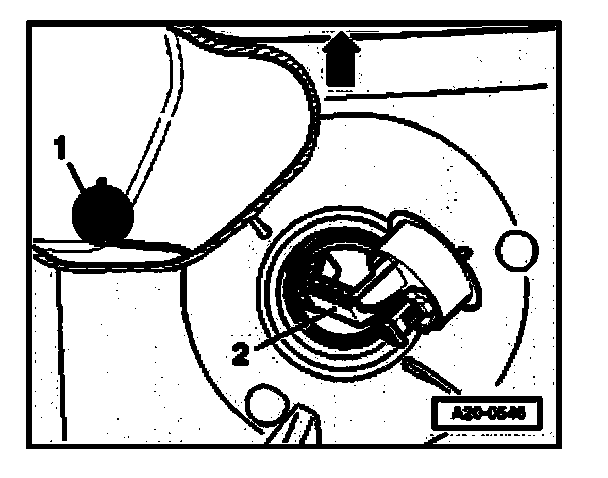
- Insert sensor -2- in fuel tank as depicted in illustration.
- Floater -1- points toward front left.
NOTE:
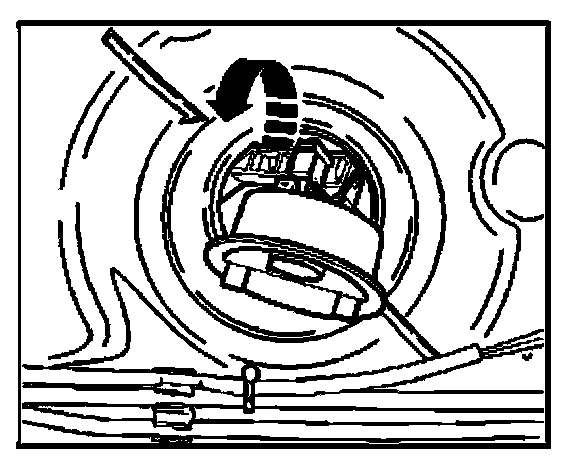
- Arrow - points in direction of travel.
- Fuel tank is depicted as cut-out section.
- When sliding in, turn sensor clockwise about its own axis - arrow -.
NOTE: Do not bend floater arm of sensor when installing.
- Slide new seal for sensor over locking flange.
- Insert new seal for flange, dry, into opening of fuel tank and coat only inner side (equipment flange) with fuel.
- Check installation position of Fuel Supply Sensor 3 -G237.
- Marking -2- on sensor must align with marking -1- on fuel tank.
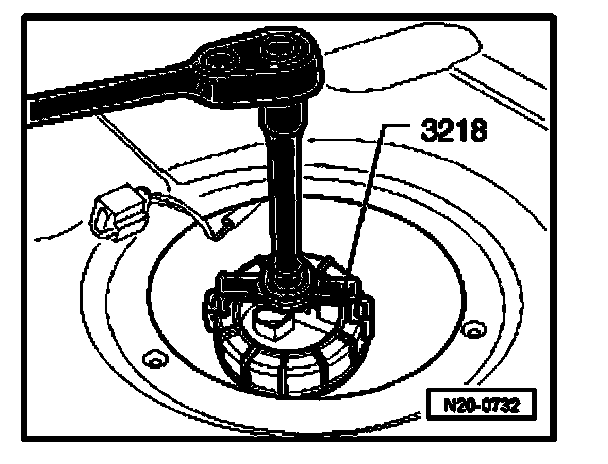
- Tighten union nut using ring nut spanner 3218.
- Tightening torque: 60 Nm
- Connect electrical connector.
- Check Diagnostic Trouble Code (DTC) memory of all control modules, repair all stored malfunctions, and erase DTC memory Vehicle Diagnosis, Testing and Information System VAS 5051; Guided Fault Finding; Vehicle System Test, or Vehicle Diagnosis and Service Information System VAS 5052; On Board Diagnostic (OBD).